Configuration of a SendGrid account allows you to customize outgoing emails
IronWiFi and Sendgrid Integration:
- Create an IronWiFi account the first>>> Open an account
- Follow the provided instructions to set up your AP configuration>>> AP configuration instructions
- Follow instructions on how to configure Sendgrid and IronWiFi⬇
IronWiFi is using SendGrid cloud service to deliver emails to its clients and users. As part of the Whitelabel feature, you are allowed to prepare your email templates to match your company brand and design.
- Signup for a SendGrid account https://app.sendgrid.com/

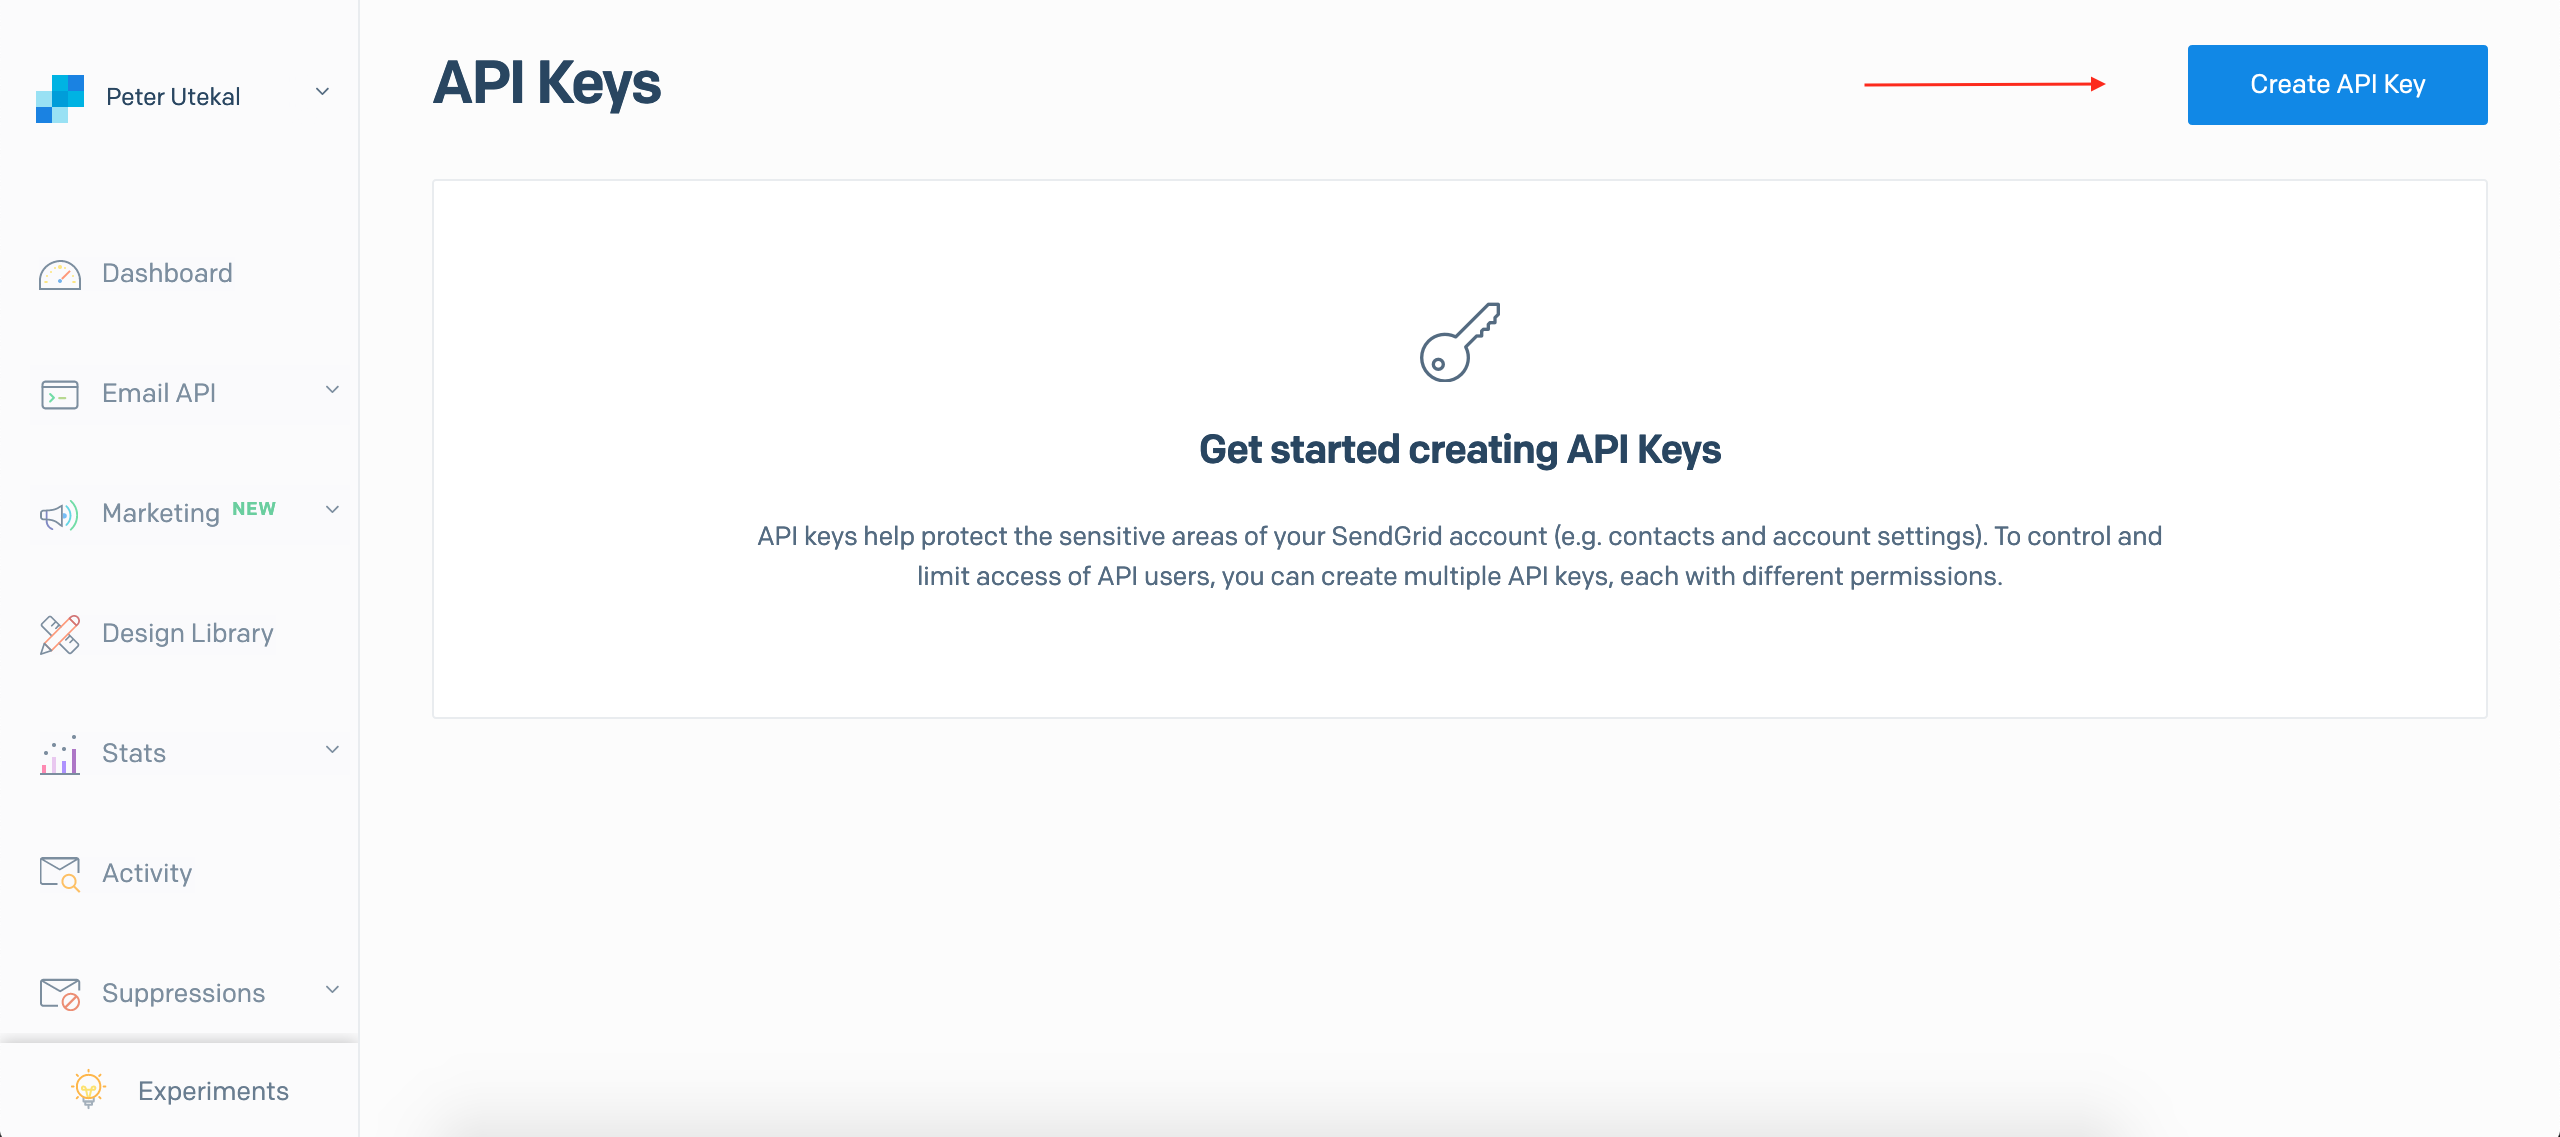
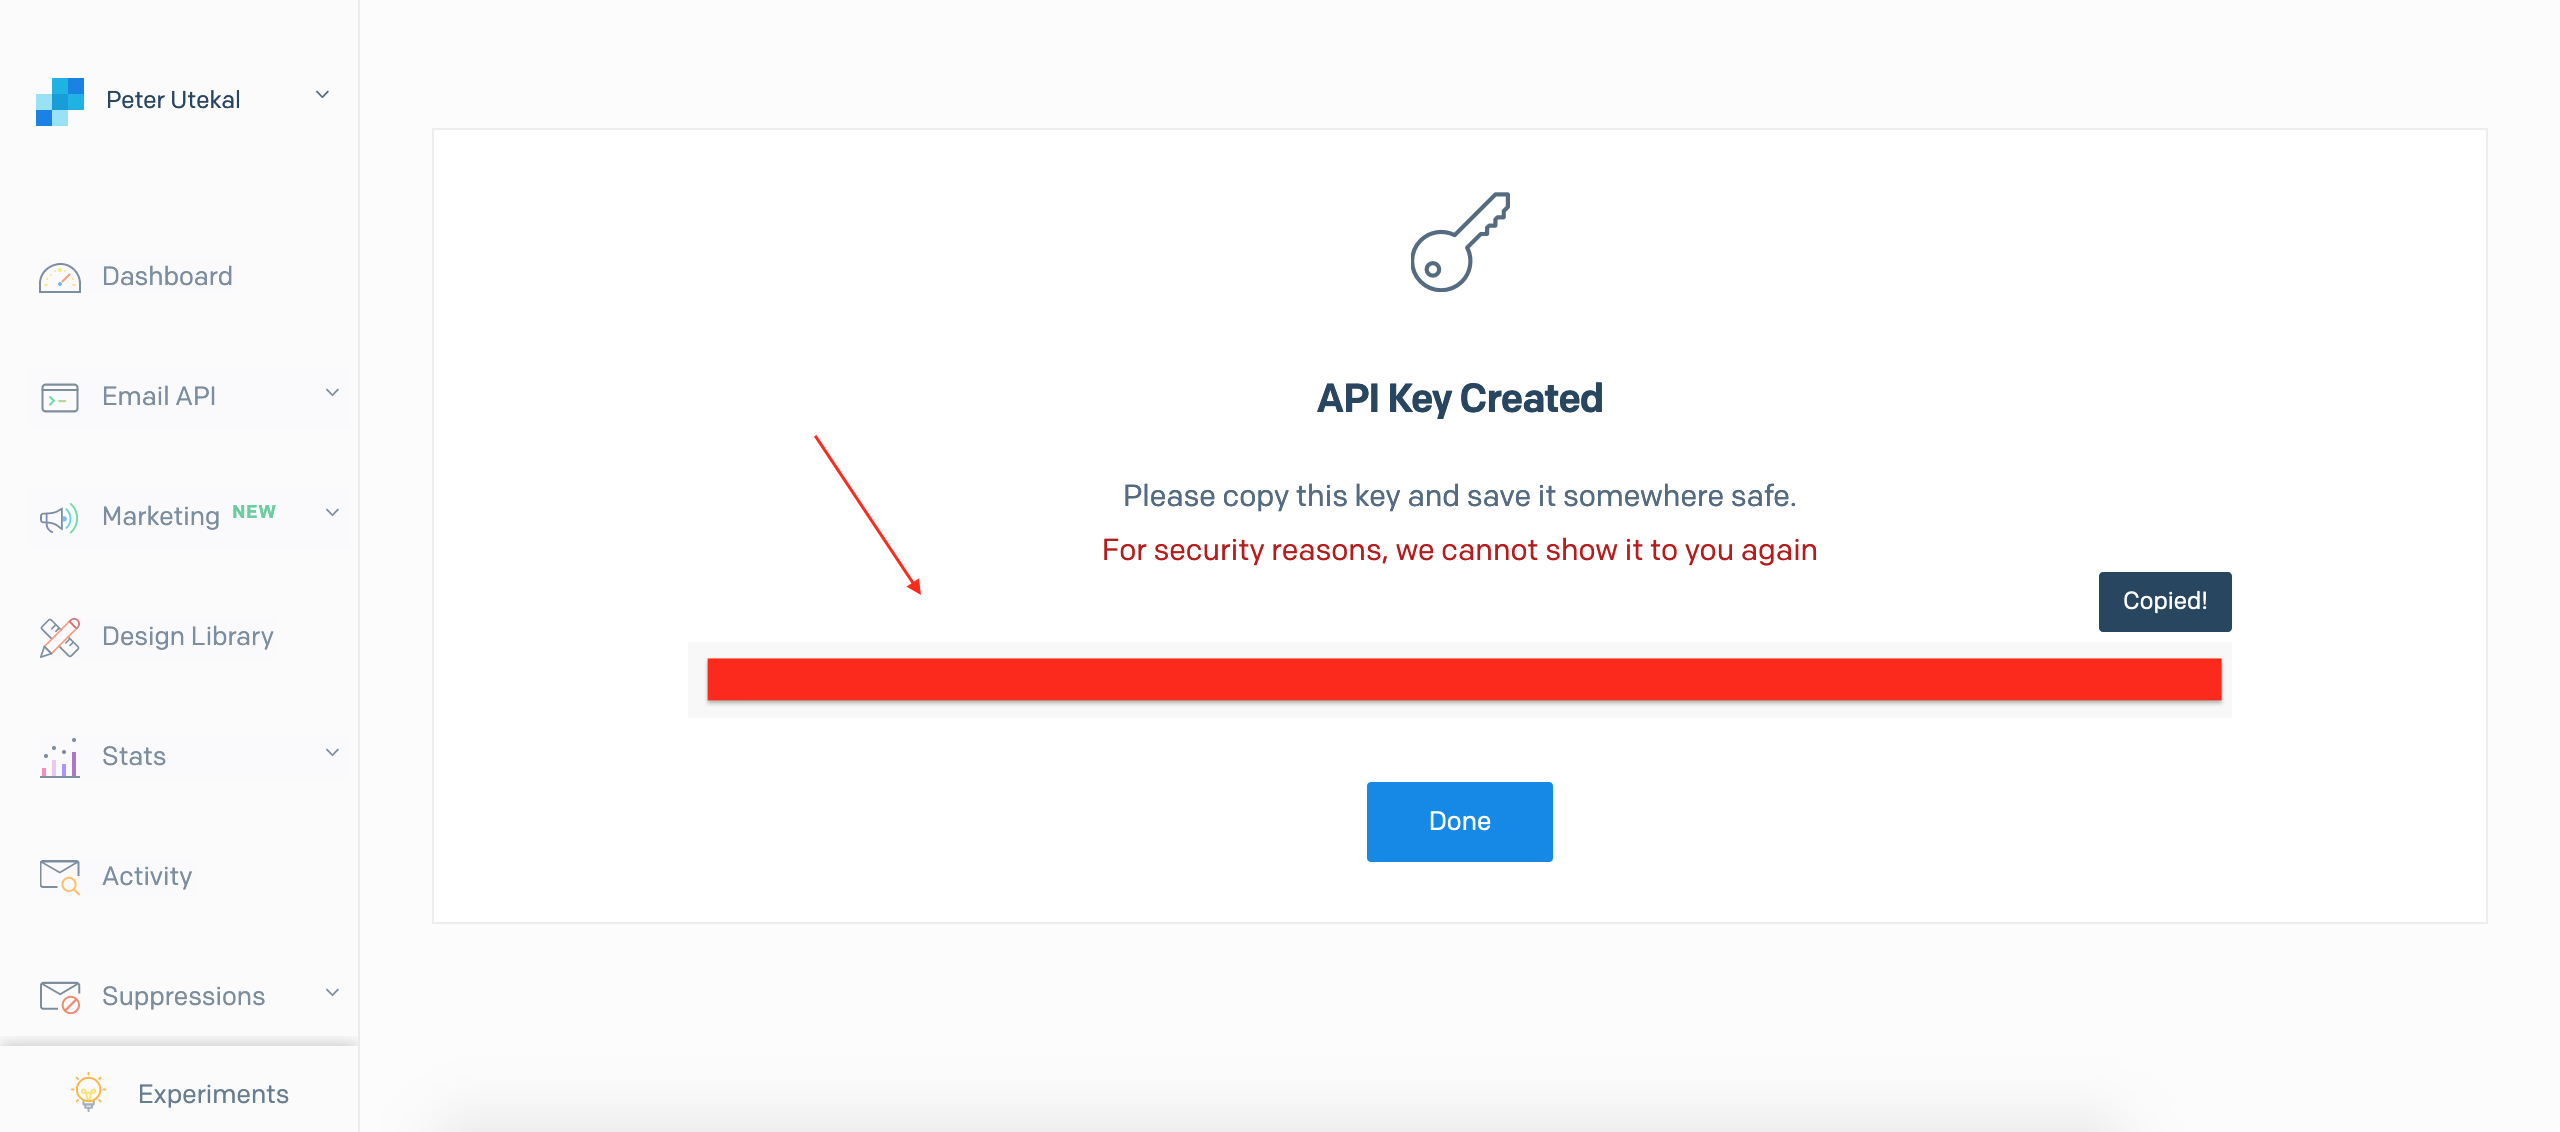
2. Generate an API key:
a, Go to the API Keys section: https://app.sendgrid.com/settings/api_keys.
b, Click on "Create API Key" in the top right corner.
c, Give your API key a name, choose "Full Access" and click "Create & View".
d, Copy the generated API key to a safe location, as you won't be able to access it again.
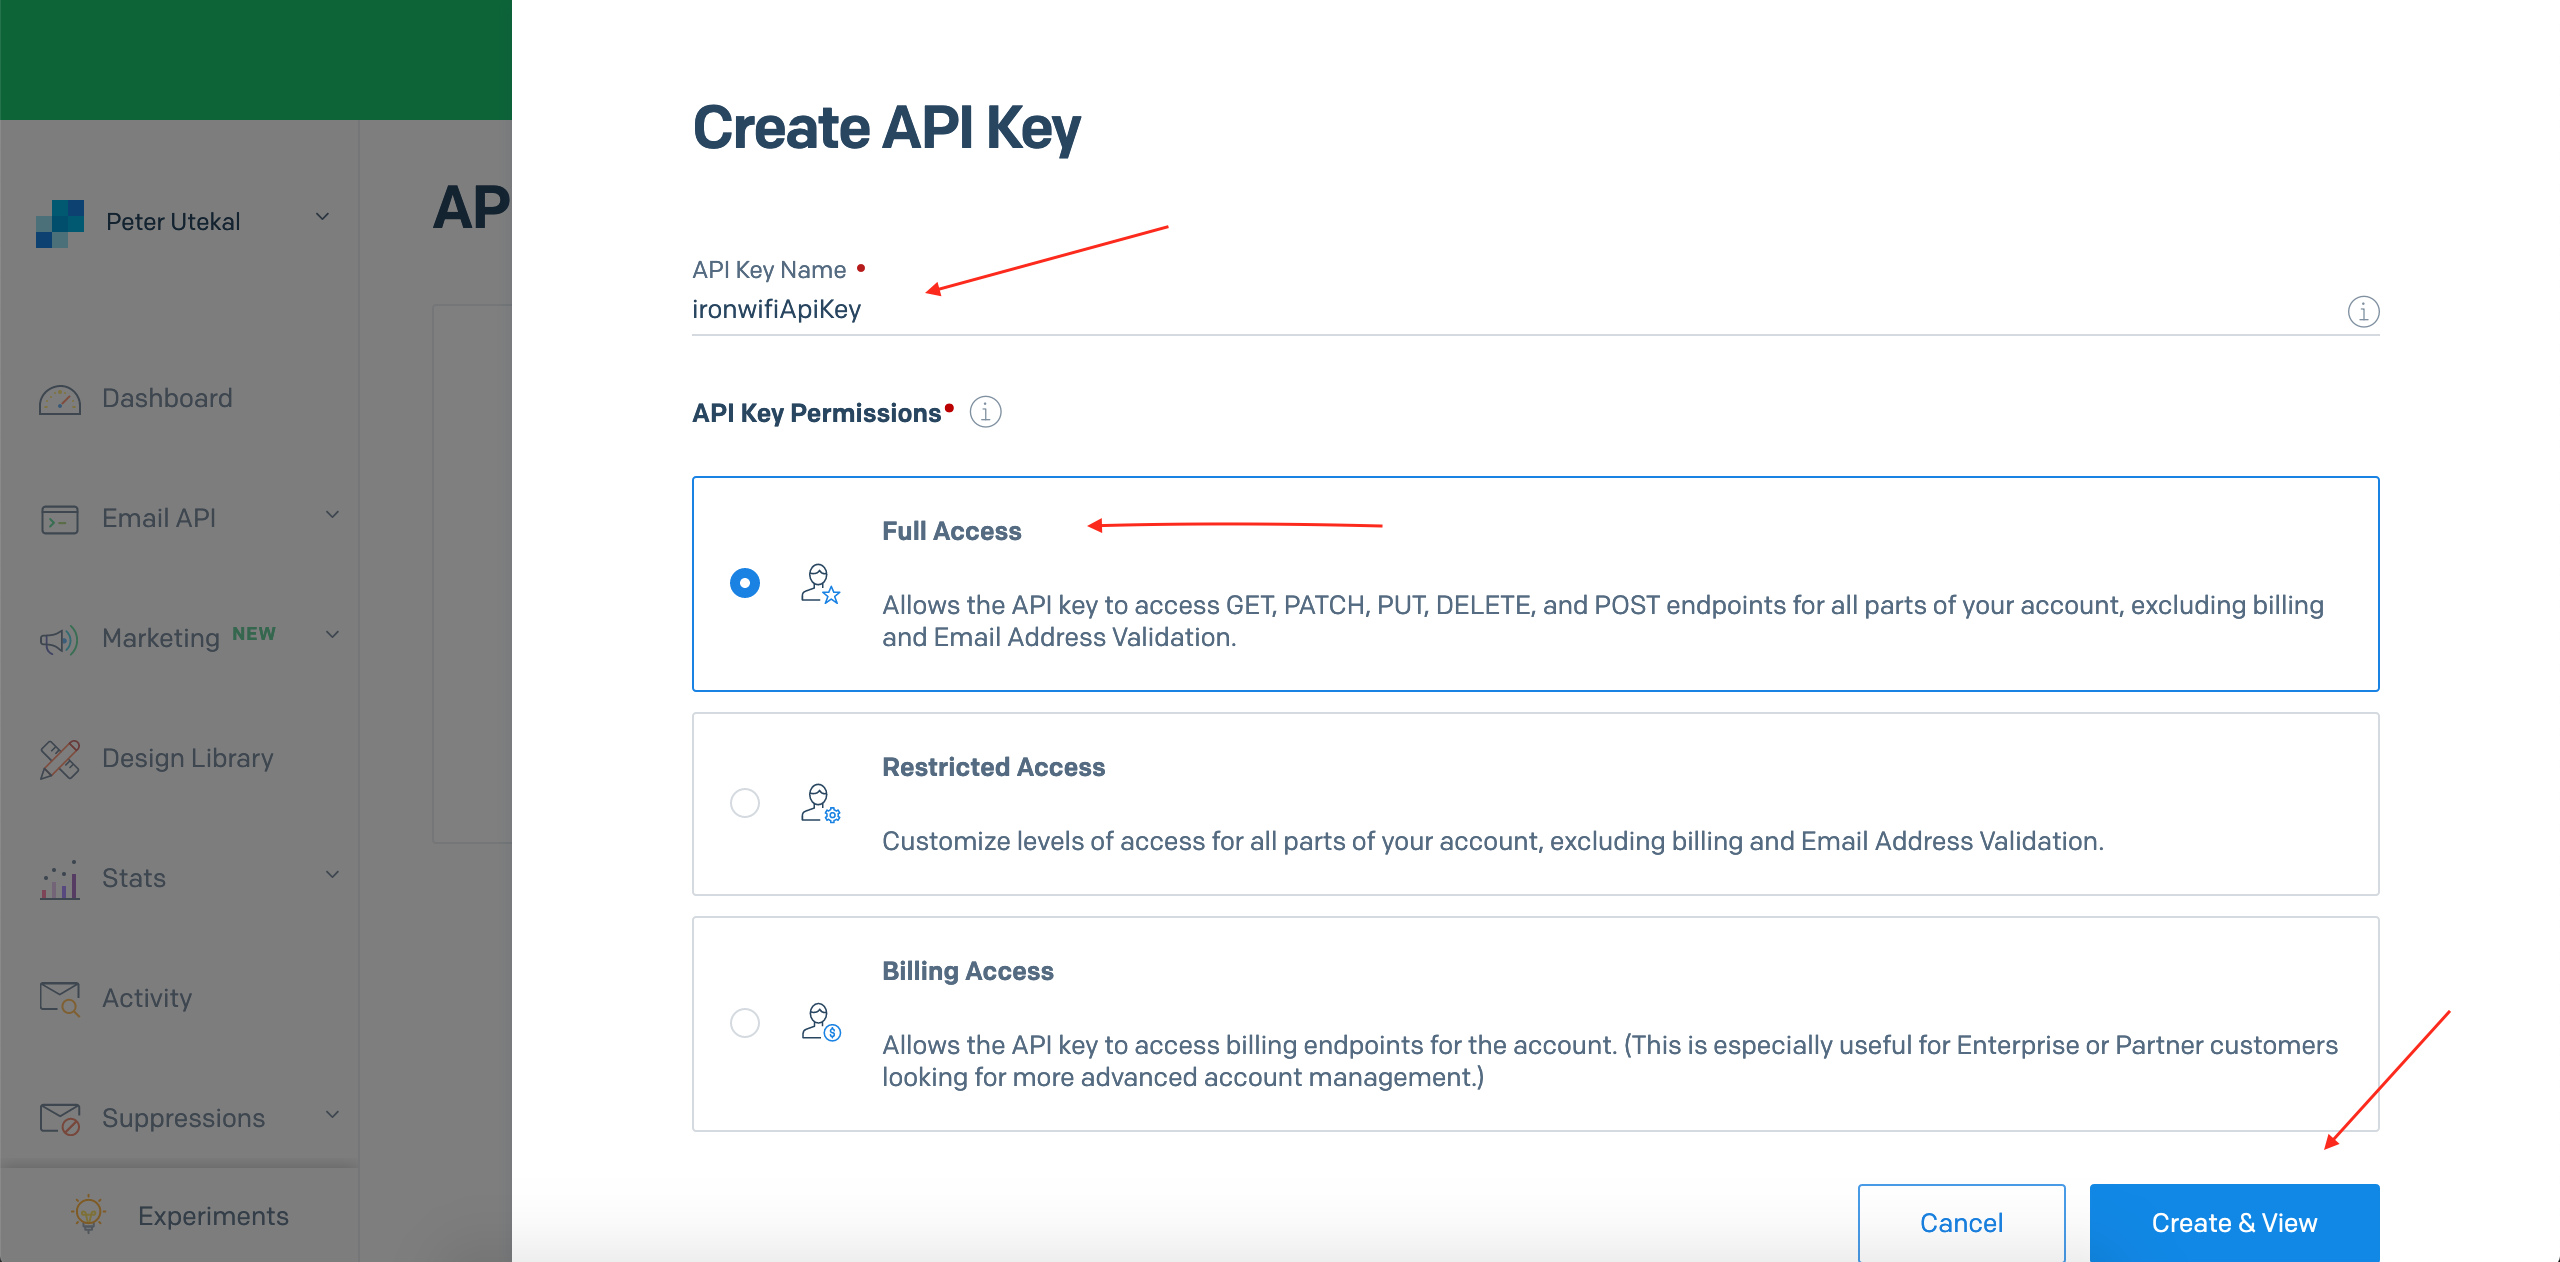
If you wish to perform email validation, add the required permissions - Reporting (read access) and Validation (full access).
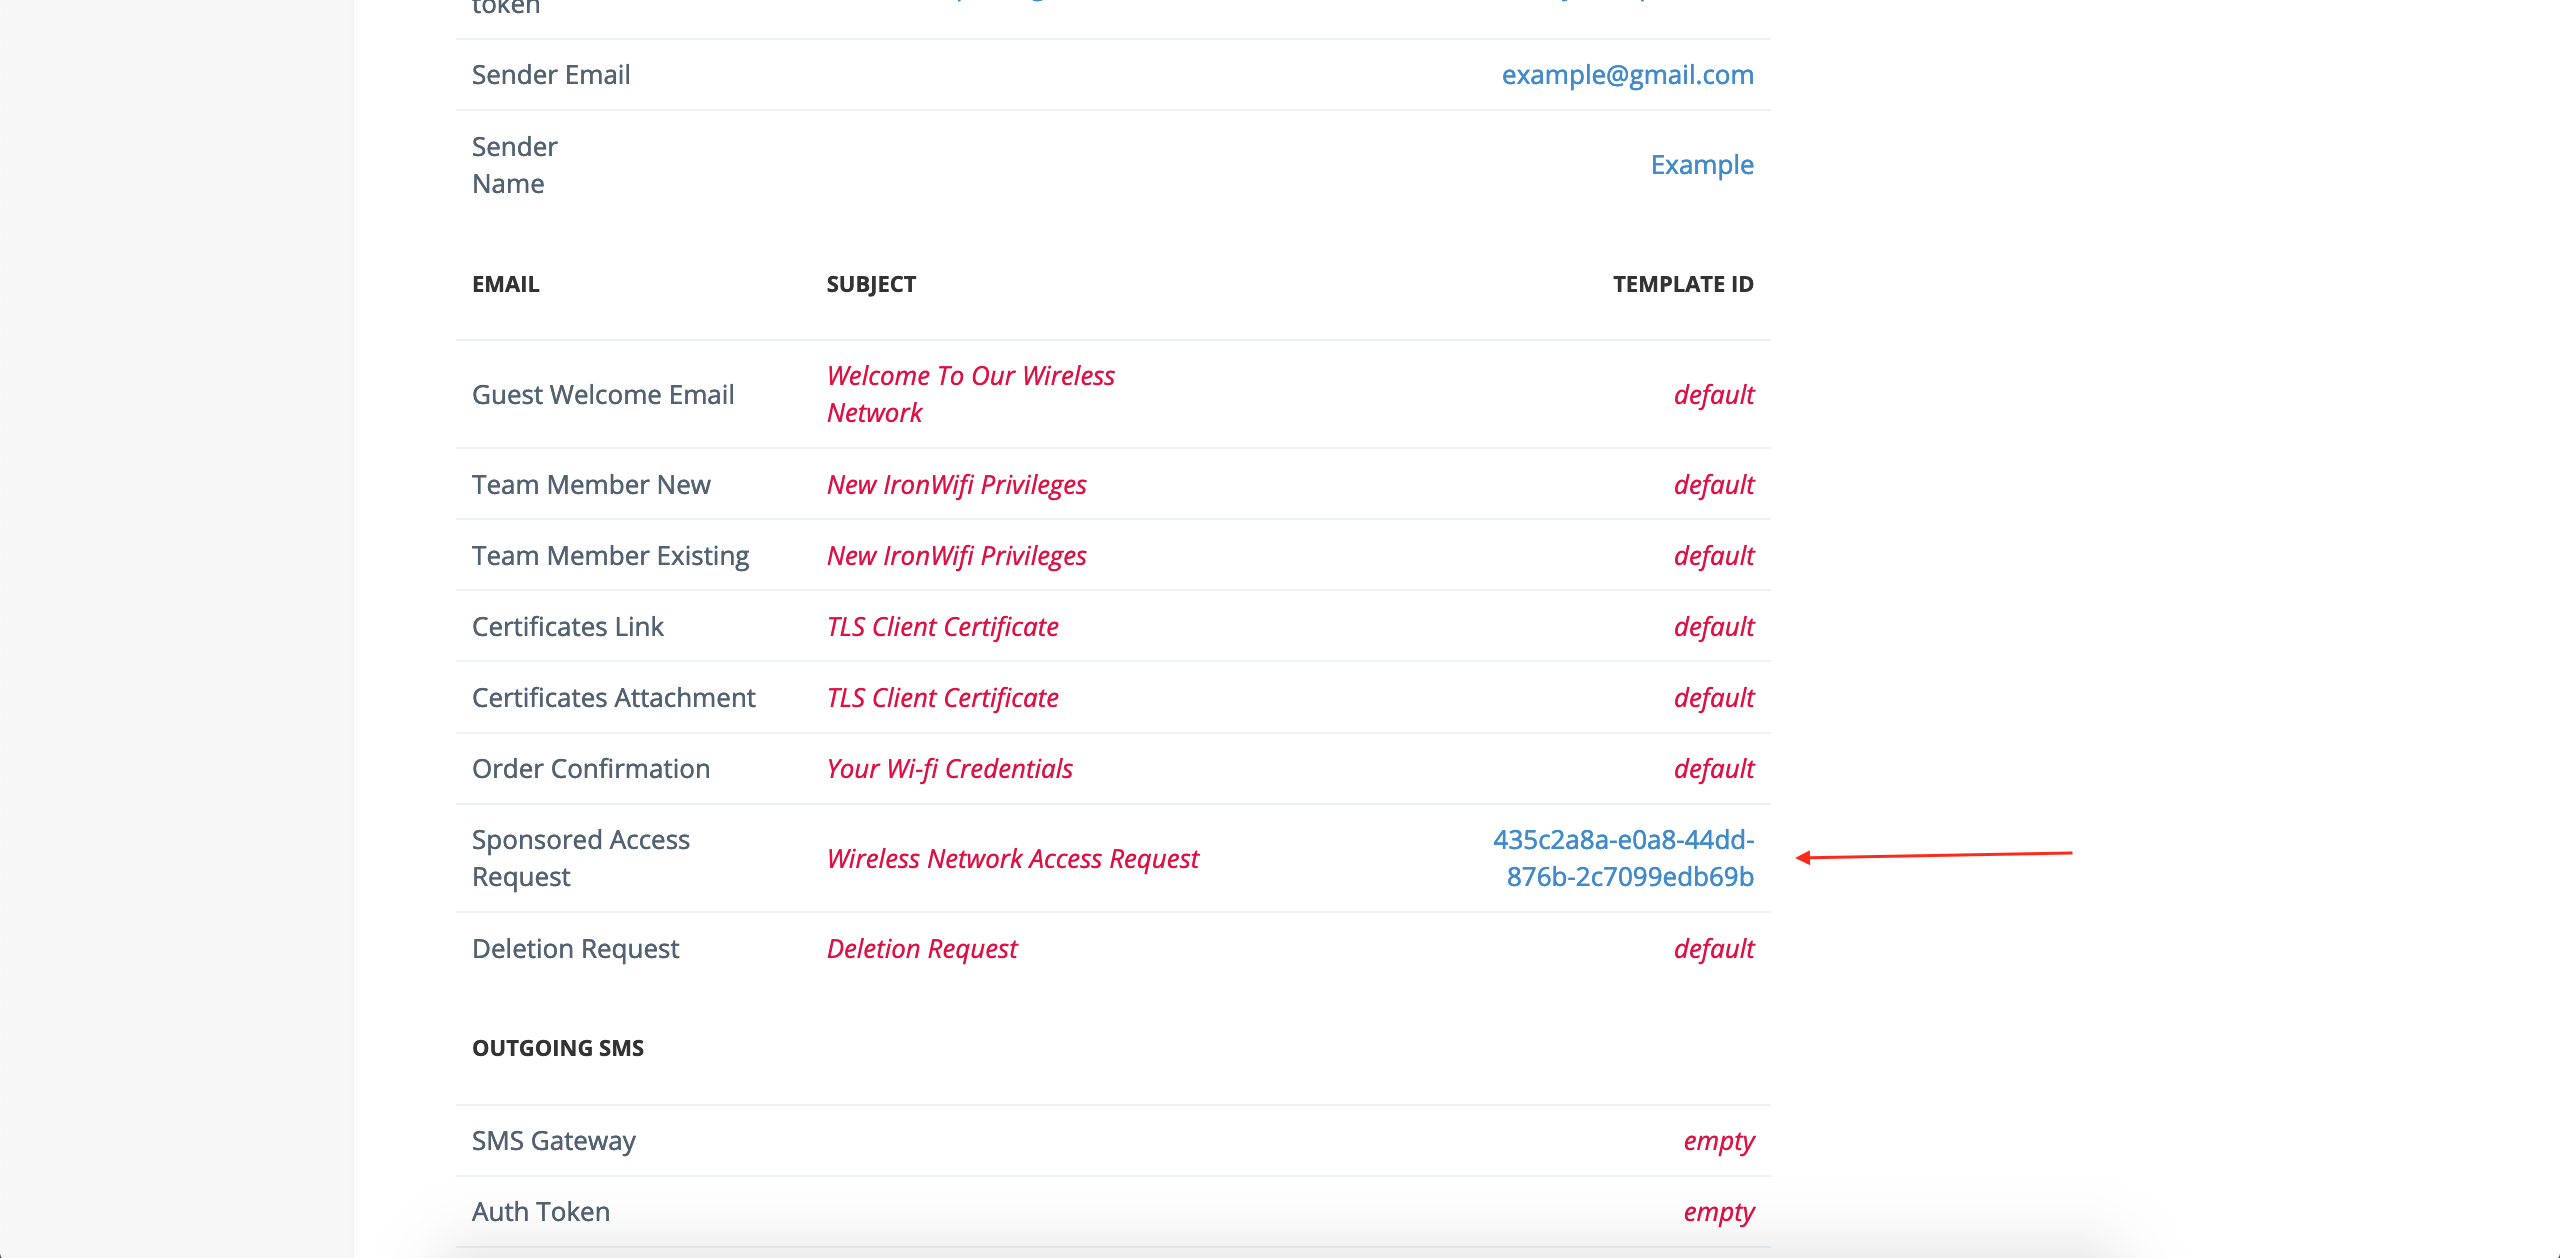
IronWiFi Console
1. Navigate to IronWiFi Console > Account > Scroll down to the White Label section > Outgoings Emails > Paste API key from Sendgrid account

2. Navigate to Networks > Captive Portals > scroll down to the section Authentication Providers > Setup approval email address in the IronWiFi console (for Employee Authorization only)