Microsoft Windows – TLS with Client Certificate
This page describes the steps required to connect a Windows desktop system to a WPA2-Enterprise secured network using TLS authentication with client certificates.
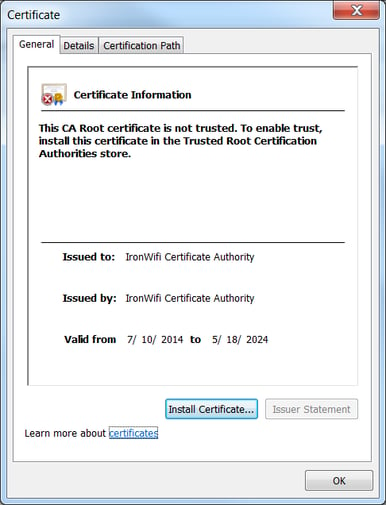
Installing Root CA Certificate
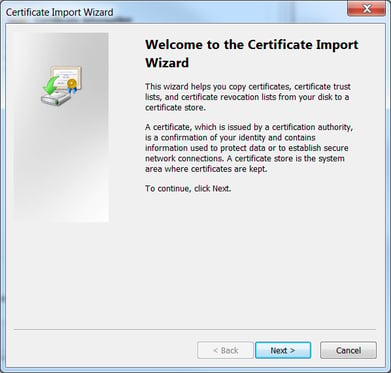
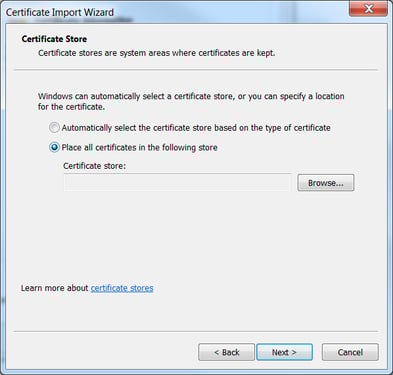
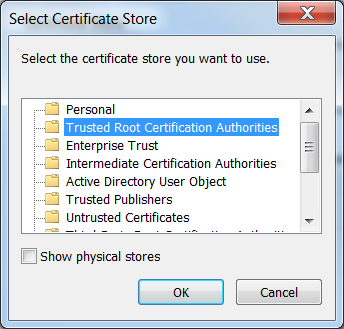
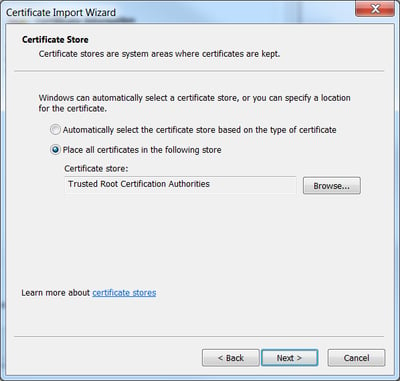
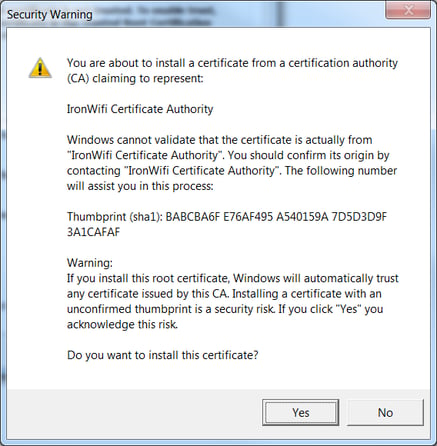
For your Windows users to be able to authenticate using a certificate, it is necessary to have the Root CA Certificate in the Trusted Root Certification Authorities repository installed.
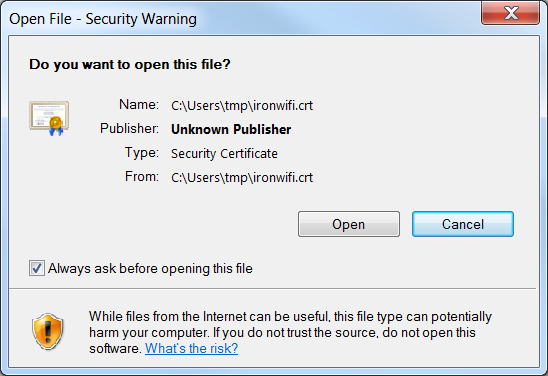
Please download the IronWiFi Root CA certificate from http://console.ironwifi.com/assets/html/ironwifi.crt and follow the instructions.


Configuring Windows Client
1. Navigate to IronWiFi Console
2. Go to the Users > Users Profile > users profile and scroll down to Certificates

3. Click add Certificate and generate User Certificate
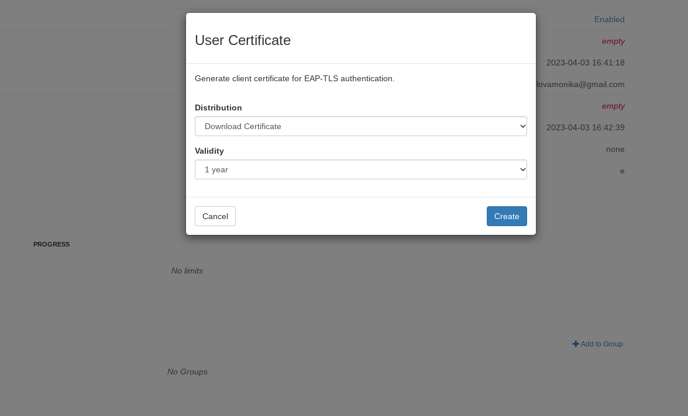
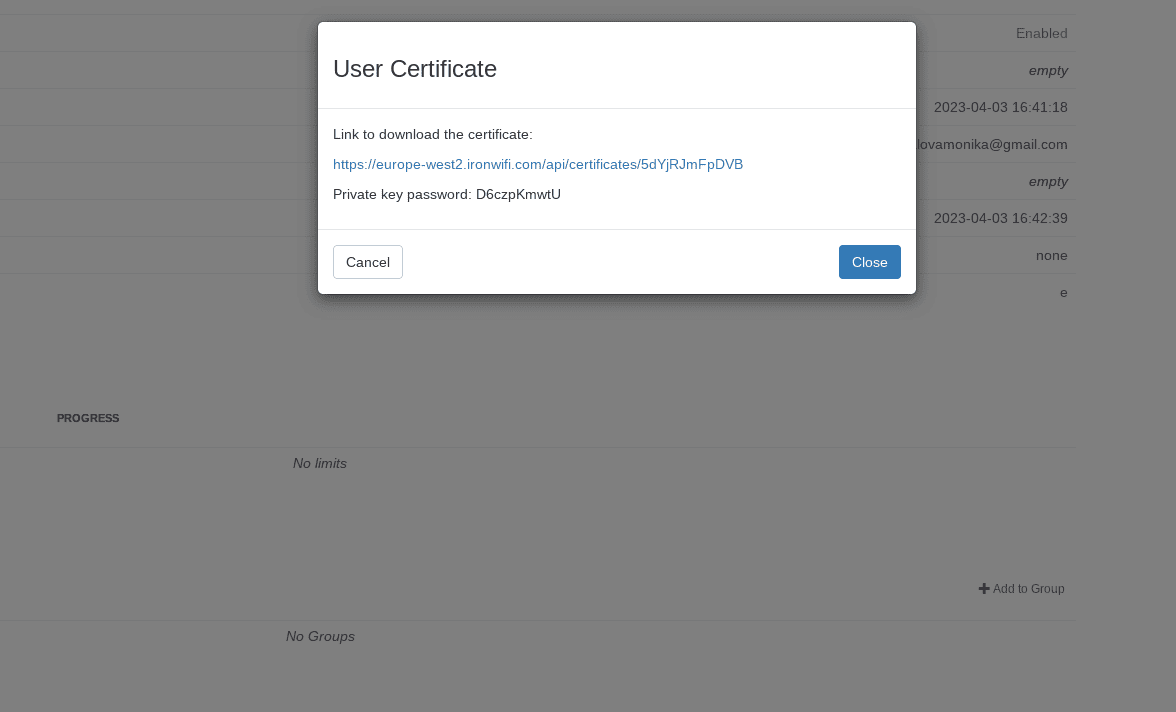
4. Download Certificate
5. After you import certificate, we can continue and change authentication method in Wireless Network Properties.
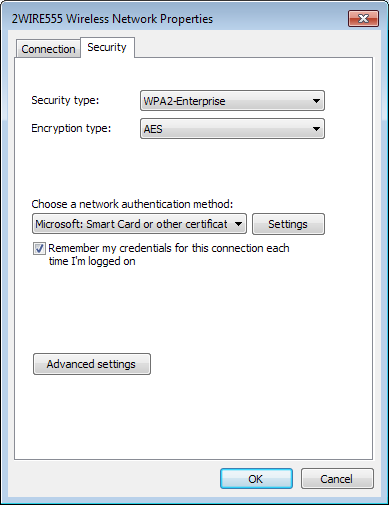
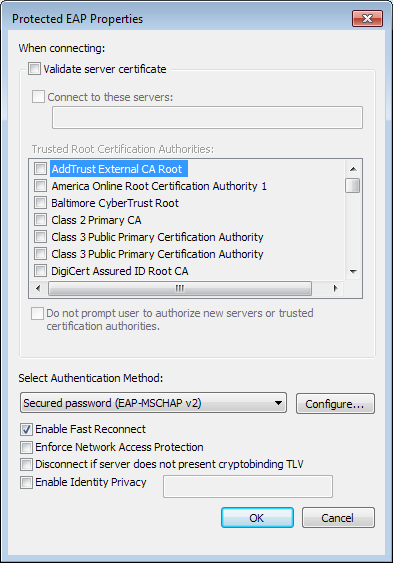
6. Since this is the first time we are connecting to this server and we don't have the IronWiFi Root Certificate imported, we deselect the Validate server certificate check-box. After our initial successful connection, it might be a good idea to turn this option back on.
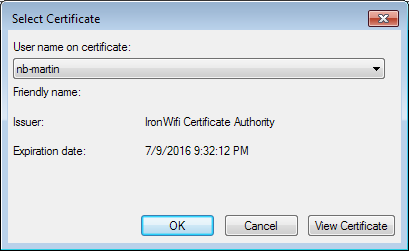
7. A small popup window is going to ask which personal certificate should be used for authentication. Select the newly imported certificate and click OK.
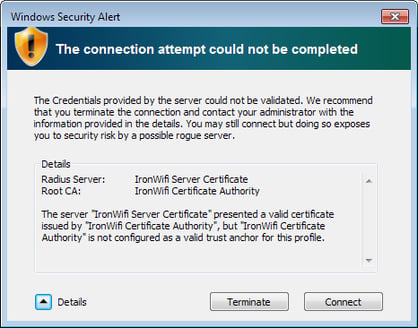
8. Since this is the first time, we are connecting to this network using TLS authentication, an alert window will inform us about unknown certificate. Click Connect to continue or open Details to examine the certificates details.
9. Last click on the Connect button should connect your system to your protected network.