Microsoft Windows – PEAP with Username and Password
Connecting a desktop system with Windows 7 to a WPA2-Enterprise secured wireless network using PEAP with MSChapv2 authentication.
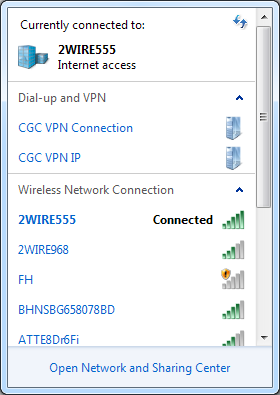
1. Click on the wireless connection icon located in the bottom right corner of the screen. A list of available wireless networks will be shown where you should also see the name of your protected network. Select your network and click Connect.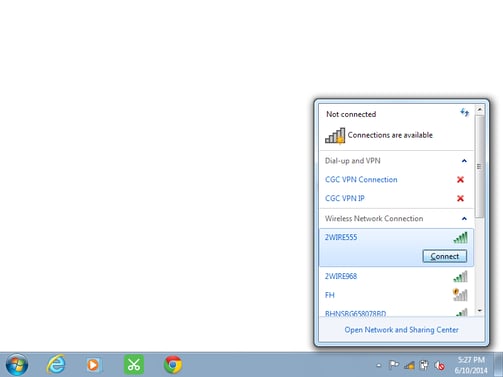
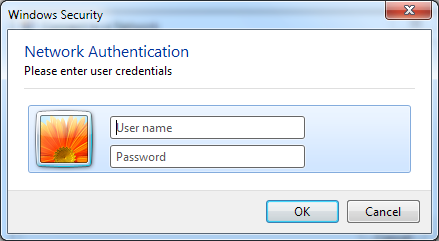
2. A small popup window will ask for your wireless network credentials. Enter here the credentials of the user, that you created during the service setup.
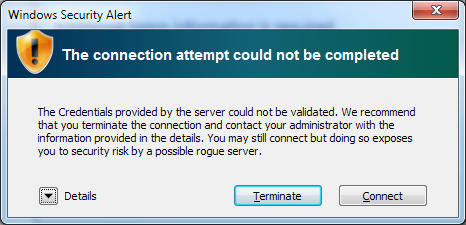
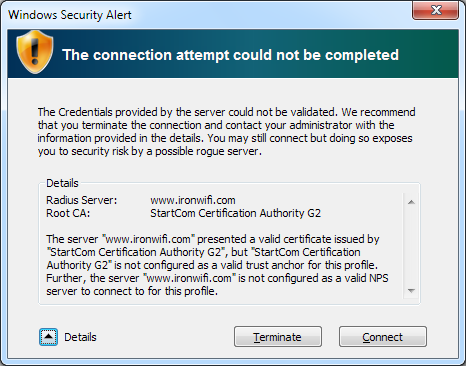
3. Since this is the first time, we are going to connect to this network, an alert window will be shown informing us about the unknown certificate. Click Connect to continue or open Details to examine the certificate details.
4. Click on the Connect button should connect your desktop to your protected network.
If the Connection Failed
If you are not able to connect to your new Wireless Network, it might be because Windows is ignoring provided credentials and trying to log you in with your Windows logon name and Password. It is necessary to turn this feature off manually.
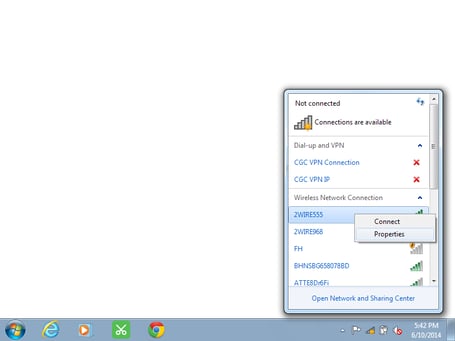
5. Right click on your Network and click on Properties.
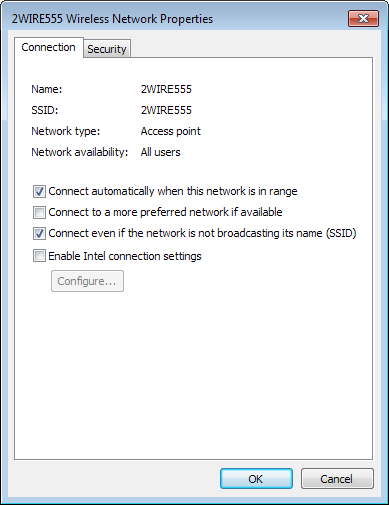
6. A new Wireless Network Properties window will open.
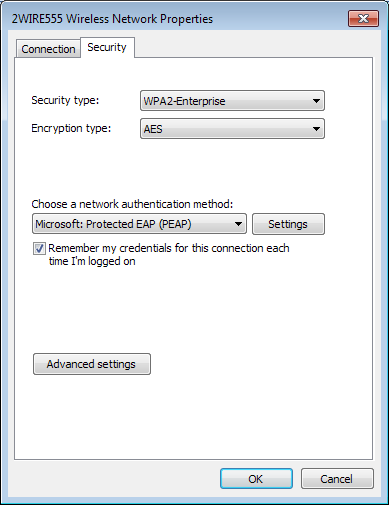
7. Next click on the Settings button next to the Microsoft: Protected EAP (PEAP) network authentication method.
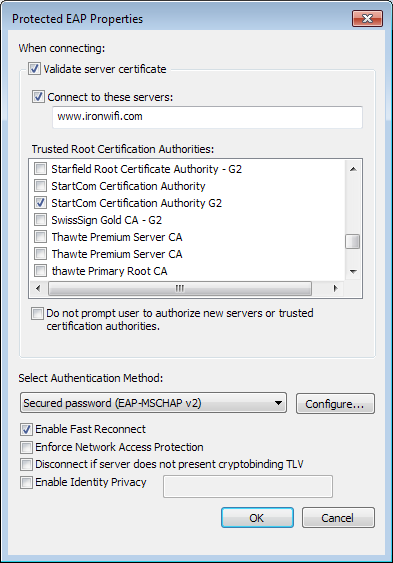
8. Now click on the Configure button next to the Secured password (EAP-MSCHAP v2) Authentication Method.
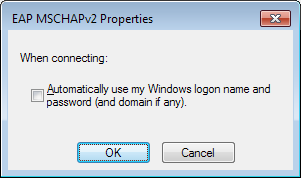
9. Deselect the check-box and click OK to save new settings.
You can quickly verify all other settings and close the Wireless Network Properties window.
10. Now you can try to reconnect to your wireless network.