In this guide we describe how to configure your Ubiquiti UniFi controller to work with OpenRoaming and SIM card authentication
Prerequisites
- Access to the Ubiquiti Dashboard as a user with administrative privileges.
- Supported Ubiquiti device. These access points have Hotspot 2.0 certification:
- UAP-AC-M-PRO
- UAP-AC-LITE
- UAP-AC-PRO
- UAP-AC-IW
- UAP-AC-M
These access points are not supported:
- UAP-nanoHD
- UAP-FlexHD
- UAP-BeaconHD
- UAP-IW-HD
- U6 series
- Information about the assigned RADIUS servers (Server IP address, port numbers, shared secrets):
- Email or document that contains this information
OR - Access to the IronWiFi Management Console - Sign in or Open Account
- Email or document that contains this information
About this guide
This guide describes how to set up and test your Ubiquiti UniFi environment so you can use it with IronWiFi Passpoint:
- Log in to the Ubiquiti UniFi dashboard as a user with administrative privileges.
- Update Ubiquiti UniFi access points with firmware that supports Hotspot 2.0.
- Configure a secure RADIUS connection.
- Configure the wireless LAN.
- Troubleshoot the configuration.
Log in to the Ubiquiti UniFi Dashboard
To start the configuration process, log in to the Ubiquiti UniFi Dashboard as admin (https://unifi.ui.com/dashboard). For existing environments with additional users, log in as a user with administrative privileges.
The Ubiquiti UniFi Dashboard appears.
Note: There are a number of options you can set. Only the options that require your input are shown. Default values are used for options that don’t need adjustment.

Update the access point firmware
Before starting the Hotspot 2.0 (HS 2.0) configuration, update the access points (APs) with firmware that supports Hotspot 2.0.
Ubiquiti recommends that the UniFi access points run firmware version 4.3.13.11253 or later. Firmware versions before 4.3.13.11253 don’t support Hotspot 2.0.
Network version 7.4 is missing the HotSpot 2.0 profiles page in the legacy UI. You can still create the SSID and select an existing HotSpot 2.0 profile, but you just can't make a new profile. You will have to downgrade to 7.3.* to create a new HS2.0 profile.
- download all available network backups. find latest backup for network version 7.3.76 - if you don't have one you will start over (note, you will want to "forget" the wifi access points if you have to start over, or forget any wifi access points that were added to your network after this backup so you can re-adopt them after)
- connect to SSH of unifi cloud key
- downgrade unifi cloud key to version 3.0.13 (the ubnt-systool fwupdate <firmware_url> command will also downgrade)
- after it reboots, you will need to reset to factory defaults
- after factory defaults, the system will enter setup mode
- once you connect it to your Unifi cloud account, it will attempt to upgrade the Unifi OS, you must not let this continue. You must restart the cloud key at this stage before it has time to update the Console Unifi OS. We used a manual method to unplug power/PoE from the device and plug it back in.
- Now the device is at Unifi OS 3.0.13 and Network 7.3.76
- In the Console Settings page, disable automatic upgrades for UniFi OS and Applications (both)
- restore network 7.3.76 backup
- continue with creating HotSpot 2.0 profile from IronWiFi instructions
Warning: Upgrading access point firmware is a disruptive event that introduces downtime during the upgrade process. It can take up to 15 minutes. Upgrade the firmware during a downtime or maintenance window.
- Select Devices from the menu on the left side of the Ubiquiti UniFi Dashboard.
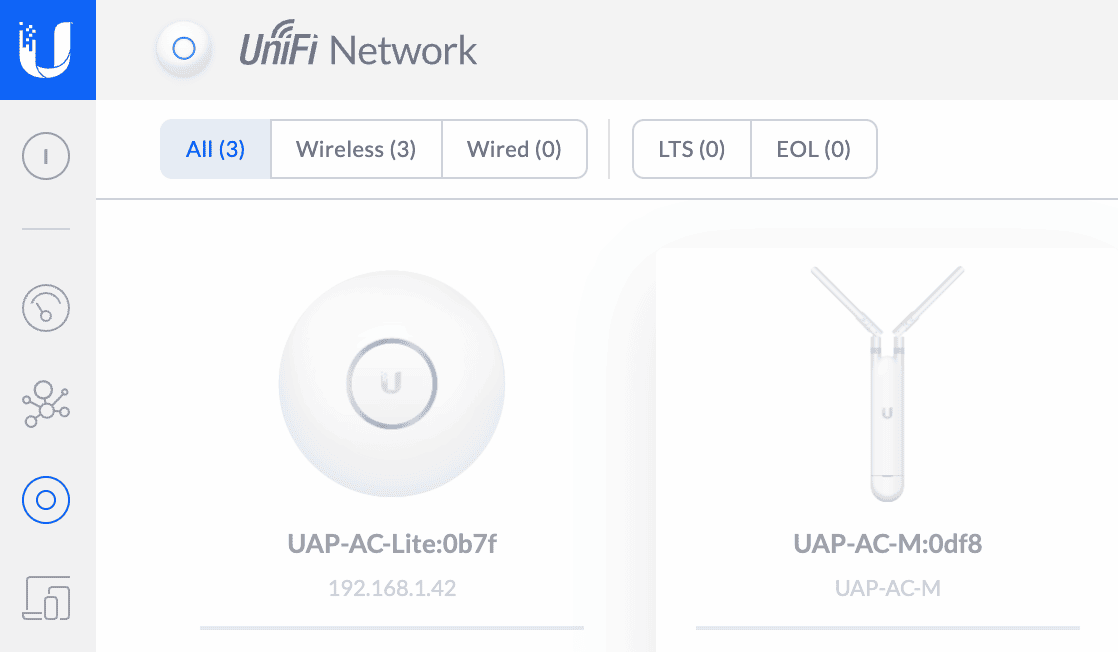
Your access points display.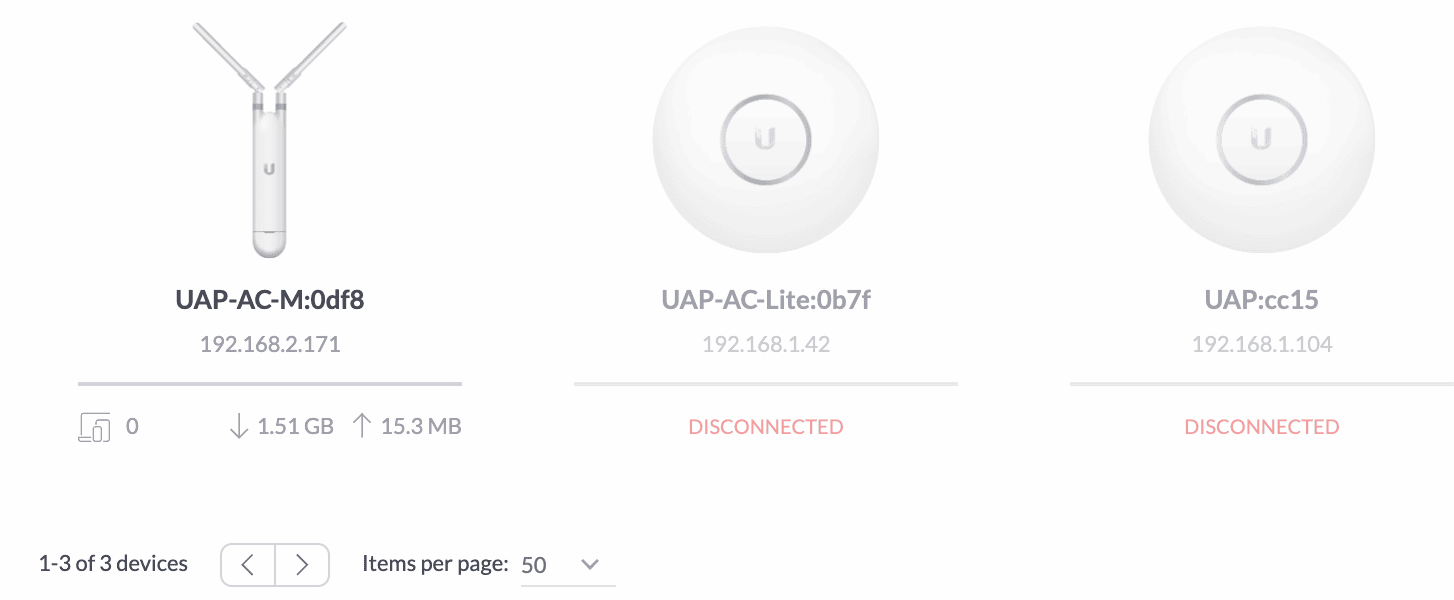
If there’s an update available, an Upgrade option appears when you hover over each access point (along with the Locate and Restart options in list view). In grid view, a small upgrade icon appears to the upper right of each device. - Follow the firmware upgrade documentation provided by Ubiquiti based on the access points in your environment.
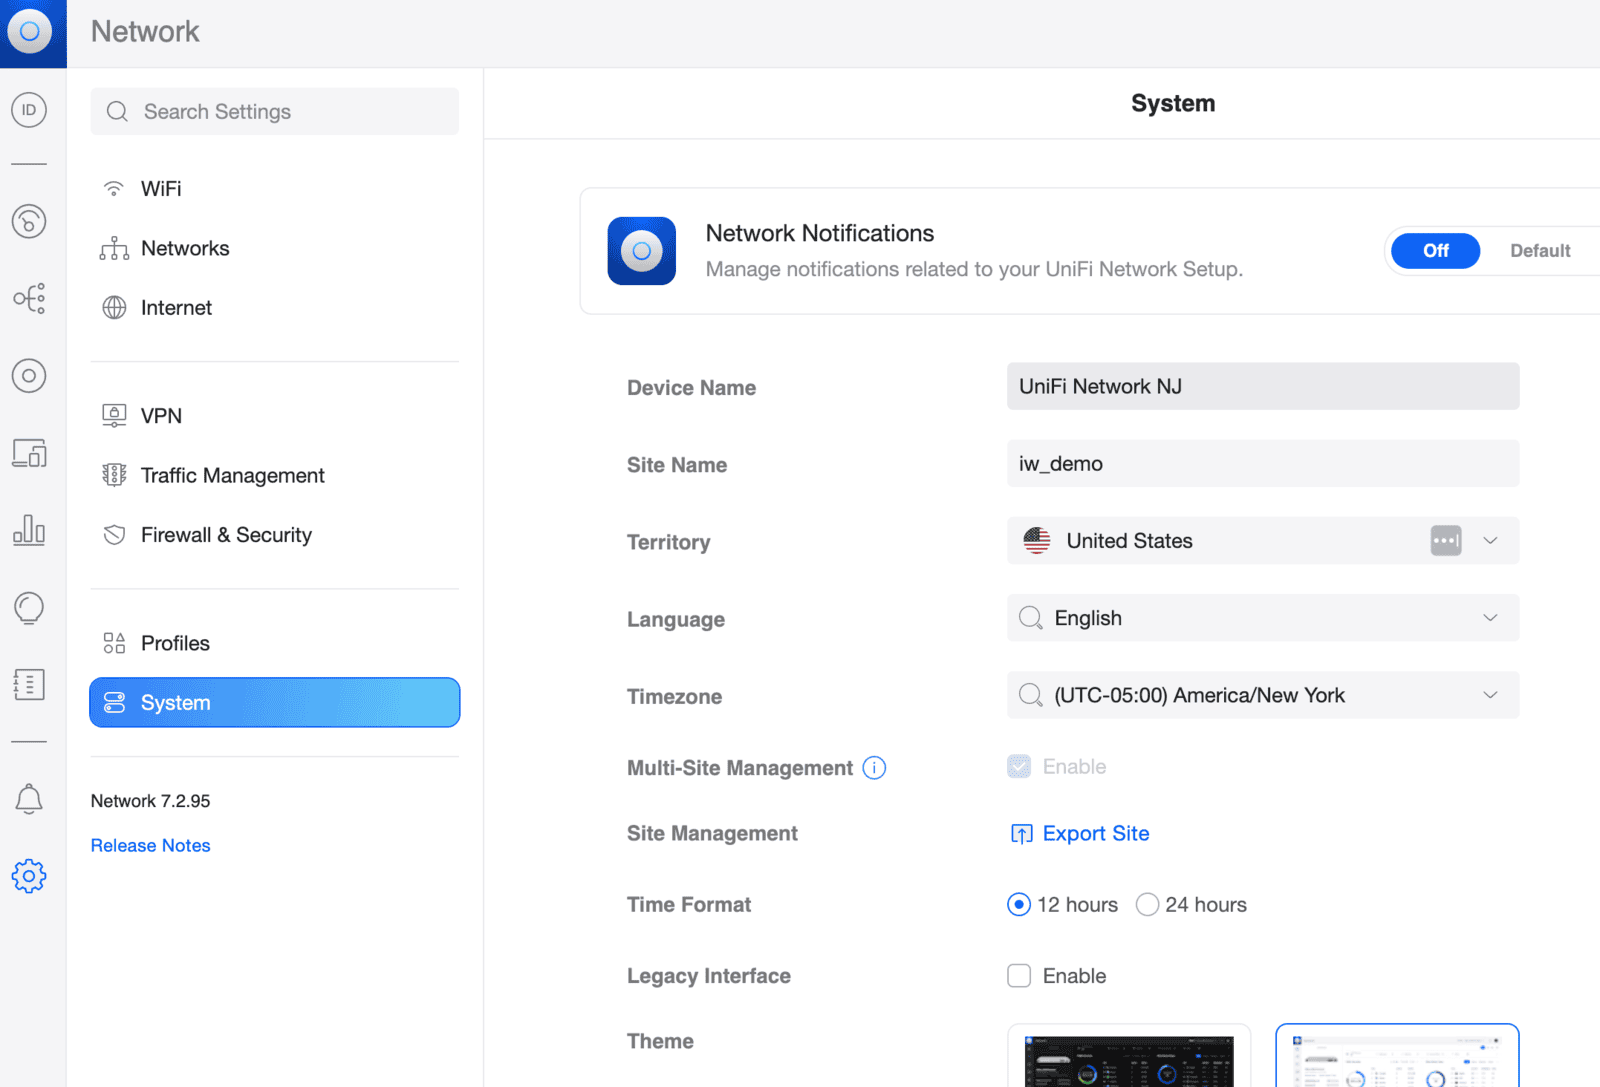
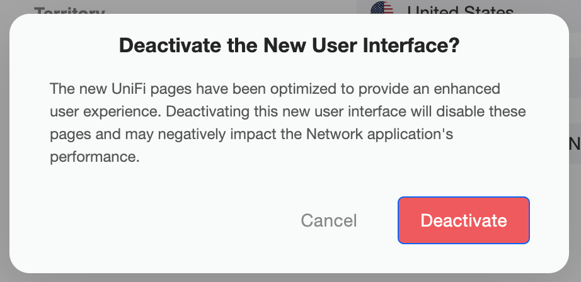
Switch to Legacy Interface
- Select Settings at the bottom left of the Dashboard.
- Click System button, enable Legacy Interface checkbox and click Deactivate

Configure the RADIUS Profile
- Select Settings at the bottom left of the Dashboard.
The Settings menu appears.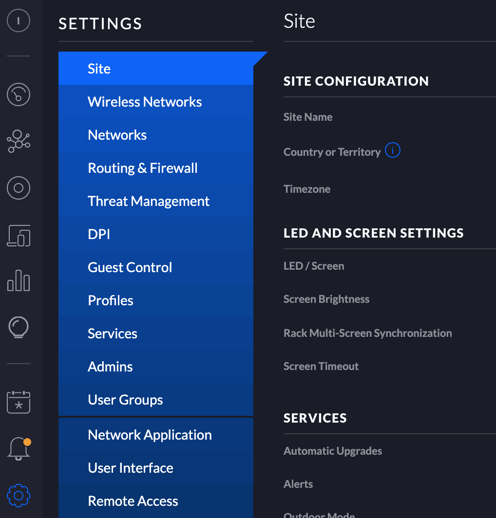
- Select Profiles from the Settings menu and click + Create New RADIUS Profile
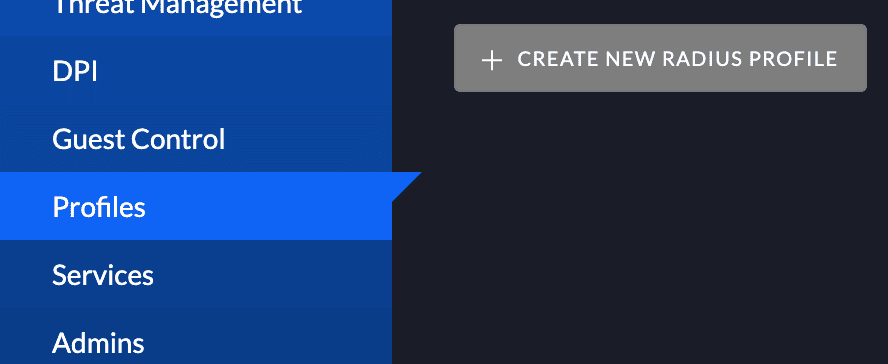
The Create New RADIUS Profile page appears.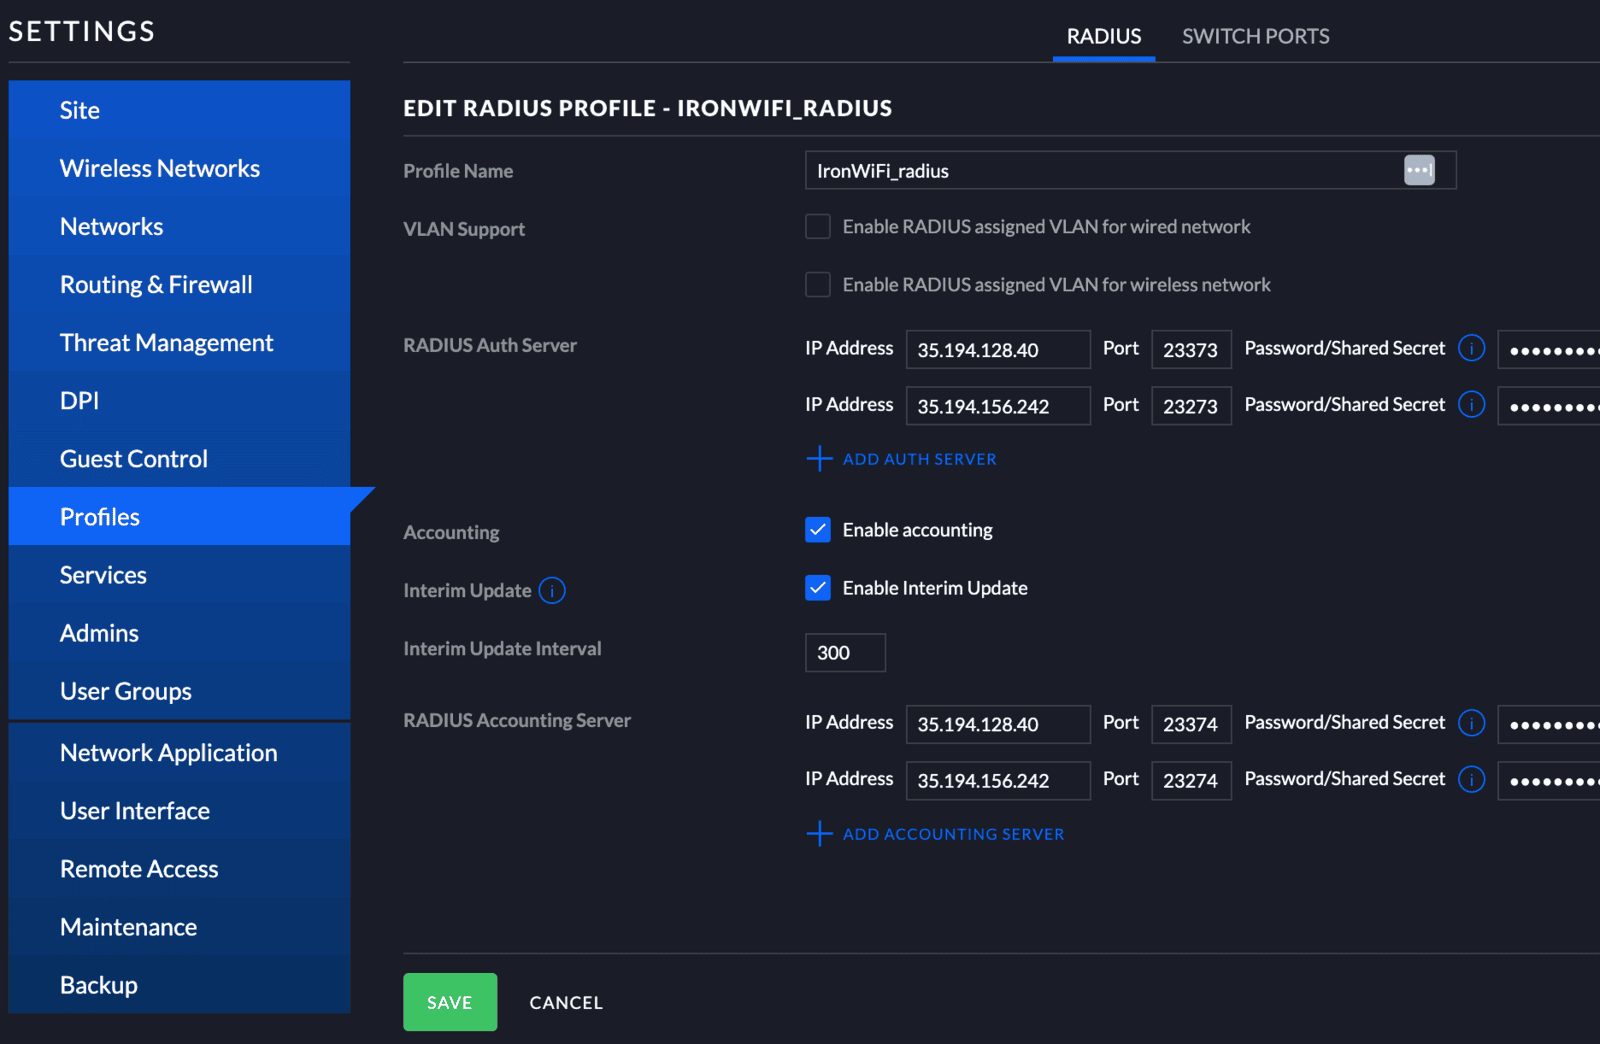
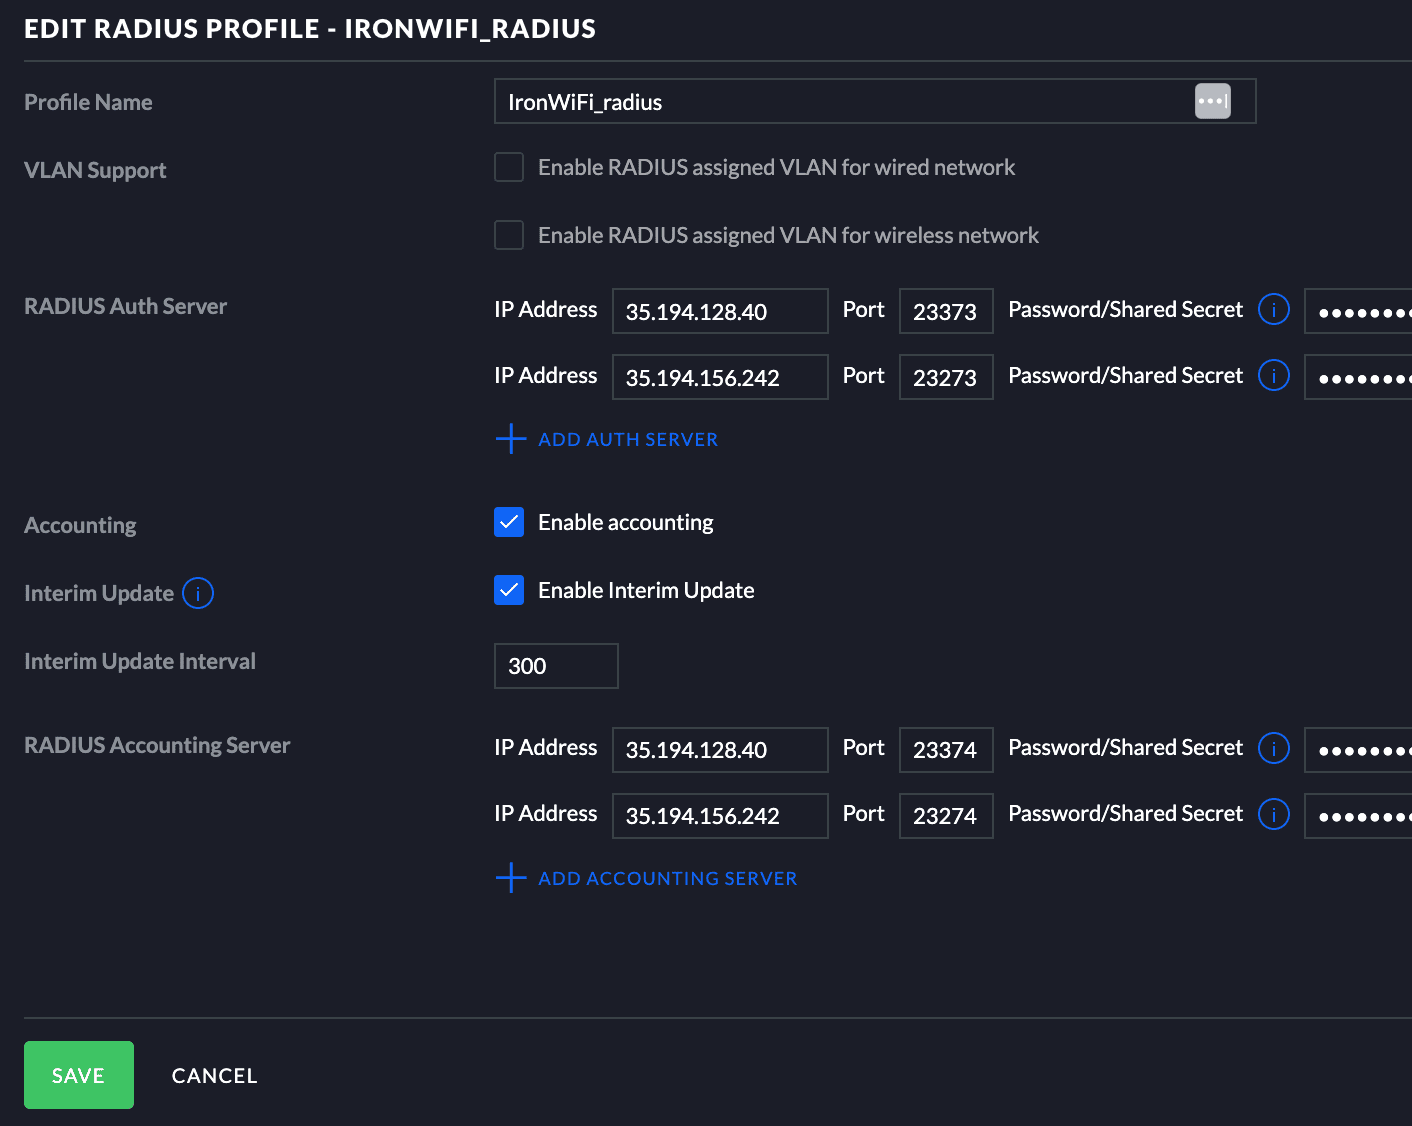
- Enter the RADIUS Profile Name, such as “IronWiFi_radius”.
- (Optional) Check the box next to VLAN Support as applicable to the existing network.
- Enter the RADIUS service values shown for the primary authentication server.
RADIUS Primary IP Address:  value from the IronWiFi Console or email

RADIUS Secondary IP Address:  value from the IronWiFi Console or email

Port: value from the IronWiFi Console or email - authentication port

Shared Secret: value from the IronWiFi Console or email - Click + Add Auth Server to add the secondary RADIUS authentication server.
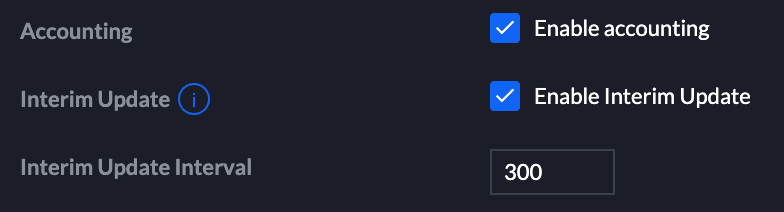
- Click the box next to Enable accounting. The Accounting section is below the RADIUS Auth Server section. The RADIUS accounting server options appear.

- Check the box next to Enable Interim Update and change the value to 300 (seconds).
- Enter the RADIUS service values for the primary RADIUS accounting server.
RADIUS Primary IP Address:  value from the IronWiFi Console or email

RADIUS Secondary IP Address:  value from the IronWiFi Console or email

Port: value from the IronWiFi Console or email - accounting port

Shared Secret: value from the IronWiFi Console or email - Click + Add Accounting Server to add the secondary RADIUS accounting server.
- Click Save at the bottom left.

A message appears at the top right indicating that the RADIUS profile changes are saved.
Configure the wireless LAN
Configure Hotspot 2.0
Hotspot 2.0 allows mobile devices to join a network automatically, including during roaming, when the devices enter the Hotspot 2.0 area.
The Hotspot 2.0 configuration is quite long. You can go through the whole configuration all at once or save changes after each major section and then edit the saved configuration.
- Select Settings at the bottom left of the Dashboard.
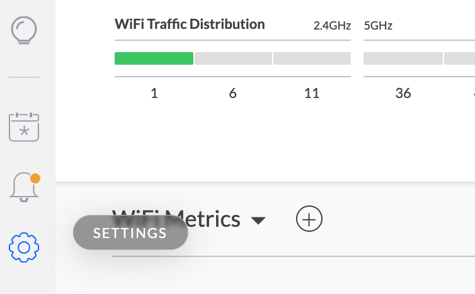
The Settings menu appears.
- Select Services.
You might see a message indicating that you need to connect a UniFi Security Gateway to enable the RADIUS configuration. Ignore that message and continue to the Hotspot2.0 configuration. - Click HOTSPOT 2.0 on the menu bar at the top of the page.
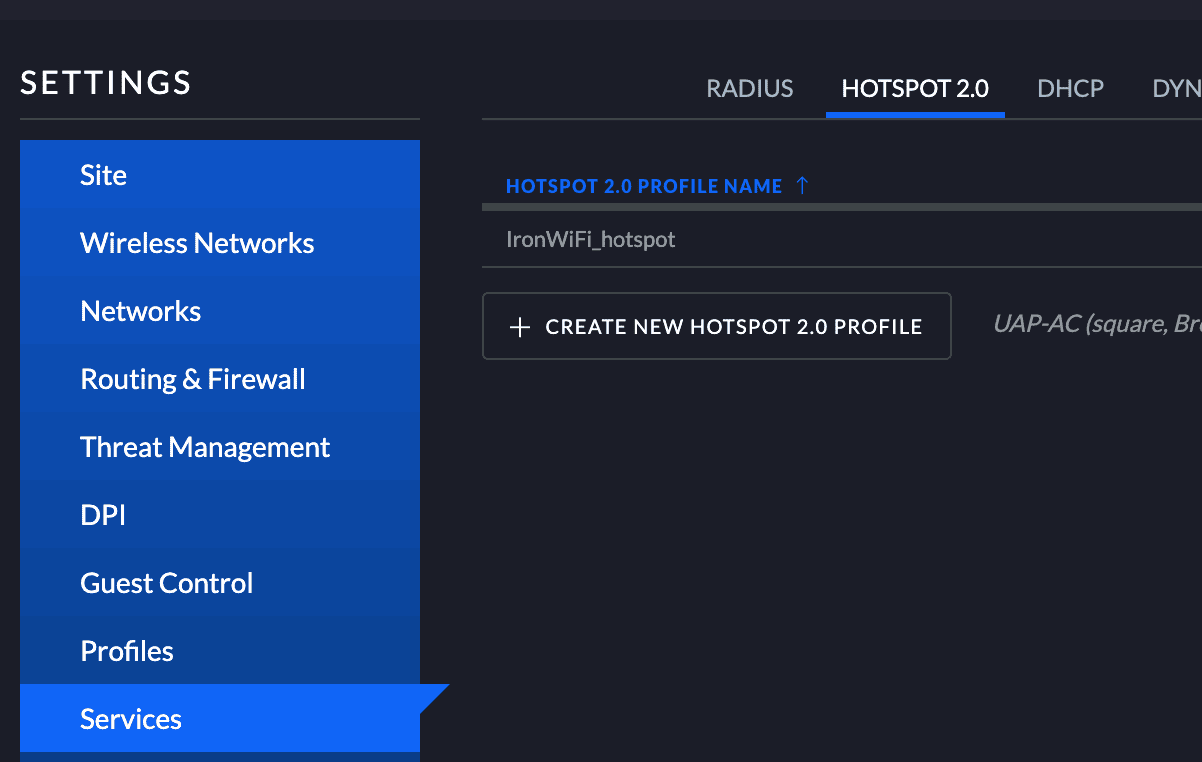
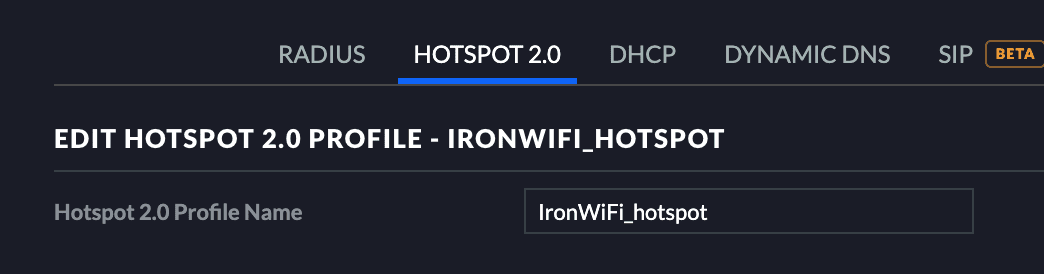
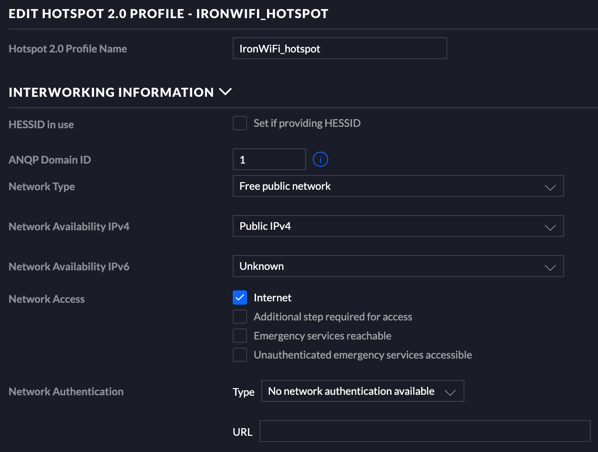
- Click + Create New Hotspot 2.0 Profile and the Create New Hotspot 2.0 Profile page appears. Enter the Hotspot 2.0 Profile Name, such as “IronWiFi_hotspot”.
- Expand INTERWORKING INFORMATION by clicking > next to it.
- For Network Type, select Free public network and for Network Access, click the box next to Internet.
- Scroll down to ONLINE SIGN-UP RELATED SETTINGS and enter the OSU SSID, such as “osu”. It can be any non-zero value. Leaving it blank stops the SSID broadcast.
Note: Online Sign-up isn’t used in IronWiFi. This is just a required setting to make IronWiFi Passpoint work on Ubiquiti.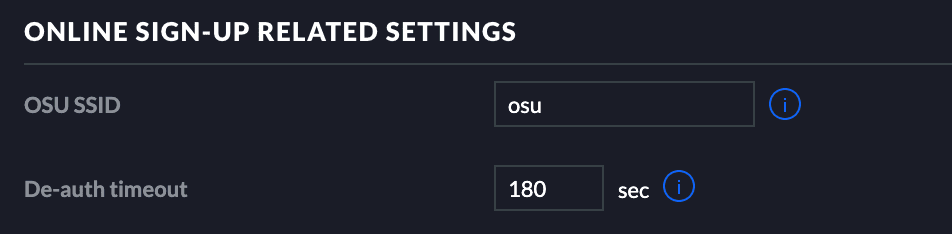
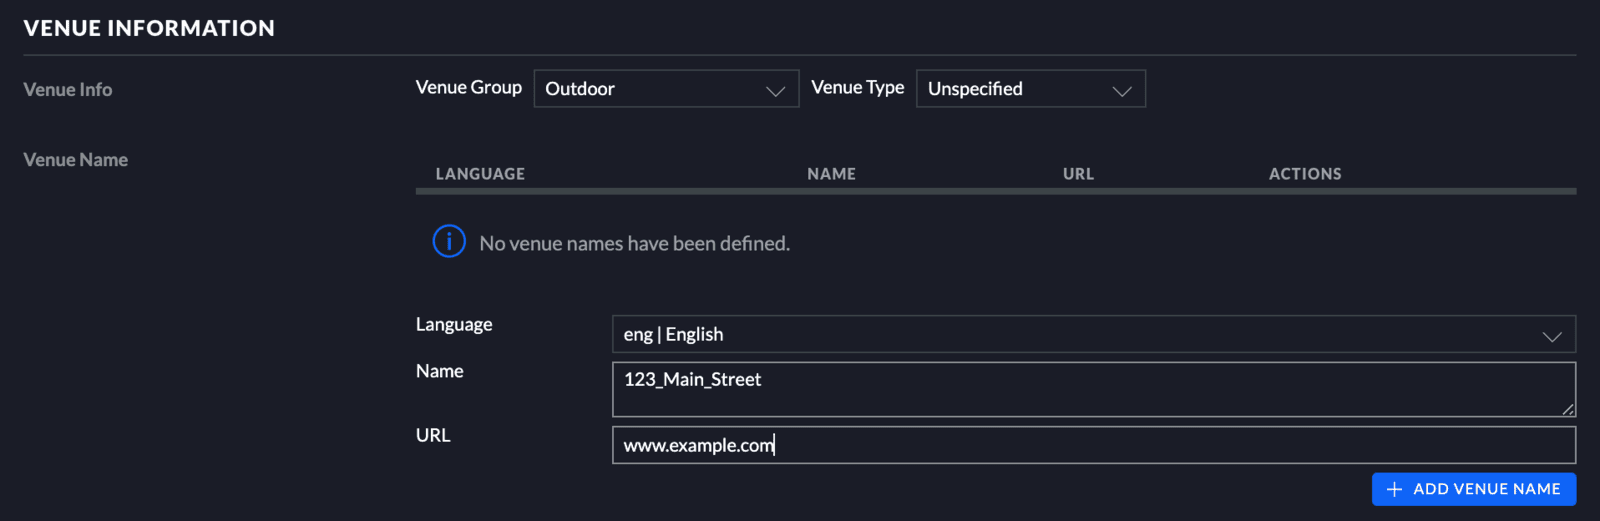
- Scroll down to Venue Information.
- For Venue Group and Venue Type, select the most appropriate values, such as Business and Professional Office, respectively.
- Select a Language and enter a value for the Venue Name.
- Click + Add Venue Name on the bottom right of Venue Information.
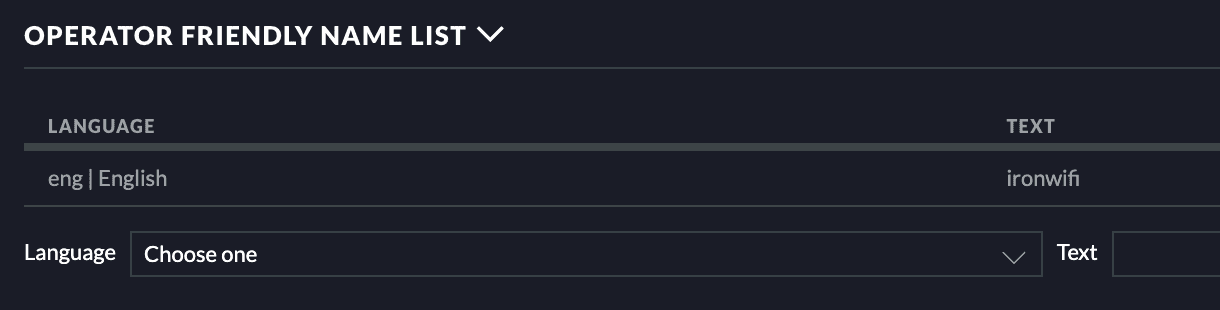
- Expand OPERATOR FRIENDLY LIST by clicking > next to it.
- Select a Language and for Text, enter the name of the Hotspot 2.0 operator, such as “IronWiFi”.
- Click +Add Operator Friendly Name on the bottom right of Operator Friendly Name List.
- Expand NAI REALM LIST by clicking > next to it.
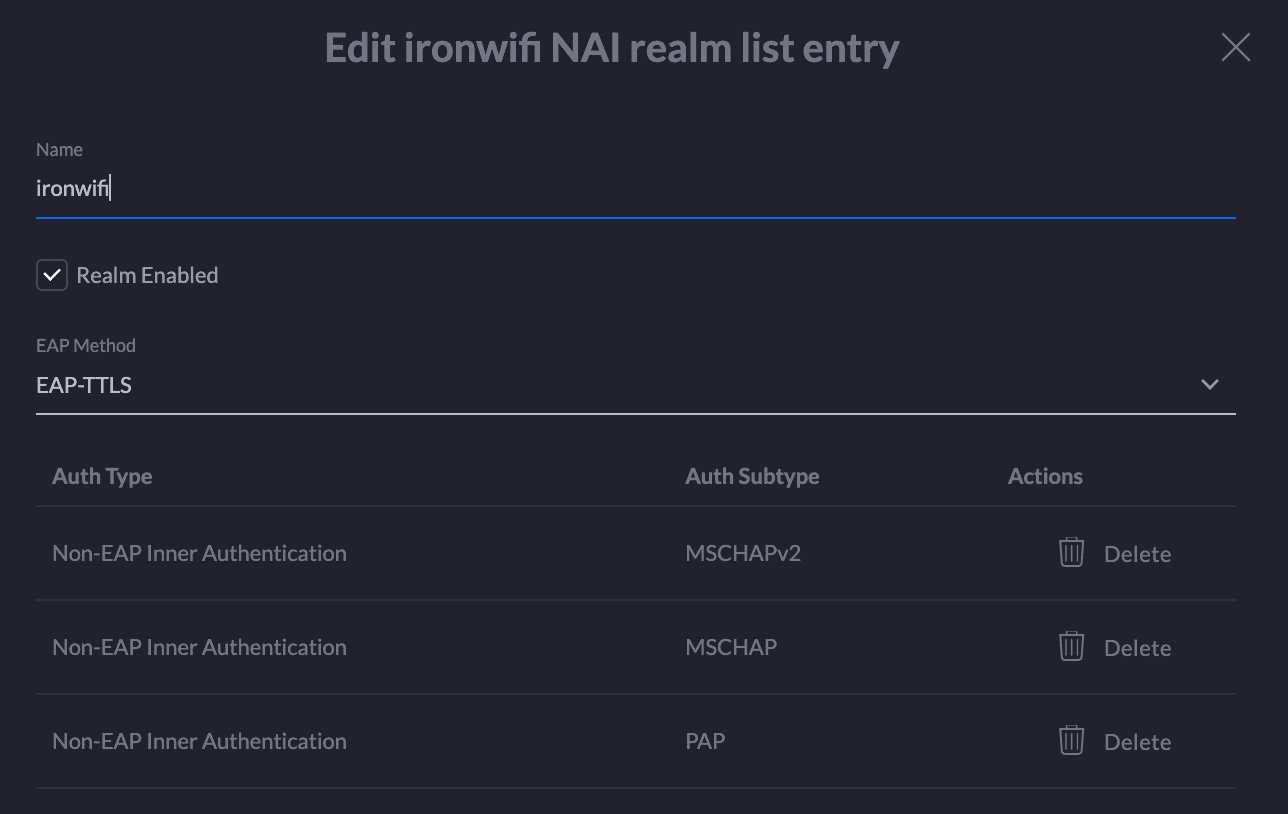
- Click +Add NAI Realm. The Add NAI realm list entry dialog box appears.
- Enter a Name, such as “IronWiFi” and click the box next to Realm Enabled.
- For EAP Method, select EAP-TTLS, Non-EAP Inner Authentication as Auth Type and MSCHAPv2 and PAP as Auth Subtypes. For certificate authentication, select EAP-Method EAP-TLS.
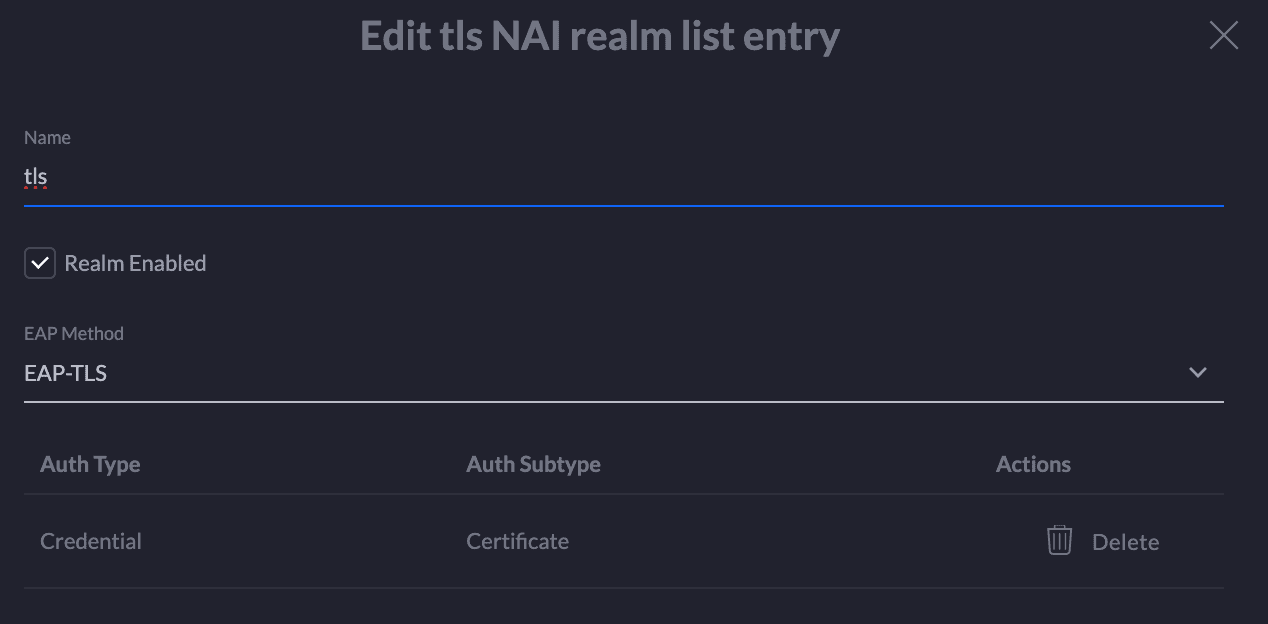
- Repeat the process for EAP-TLS method. For EAP Method, select EAP-TLS, Credential as Auth Type and Certificate as Auth Subtype.
- Repeat the process for EAP-AKA method. For EAP Method, select EAP-AKA, Credential as Auth Type and SIM as Auth Subtype.
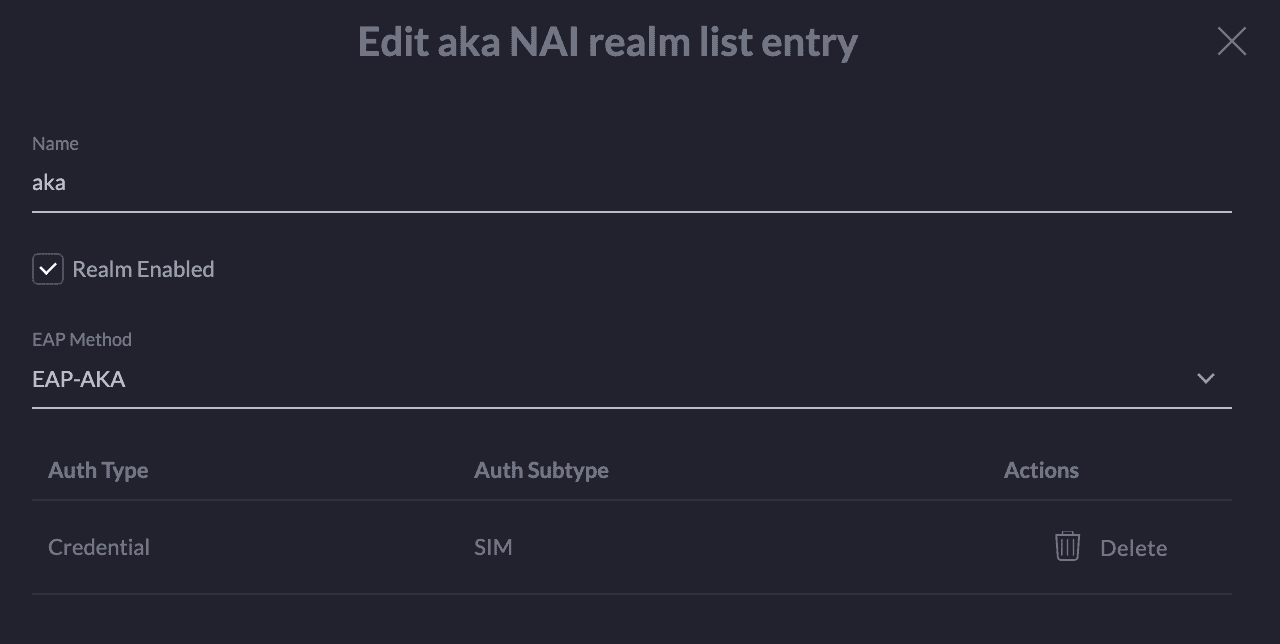
You can also add EAP-SIM and EAP-AKA' methods.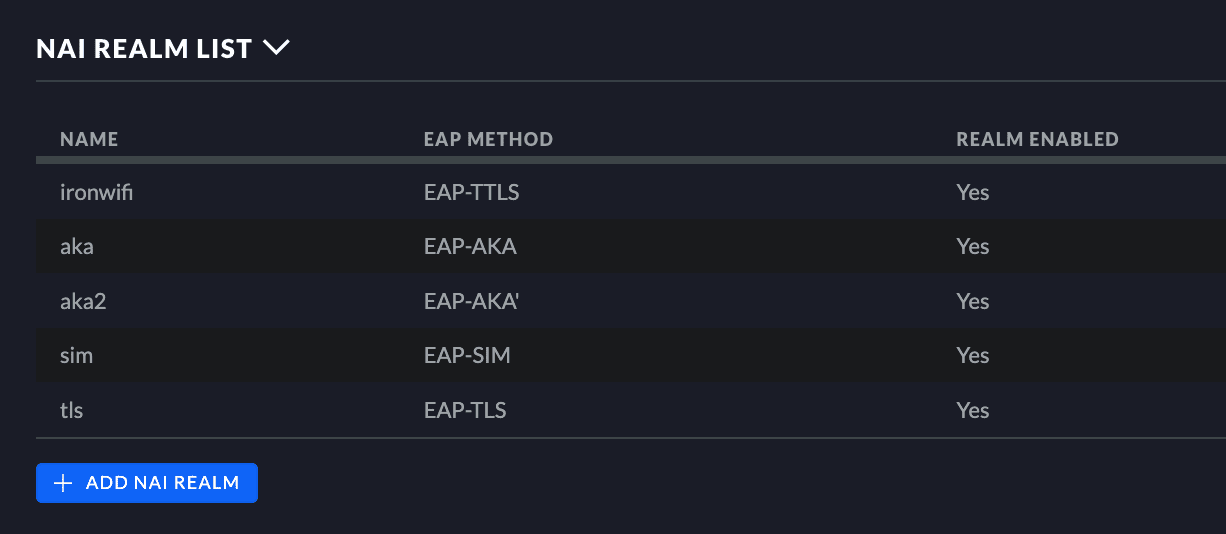
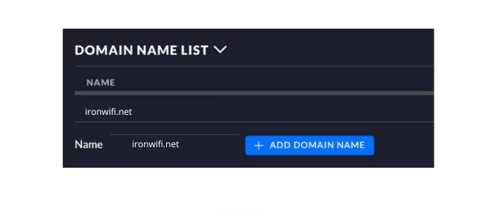
- Expand DOMAIN NAME LIST by clicking > next to it.
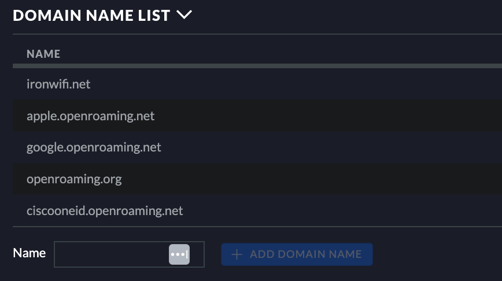
- For Name, enter the ironwifi.net and click +Add Domain Name.
- For OpenRoaming, repeat the process and add the following domains:
- apple.openroaming.net
- google.openroaming.net
- openroaming.org
- ciscooneid.openroaming.net
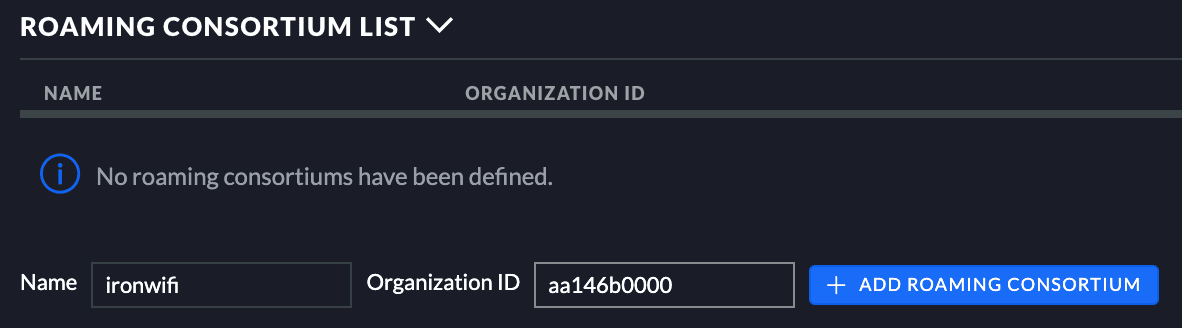
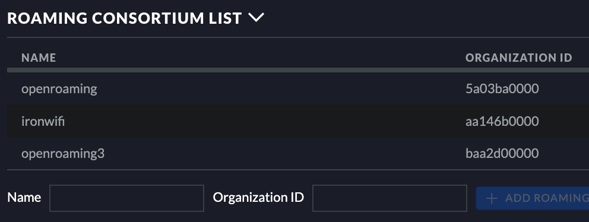
- Under ROAMING CONSORTIUM LIST, enter name ironwifi and Organization ID aa146b0000. Click + ADD ROAMING CONSORTIUM to confirm.
- For OpenRoaming, add the following organization ids:
- 5a03ba0000
- baa2d00000
- 004096
- Scroll down to HOTSPOT2 WAN METRIC and select “Enable WAN metrics”.
- Insert uplink and downlink speeds (such as 10000 Kbps). Ensure the Link Status is Up and make sure it is not marked as “At Capacity”.
- Click Save at the bottom left.


Configure SSID with RADIUS profile and Hotspot 2.0 profile
If you're new to IronWiFi, we recommend creating a new SSID to avoid impacting any existing SSID configurations running in production.
- Select Wireless Networks from the Settings menu and click + Create New Wireless Network.
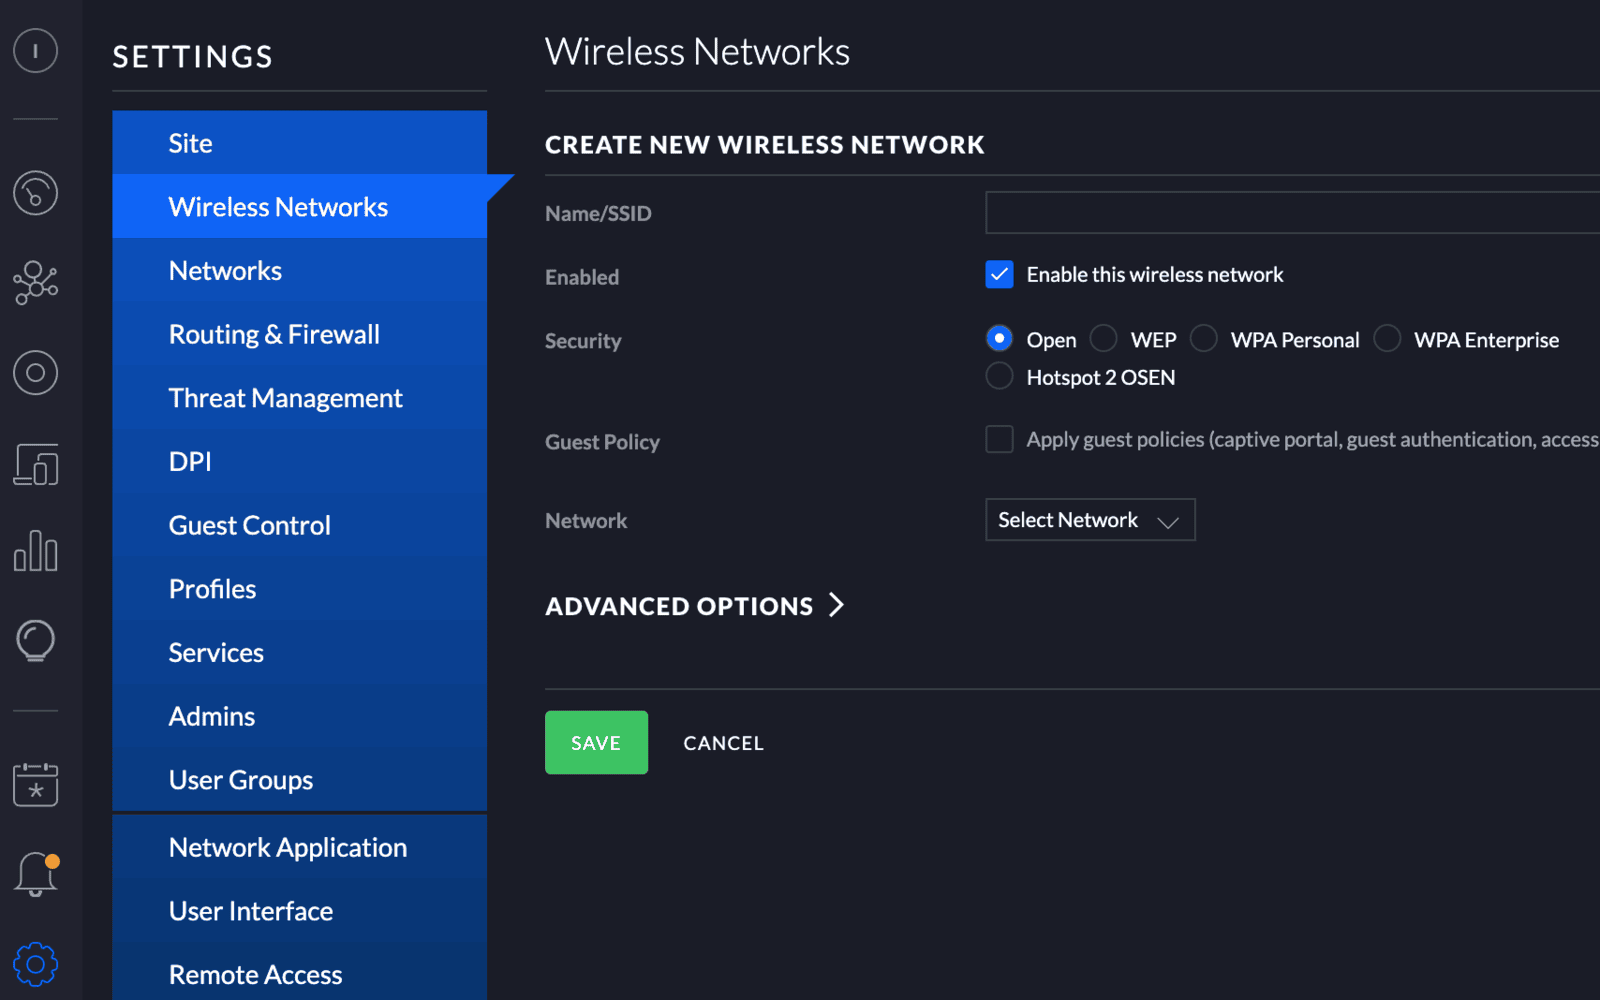
- Enter Name/SSID, such as ‘unifi_hs20’
- For Security, select WPA Enterprise. RADIUS profile options appear so you can associate the RADIUS profile with the wireless LAN.
- Select the RADIUS Profile you created, “IronWiFi_radius”.
- Click the box next to Enable Hotspot 2.0.
- Select the Hotspot 2.0 profile you created, “IronWiFi_hotspot”.
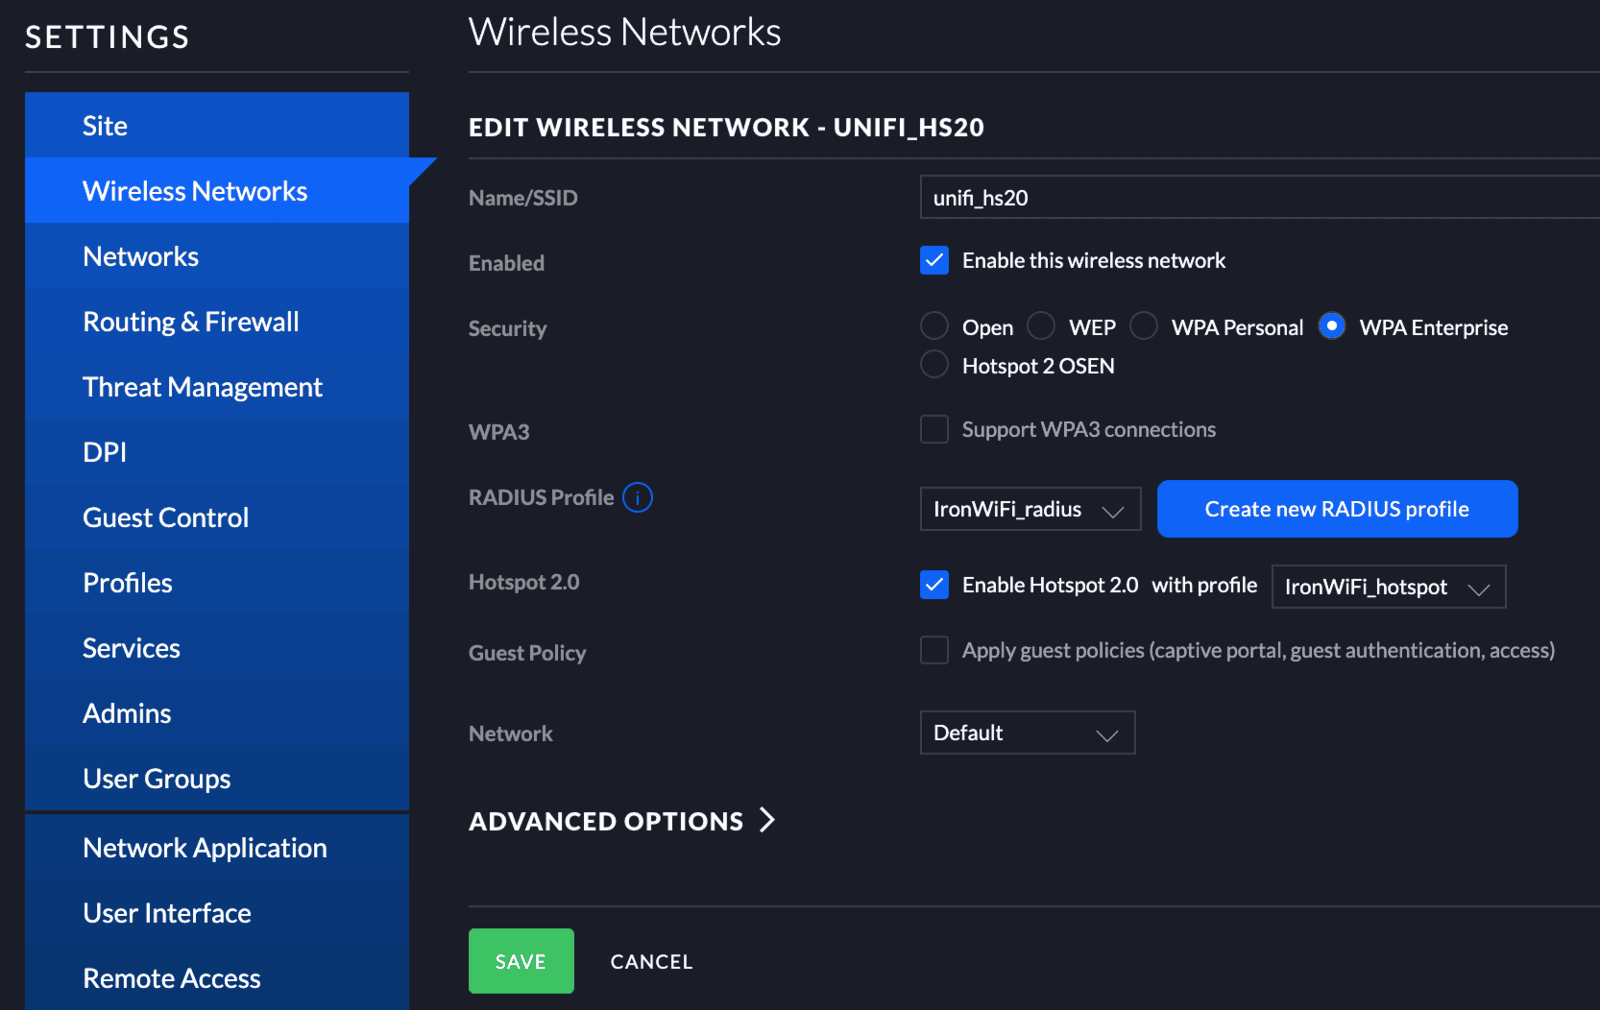
- Click Save at the bottom left.

A message appears at the top right indicating that the wireless network changes are saved.
