Access Point Instructions for TP Link Omada (version 4)
This page explains the configuration of TP Link access points with Omada version 4 controller for external Captive Portal and RADIUS authentication.
IronWiFi Console Configuration
- Log into the IronWiFi console or register for free
- Create a new network
- After that, create a new captive portal, with vendor TP Link Omada v4
Access Point Configuration
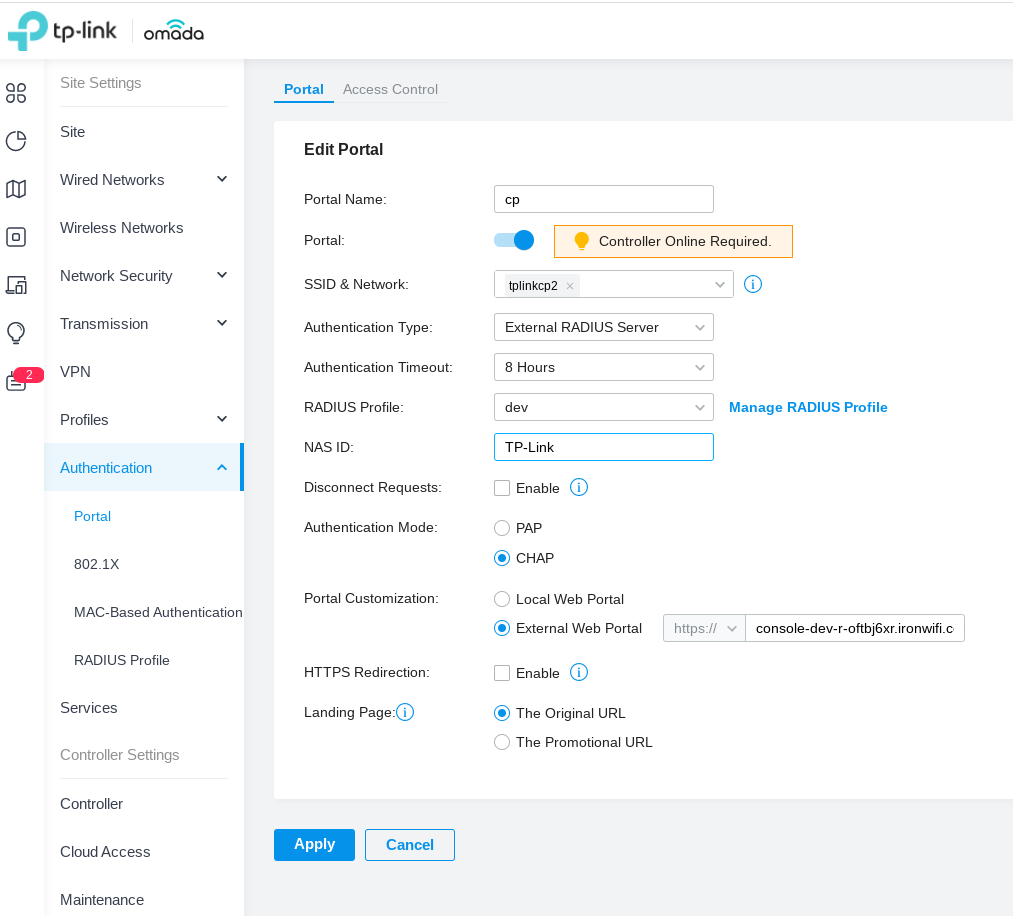
- Configure the Captive Portal under Authentication -> Portal. Use the following values:
- Authentication Type - External RADIUS Server
- Authentication Timeout - 8 hours
- NAS ID - TP-Link
- Authentication Mode - CHAP
- Portal Customization - External Web Portal - get this value from the IronWiFi console
- Landing Page - The Original URL
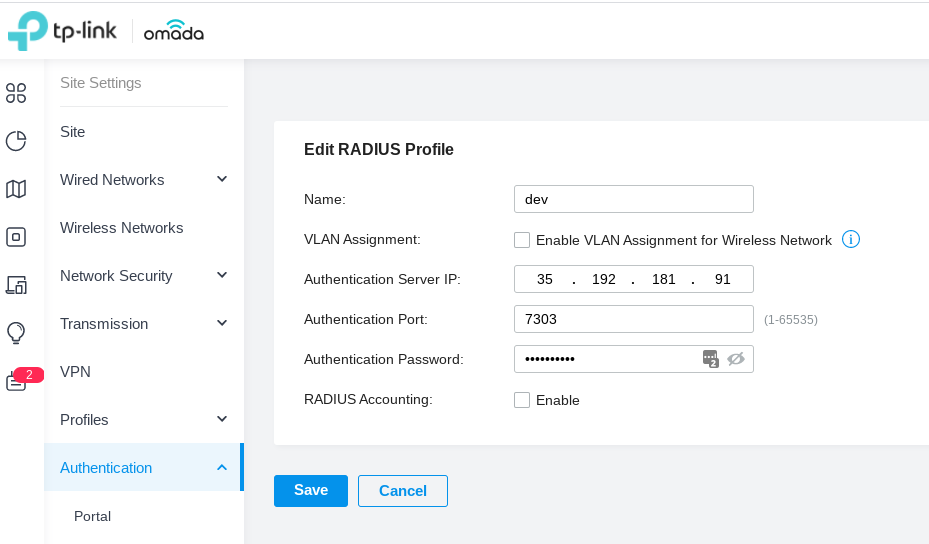
- Define a RADIUS profile by clicking on manage RADIUS Profile. Configure with:
- Name - ironwifi_radius (or whatever you wish)
- VLAN Assignment - Disabled
- Authentication Server IP - get this value from the IronWiFi console
- Authentication Port - get this value from the IronWiFi console
- Authentication Password - get this value from the IronWiFi console
- Radius Accounting - Enabled
- Accounting Port - get this value from the IronWiFi console
-
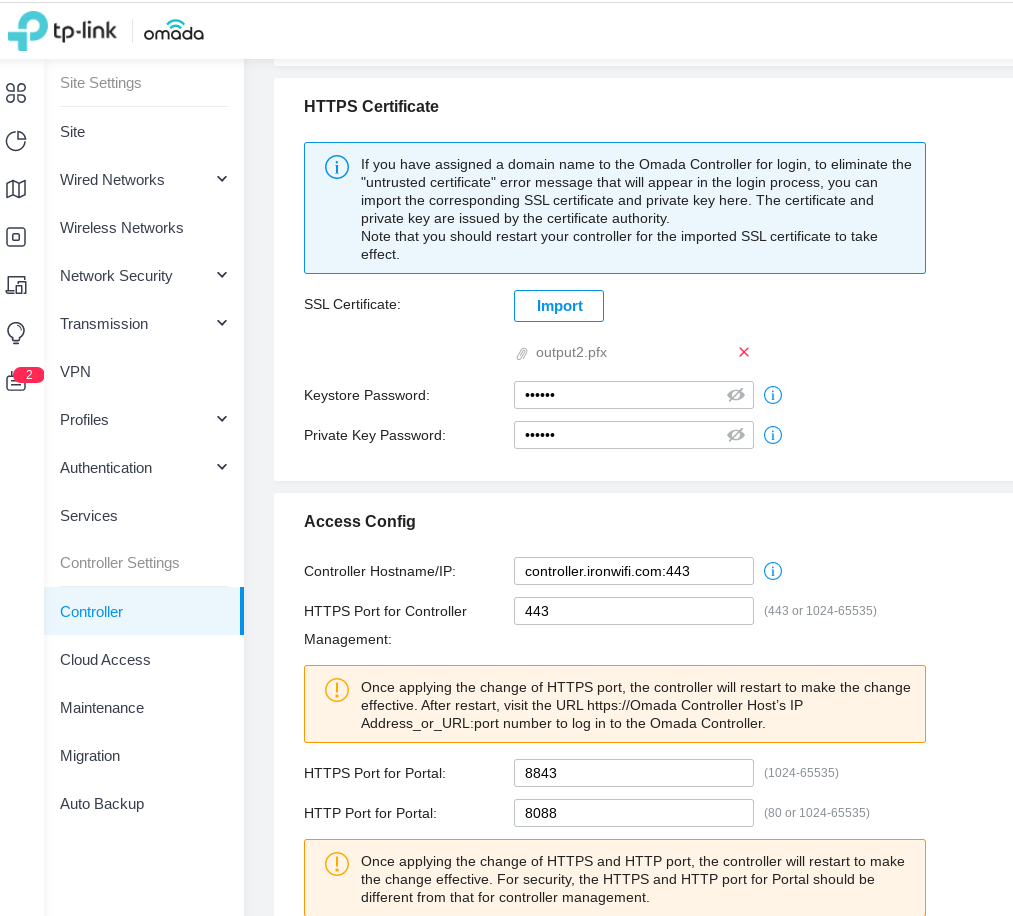
Import your SSL certificate under Controller
-
Add an A type DNS record to point the hostname to your omada controller.
! You must also install a valid SSL certificate on your controller/AP, in order to avoid authentication issues !