In this guide we describe how to configure your RUCKUS wireless LAN controller to work with Passpoint profiles, OpenRoaming and SIM card authentication
Prerequisites
- Access to the Ruckus SmartZone Dashboard as a user with administrative privileges.
- Information about the assigned RADIUS servers (Server IP address, port numbers, shared secrets):
- Email or document that contains this information
OR - Access to the IronWiFi Management Console - Sign in or Open Account
- Email or document that contains this information
Log in to the RUCKUS SmartZone wireless LAN controller
To start the configuration process, log in to the SmartZone wireless LAN controller as admin.
For existing environments with additional users, log in as a user with administrative
privileges.
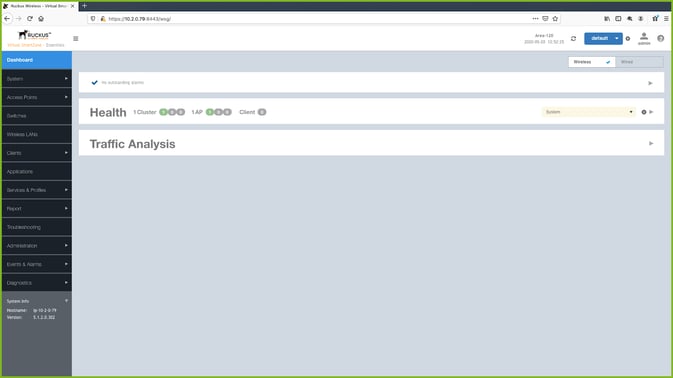
The RUCKUS Dashboard appears.
Create a Wireless LAN and Hotspot 2.0 Profile with RADIUS
This procedure describes how to create a wireless LAN that you’ll enable with Hotspot 2.0.
Hotspot 2.0 allows mobile devices to join a WiFi network automatically, including during
roaming, when the devices enter the Hotspot 2.0 area.
Before creating a new wireless LAN for Hotspot 2.0, review the RUCKUS documentation.
Create a wireless LAN
1. Select Wireless LANs from the menu on the left side of the RUCKUS Dashboard.
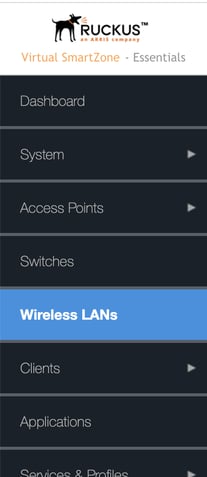
The Wireless LANs page appears.
2. Click ➕Create
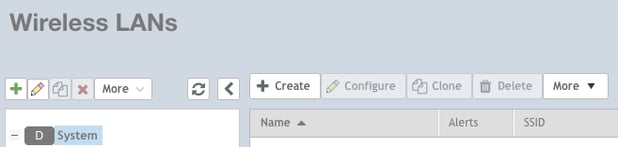
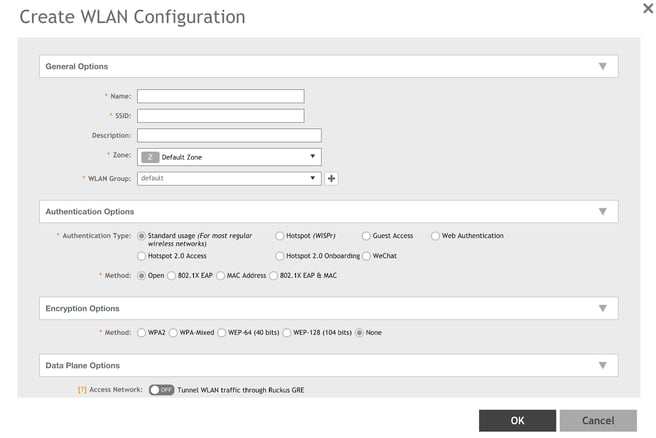
The Create WLAN Configuration dialog box appears.
If you're new to IronWiFi, we recommend creating a new wireless LAN to avoid
impacting any existing wireless LAN configurations running in production.
Note: There are a number of options to set. Only the options that require your input
are shown. Default values are used for options that don’t need adjustment.
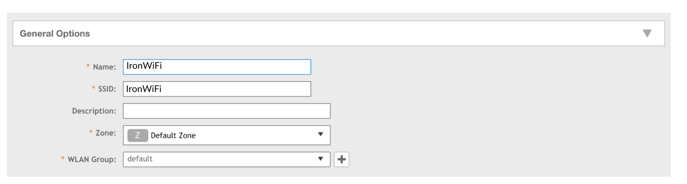
General options
1. Enter the name of the wireless LAN you are creating in the Name field. We
recommend you use “IronWiFi”.
2. Enter the SSID.
We recommend using the SSID “IronWiFi”. While the connection process is automatic,
the SSID name will be recognized by more users over time.
3. Set the Zone and WLAN Group.
For large RUCKUS environments where your company uses WLAN groups, set the
zone based on company preferences and use the correct WLAN group for the
company WLAN categorizations.
Otherwise, use the default zone (“Default Zone”) and default WLAN Group (“default”).
Authentication options
For Authentication Type, select Hotspot 2.0 Access. (You can’t specify Hotspot 2.0
Onboarding because that option doesn’t give you the ability to add a Hotspot 2.0 profile.)
Selecting Hotspot 2.0 Access automatically sets Method to 802.1X EAP and it can’t be
changed.

Encryption options
The (encryption) Method defaults to WPA2 and can’t be changed.
Use the default values for other fields.

RADIUS options: define your venue
Important: IronWiFi uses the RADIUS NAS ID to identify your venue (a site location) with
each RADIUS access request. By default RUCKUS uses the WLAN BSSID for the NAS ID.
Replace the default with your site-specific venue name or address.
1. For NAS ID, select User Defined.
2. Set the NAS ID to something site-specific to your wireless LAN configuration.
Example: “Shopping-Center_123-Main-Street_AnyCity_State_Zip-Code”.

Hotspot 2.0 Profile
1. Set the Accounting Server update interval to 5 minutes.
2. Click ➕to the right of Hotspot 2.0 Profile.

The Create Hotspot 2.0 WLAN Profile dialog box appears.
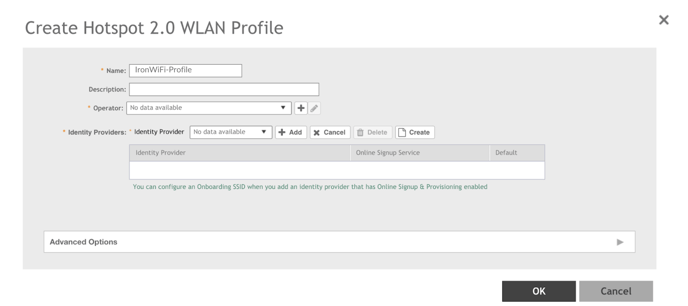
3. Enter the profile name in the Name field, such as “IronWiFi”.
Create Operator
1. On the Create Hotspot 2.0 WLAN Profile dialog box, click ➕to the right of Operator.
The Create Hotspot 2.0 Wi-Fi Operator Profile dialog box appears.
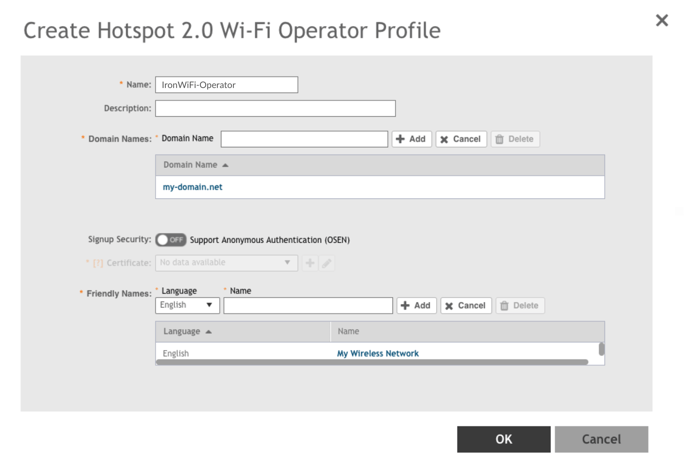
2. Enter the operator name in the Name field, for example “IronWiFi-Operator”.
3. Enter at least one Domain Name from your environment, for example "ironwifi.net".
4. Click ➕Add to the right of Domain Name to add the domain.
5. Enter at least one name for Friendly Names, “such as My Wireless Network”. Friendly
names are additional descriptors. The friendly name is what a Hotspot 2.0 client sees
on their screen.
6. Click ➕Add to the right of the friendly name to add the friendly name.
7. Click OK. You return to the Create Hotspot 2.0 WLAN Profile dialog box.
Create Identity Provider
1. On the Create Hotspot 2.0 WLAN Profile dialog box, to the right of Identity
Provider, click Create to start the Identity Provider creation process.
The Create Hotspot 2.0 Identity Provider dialog box appears. Network Identifier is
selected in the top navigation.
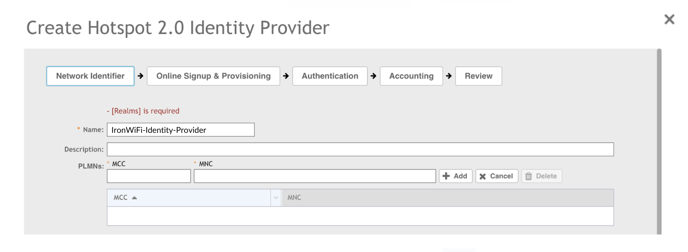
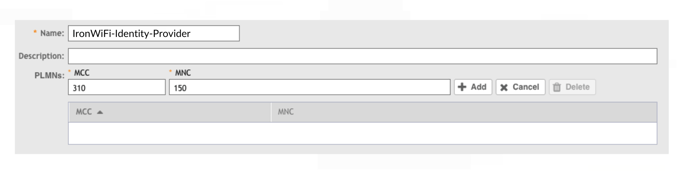
2. Enter the name of the identity provider in the Name field, such as “IronWiFi-Identity-Provider”.
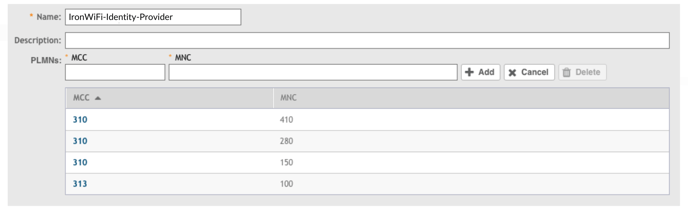
3. Under the PLMNs section, enter the MCC/MNC codes one entry at a time and click +Add to register each code pair.
4. Add the following MCC/MNC code pairs and repeat step 3 to register each code on the
WLC.
- MCC (310) ; MNC (410)
- MCC (310) ; MNC (280)
- MCC (310) ; MNC (150)
- MCC (313) ; MNC (100)
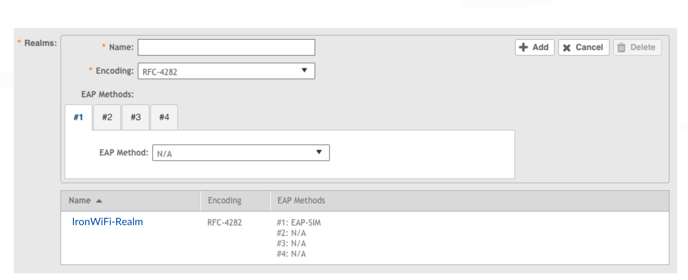
5. In the Realms section, enter the realm name in the Name field, for example “IronWiFi-Realm”
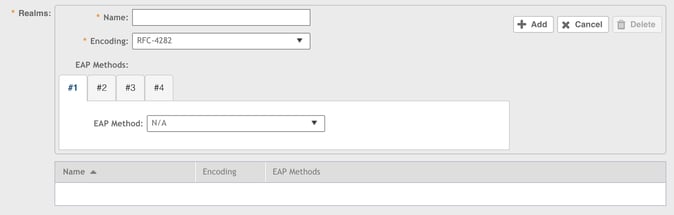
6. For Encoding, take the default of “RFC-4282”.
7. For EAP Method, select #1 and select EAP-AKA. A section appears where you can
add EAP Auth Info.
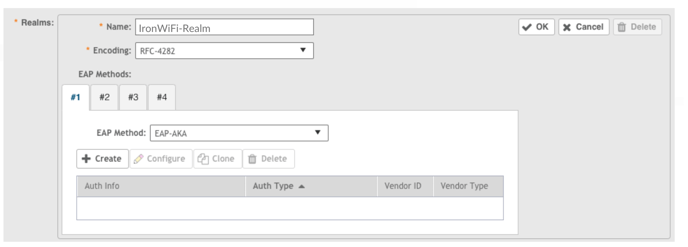
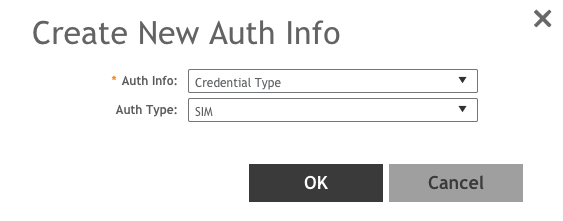
8. Below EAP Method, click ➕Create. The Create New Auth Info dialog box appears.
9. For Auth Info, select Credential Type from the drop down menu and for Auth Type
select SIM. Click OK. You return to the Realms section of the Create Hotspot 2.0
Identity Provider dialog box.
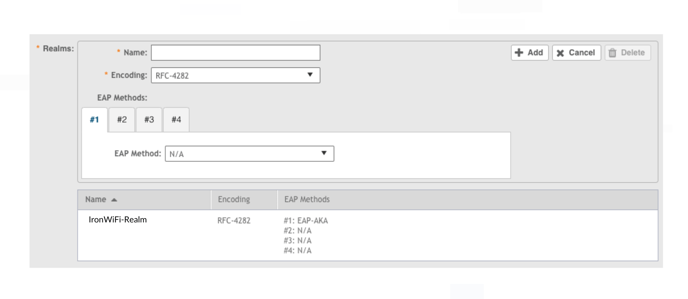
10. Click ➕Add in the upper right corner of the Realms section to add the realm entry.
The Realms information should look like this example.
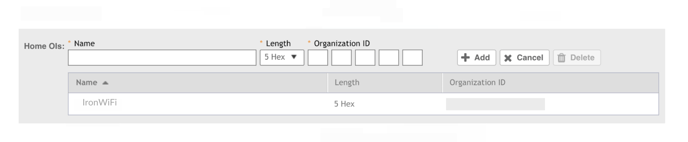
11. Scroll down to the Home OIs field, and enter “IronWiFi” in the Name field for the Roaming Consortium OI (RCOI).
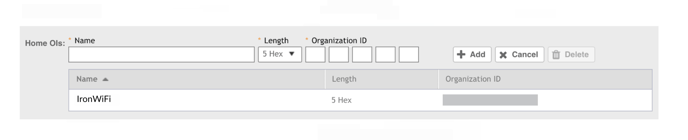
12. Verify the Length is “5 Hex” and set Organization ID fields to these values. They are
case-sensitive.
Length and Organization ID are crucial in this configuration because they act as a
unique identifier for the organization.
13. Click ➕Add to add the OI. The OI information should look like this example.

14. Click Next on the bottom right.
Set up a secure RADIUS connection
Create RADIUS Authentication Service
This procedure describes settings for RADIUS Authentication. By default, two realms exist:
No Match and Unspecified. When configured with the same RADIUS service, these two
Authentication realms together accept all traffic realms for the RCOI, essentially acting as a
wildcard pattern match which is the ideal configuration for IronWiFi.
No Match Realm configuration (authentication)
1. Select Authentication at the top of the Create Hotspot 2.0 Identity Provider dialog
box.
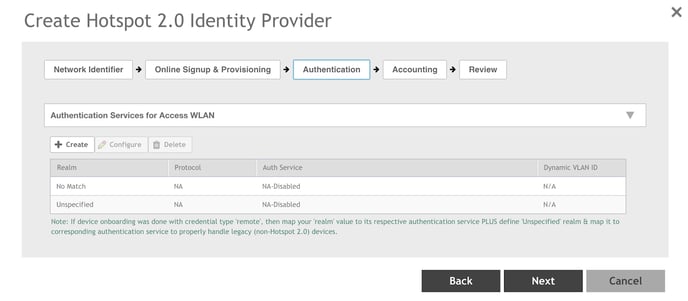
2. Double click the No Match row. The Edit Realm Based Authentication Service: No
Match dialog box appears.
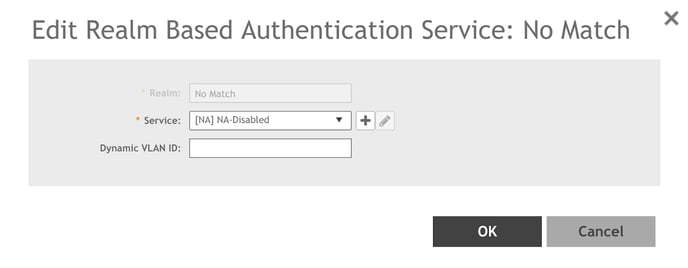
3. Click ➕next to Service. The Create Authentication Service dialog box appears.
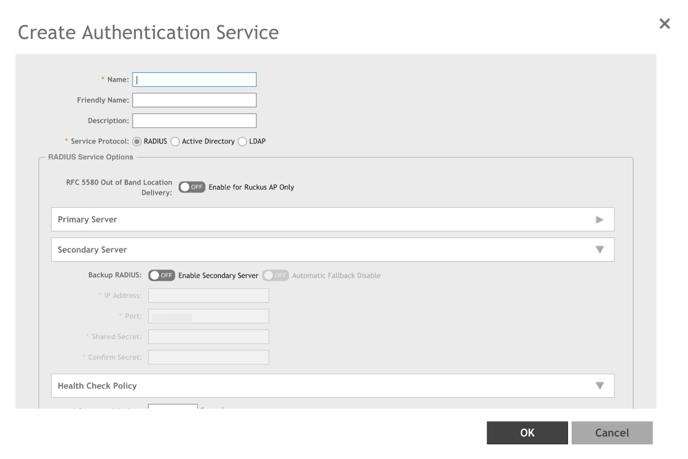
4. Enter the RADIUS service values shown for the primary server, and follow the
instructions in the RUCKUS documentation.
Service Protocol - RADIUS
Primary Server IP Address - assigned RADIUS IP
Primary Server Port - assigned authentication port
Primary Server Shared Secret - assigned shared secret
Primary Server Confirm Secret - assigned shared secret
5. Click OK. You return to the Edit Realm Authentication Service: No Match dialog
box.
6. In the Edit Realm Authentication Service: No Match dialog box, click OK.
Unspecified Realm configuration (authentication)
1. Double click the Unspecified row. The Edit Realm Based Authentication Service:
Unspecified appears.
2. For Service, select [RADIUS] RADIUS. This selection uses the same defaults as the
No Match realm. Click OK.
3. Verify that the Authentication Service values look like this example. Click Next on the
bottom right.
-1.png?width=688&height=458&name=35.189.111.2%20(1)-1.png)
After clicking Next, Accounting is selected on the Create Hotspot 2.0 Identity
Provider dialog box.
Create RADIUS Accounting Service
This procedure describes settings for RADIUS Accounting. By default, two realms exist: No
Match and Unspecified. When configured with the same RADIUS service, these two
Authentication realms together accept all traffic realms for the RCOI, essentially acting as a
wildcard pattern match. If you’re creating a dedicated wireless LAN, you can configure all realms to point to the IronWiFi RADIUS end point for authentication and accounting.
No Match Realm configuration (accounting)
1. Toggle Enable Accounting to ON so you can edit the two realms.
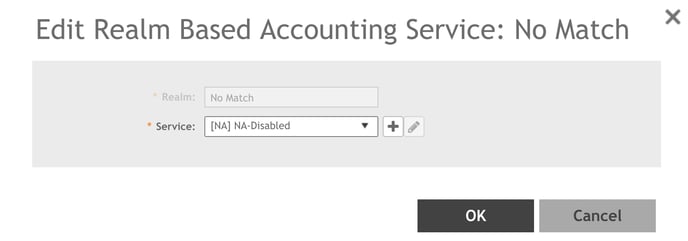
2. Double click the No Match row. The Edit Realm Based Authentication Service: No
Match dialog box appears.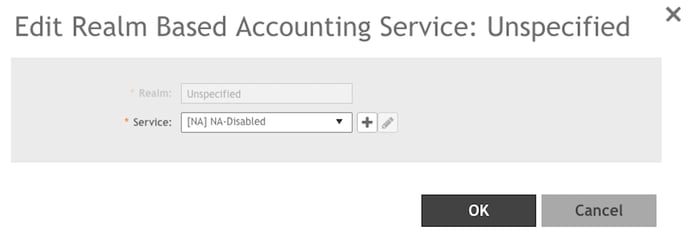
3. Click ➕next to Service. The Create Accounting Service dialog box appears.-1.png?width=599&height=398&name=35.189.111.2%20(1)-1.png)
4. Enter the RADIUS service values shown for the primary server, and follow the
instructions in the RUCKUS documentation.
Service Protocol: RADIUS
Primary Server IP Address: Assigned RADIUS server IP address
Primary Server Port: Assigned authentication port
Primary Server Shared Secret: Assigned shared secret
6. Click OK. You return to the Edit Realm Accounting Service: No Match dialog box.
7. In the Edit Realm Accounting Service: No Match dialog box, click OK.
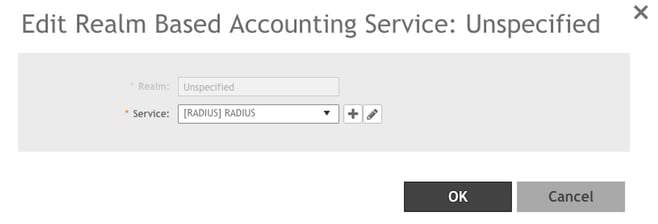
Unspecified Realm configuration (accounting)
1. Double click the Unspecified row. The Edit Realm Based Authentication Service:
Unspecified appears.

2. For Service, select [RADIUS] RADIUS. This selection uses the same defaults as the
No Match realm.
3. The Edit Realm Accounting Service: Unspecified dialog box should look like this
example. Click OK.
4. Verify that the Authentication Service values look like this example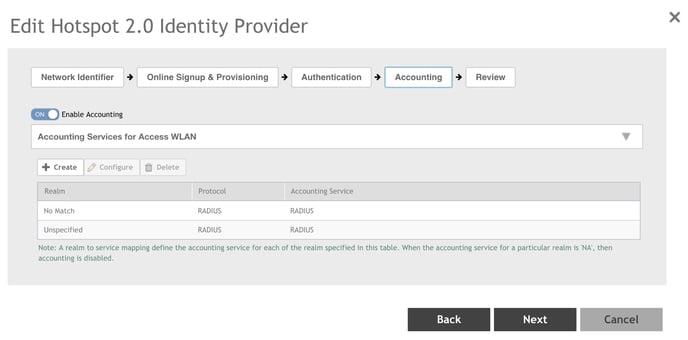
5. Select Review at the top of the Create Hotspot 2.0 WLAN Profile dialog box.
6. Review the settings and click OK. You return to the Create Hotspot 2.0 WLAN
Profile dialog box.
7. On the Create Hotspot 2.0 WLAN Profile dialog box, click ➕Add next to Identity
Provider to add the “IronWiFi-Identity-Provider” to the list of identity providers.
8. Click OK. You return to the Create WLAN Configuration dialog box.
9. On the Create WLAN Configuration dialog box, click OK to save the completed
RADIUS-enabled wireless LAN configuration.
Troubleshoot the RUCKUS configuration
If you see errors or problems while installing and testing the RUCKUS
configuration, here are some ways to validate the configuration and look for errors.
Most problems occur during setup. One way to test whether the setup is correct is to go
through the steps again.
Home OI (RCOI) and EAP settings
If the Home OI and EAP method aren’t set correctly, mobile devices can’t automatically
connect (which is intended). If authentication logs are showing an attempt to connect but failing,
it means RADIUS server IP addresses are probably correct in the RADIUS Authentication and
Accounting settings, but the EAP settings could be wrong.
1. From the RUCKUS Dashboard, verify the Home OI is set correctly by selecting
Services & Profiles > Hotspots & Portals.
2. On the Hotspots & Portals page, click the Hotspot 2.0 tab near the top.
3. Double-click the Identity Provider named “IronWiFi-Identity-Provider”.
4. Verify the Home OI in the list looks like this example.
5. If the Organization ID isn’t with a Length of 5 Hex:
○ Select the IronWiFi Home OI and click Delete
○ Recreate the Home OI to match the image above, or use the values from
Create Identity Provider.
EAP-AKA with Credential type SIM
Another potential issue is the EAP-AKA settings on the Realm as part of the identity provider setup. It’s easy to miss adding the EAP Method to the #1 Realm.
1. From the RUCKUS Dashboard, verify the Home OI is set correctly by selecting
Services & Profiles > Hotspots & Portals.
2. On the Hotspots & Portals page, click the Hotspot 2.0 tab near the top.
3. Double-click the Identity Provider named “IronWiFi-Identity-Provider”.
4. Verify the Realms section looks like this example.
5. Verify the EAP-AKA method on the IronWiFi-Realm is correct by double-clicking on the name “IronWiFi-Realm”.
6. Verify the EAP Method looks like this example.
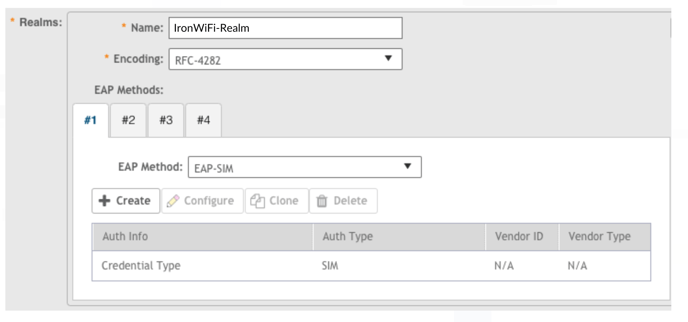
7. If Auth Info isn’t Credential Type or Auth Type isn’t SIM, correct the values by
selecting Credential Type and clicking Configure.
8. Click OK in the dialog box followed by OK in the upper-right corner of the Realms
section to save changes.
RADIUS Authentication and Accounting Service
If the IP addresses, ports, or secrets used for the primary and secondary servers are wrong, the RADIUS server can’t be contacted. In this situation, authentication logs on the RADIUS server can’t be generated, because traffic isn’t passing to the wireless LAN controller from RADIUS.
If no new logs are coming in, it means the wireless LAN controller isn’t passing traffic to the
RADIUS. If this is the case, you should check the
Authentication RADIUS Service and the Accounting RADIUS Service.
Authentication RADIUS Service
1. From the RUCKUS Dashboard, select Services & Profiles > Authentication.
2. On the Authentication page, click the Proxy (SZ Authentication) tab near the top,
and double-click the RADIUS service named “RADIUS”.
The Edit Authentication Service RADIUS dialog box appears.
.png?width=688&height=489&name=35.189.111.2%20(2).png)
3. Update the IP Address, Port, and Secret information for the primary server from
Primary server RADIUS service values: Authentication Service in Create RADIUS
Authentication Service.
4. If a secondary server is in use, update the IP Address, Port, and Secret information
from Secondary server RADIUS service values: Authentication Service in Create
RADIUS Authentication Service.
5. Click OK.
6. Using a mobile device, test connectivity again by turning WiFi on and off, and check
the authentication logs.
Accounting RADIUS Service
If traffic is still not coming into RADIUS, check the Accounting RADIUS Service.
1. From the RUCKUS Dashboard, select Services & Profiles > Accounting.
2. On the Accounting page, click the Proxy tab near the top, and double-click the
RADIUS service named “RADIUS”.
The Edit Accounting Service RADIUS dialog box appears.
3. Update the IP Address, Port and Secret information for the Primary Server from
Primary server RADIUS service values: Accounting Service in Create RADIUS
Accounting Service.
4. If a Secondary Server is in use, update the IP Address, Port, and Secret information
from Secondary server RADIUS service values: Accounting Service in Create
RADIUS Accounting Service.
5. Check that the Maximum Outstanding Requests (MOR) is also set to the value from
Primary Server from Primary server RADIUS service values: Accounting Service
in Create RADIUS Accounting Service.

6. Click OK.
7. Using a mobile device, test connectivity again by turning WiFi on and off, and check
the authentication logs.
Wireless LAN Configuration
If you’re configuring the wireless LAN for the first time, sometimes option configuration or
hardware compatibility prevent the access points from communicating with the wireless LAN
controller.
Option configuration
Wireless LAN controller administrators familiar with configuring wireless LAN controller and
wireless LANs for other vendors might be used to changing the VLAN ID used by their
provider to match the values used by the access points. In RUCKUS environments this can
create communication issues between the access point and the wireless LAN controller.
1. Click the Wireless LANs menu item on the left side of the page.
2. Double-click the IronWiFi wireless LAN to open the Edit WLAN Config dialog box.
3. Under Advanced Options, make sure the Access VLAN value is set to 1.
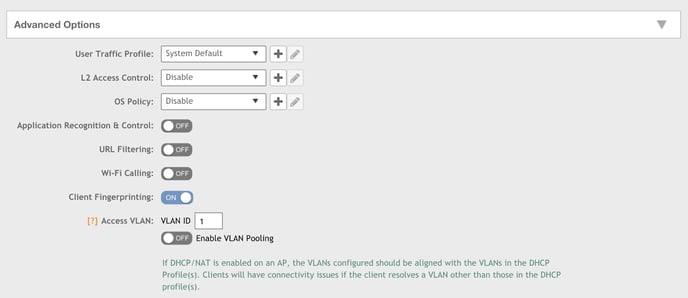
If it’s set to a value other than 1, RUCKUS access points might not route traffic to the
wireless LAN. Always use the default options provided by RUCKUS unless otherwise
specified by the Create a Wireless LAN and Hotspot 2.0 Profile with RADIUS setup
instructions. For more information about Access VLANs, review the RUCKUS
documentation.
Hardware and software compatibility
Hardware compatibility problems can occur between the access points and the wireless LAN
controller if FIPS-supported access points are in use. If you’re using custom releases,
RUCKUS might be installing a non-FIPS supported release. If you use FIPS-based access
points, they won’t connect to a non-FIPS wireless LAN controller from RUCKUS.
To be fully compliant with FIPS, RUCKUS must have a FIPS-certified software release on the
wireless LAN controller and FIPS-supported access points.
1. Check the part number on the access point. If it starts with “9F1”, the device is FIPS-certified.
2. Check the wireless LAN controller release on the RUCKUS software site to confirm it
is FIPS-compliant.
If it’s not compliant, modify your environment to use non-FIPS supported access points
that start with the part number “901” or use a FIPS-supported wireless LAN controller
software release.
Device type connectivity issues
When checking connectivity to the IronWiFi, it’s important to test both iOS and Android
devices to make sure both auto-connect without having to select the RUCKUS WLAN where
RADIUS is configured.
If iOS connects without issue, but Android doesn’t work, it’s likely the NAI Realm settings for
the WLAN aren’t correct. This is because iOS autocorrects without an EAP method specified,
while Android does not. See Create Identity Provider for information about configuring EAP-AKA.
Review the Realms settings in Create Identity Provider to verify the IronWiFi-Realm is configured with an Auth Info of “Credential Type” for #1, and with an Auth Type of “SIM”.