In this guide we describe how to configure your MikroTik devices to work with Passpoint profiles, OpenRoaming and SIM card authentication
Prerequisites
- Mikrotik device that supports 802.11u. Make sure to use the latest long-term or stable RouterOS releases.
- Information about the assigned RADIUS servers (Server IP address, port numbers, shared secrets):
- Email or document that contains this information
OR - Access to the IronWiFi Management Console - Sign in or Open Account
- Email or document that contains this information
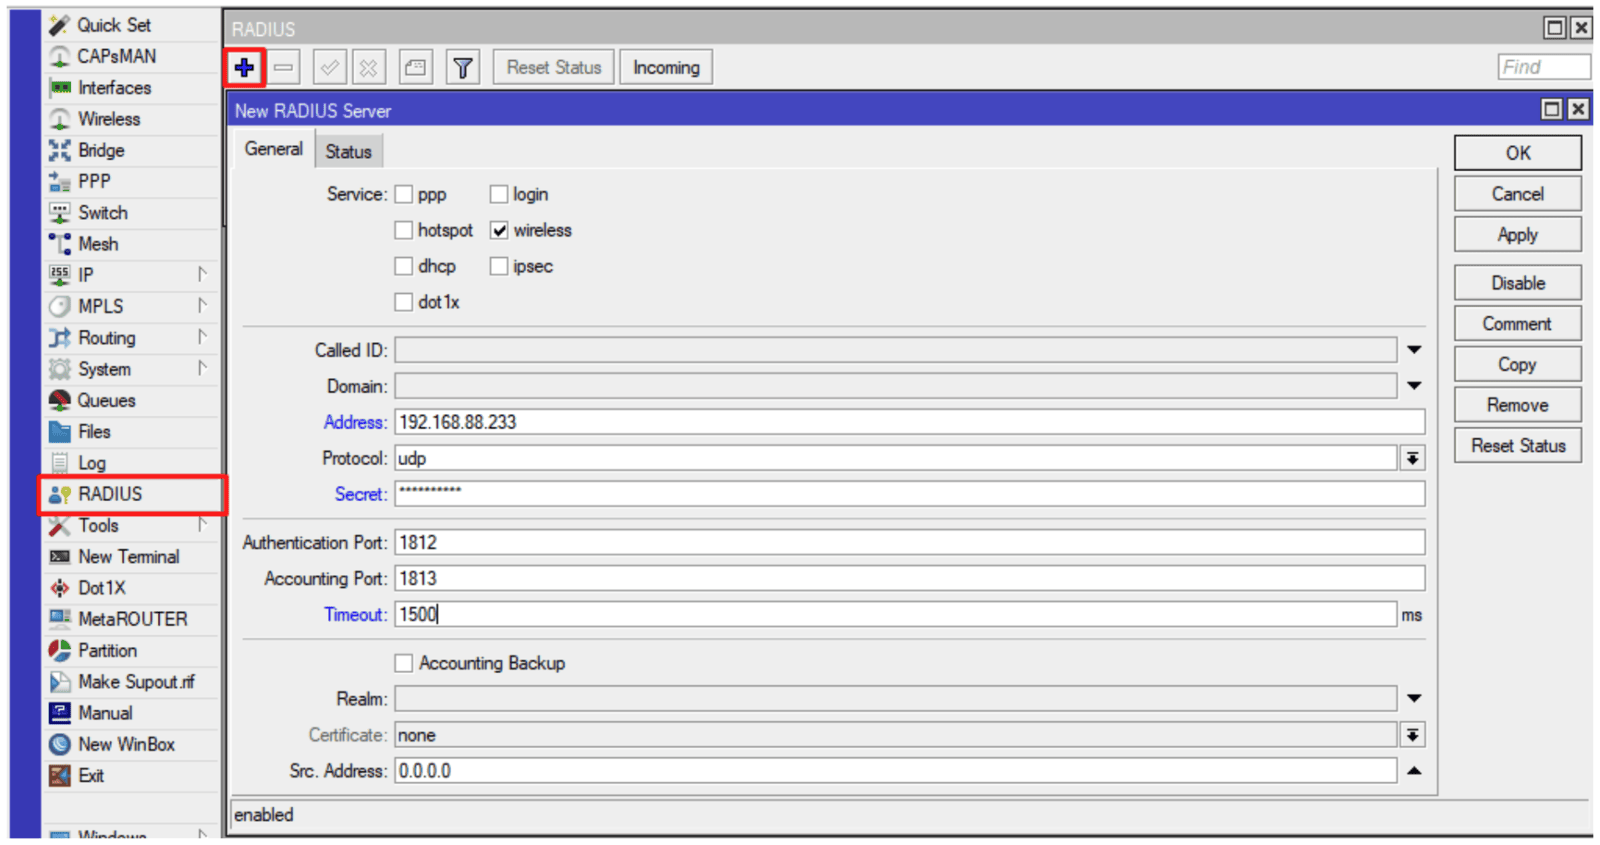
1) Configure the RADIUS client that points to assigned IronWiFi RADIUS servers
Command line equivalent is:
/radius add address=AAA.BBB.CCC.DDD authentication-port=XXXX
accounting-port=YYYY secret=yourSecret service=wireless
timeout=1500ms
The values must match the one displayed in the IronWiFi Management Console.
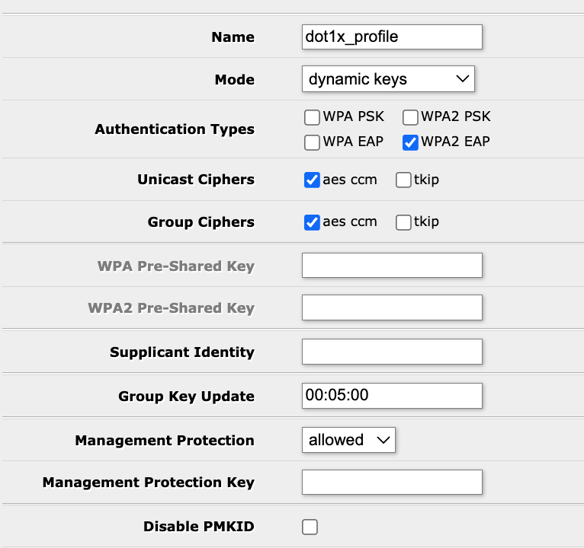
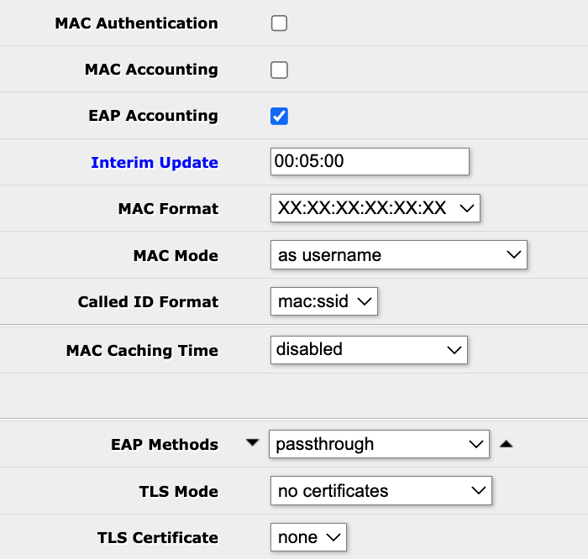
2) Create a wireless security profile that would perform 802.1x authentication

Command line equivalent is:
/interface wireless security-profiles add authentication-types=wpa2-eap
management-protection=allowed mode=dynamic-keys name=dot1x_profile
supplicant-identity="" radius-eap-accounting=yes eap-methods=passthrough
interim-update=300
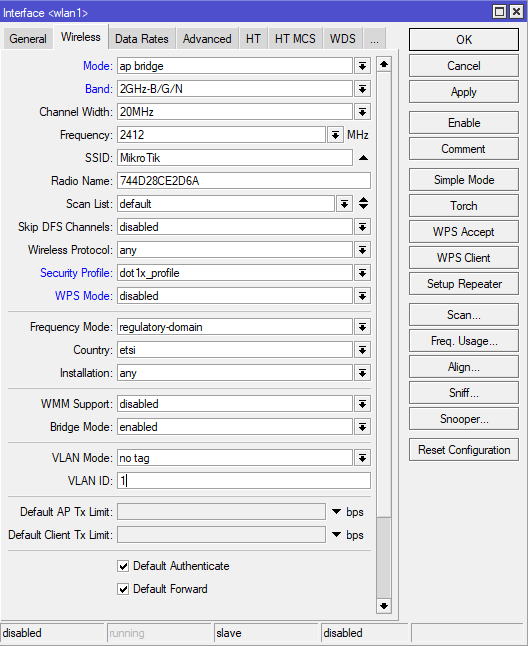
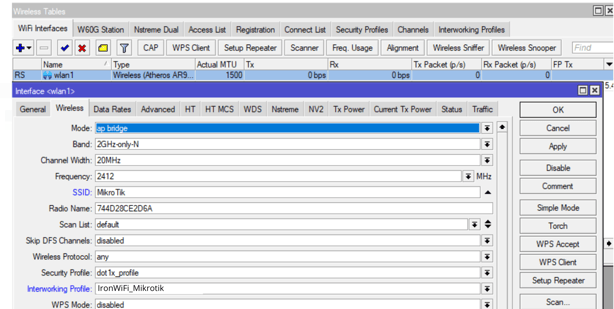
3) The next step is configuring the wireless interface and assigning the created security profile. Press “Advanced mode” to see all the options
Command line equivalent is:
/interface wireless set [ find default-name=wlan1 ] mode=ap-bridge
security-profile=dot1x_profile wps-mode=disabled
Make sure the correct country profile is configured. In this example, we are using “wlan1”, but the same command would work with other interfaces, or as
/interface wireless set wlan1
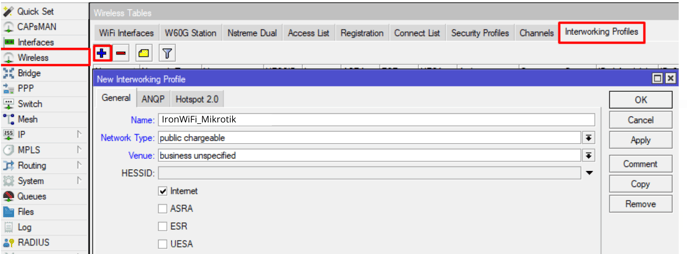
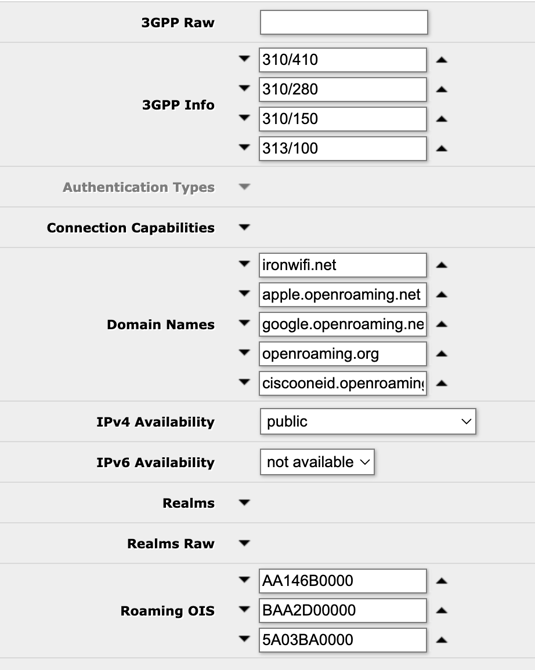
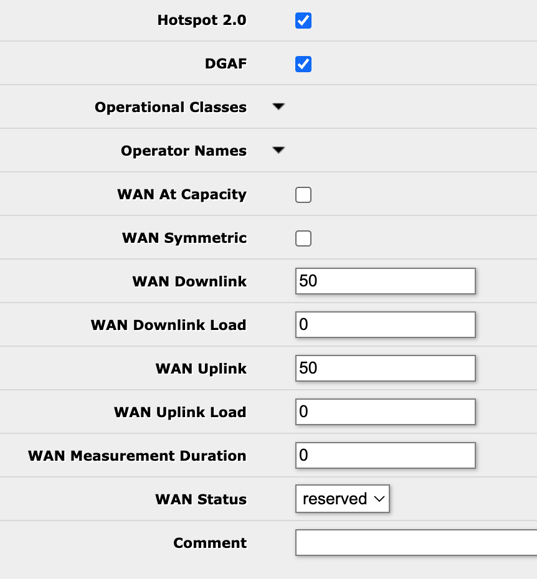
4) Configure interworking settings (Hotspot 2.0)
Command line equivalent:
/interface wireless interworking-profile add
domain-names=ironwifi.net,apple.openroaming.net,google.openroaming.net,openroaming.org,ciscooneid.openroaming.net
ipv4-availability=public name=IronWiFi_MikroTik
network-type=public-chargeable operator-names=IronWiFi:eng
roaming-ois=AA146B0000,BAA2D00000,BA03BA0000,004096 venue=business-unspecified
venue-names=IronWiFi:eng wan-downlink=50 wan-uplink=50 wan-status=up
3gpp-info=310/410,310/280,310/150,313/100
Be sure to specify some value in "wan-downlink" and "wan-uplink", in this scenario value of "50" is used as a placeholder, some client devices use it to evaluate, if they should join the network. Set “venue” – venue type, ”venue-names” and other attributes as applicable. “domain-names” should be of Hotspot 2.0 Operator.
5) Assign the interworking profile to the interface
This step can also be done with the following command:
/interface wireless set wlan1 interworking-profile=IronWiFi_MikroTik
Note: NAS-id that's used by IronWiFi to differentiate networks is equal to system identity, to adjust the nas-id, you can do:
/system identity set name=exampleName
Graphical interface support for interworking profiles is added from versions above 6.47.10, 6.48.3.
Troubleshooting
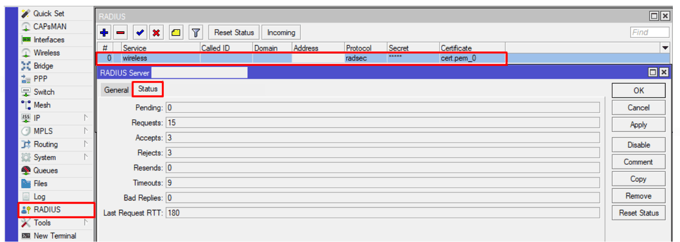
To check the status of RADIUS messages, you can use the RADIUS menu.
Or alternatively via the command line run:
/radius monitor X
X being the numerical ID, you can see the IDs with
/radius print
For more information, additional logging can be configured under
/system logging add topics=radius,debug,packet
/log
To view active wireless connections check the wireless registration table:
/interface wireless registration-table print