Setup instructions on how to configure social login with your own Linkedln app
Enabling Linkedln's social login through IronWiFi provides users with a secure way to log in to third-party applications and websites using their Linkedln account as their identity source. With this feature configured and activated, IronWiFi can easily obtain basic public information from Linkedln and allow users to log in without needing to remember and enter their login credentials.
IronWiFi and Linkedln Integration:
- Create an IronWiFi account the first >>> Open an account
- Follow the provided instructions to set up your AP configuration >>> AP configuration instructions
- Follow the instructions on how to install your own Linkedln app⬇
Creating a new app
You need to create a LinkedIn app to allow users to log in to your site with their LinkedIn accounts. To create a new LinkedIn app, please do the following:
- Go to the LinkedIn developer site: https://developer.linkedin.com/.
- Click the “Create App” button on the banner.
- To correctly create the application, please fill in the application sections, which are explained below.
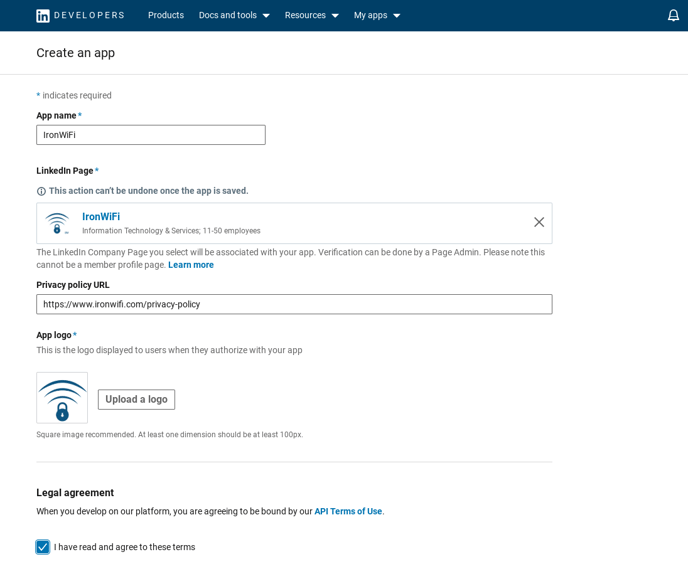
Create an app
- Application Name – Enter a name for your application.
- Company name – Select an existing company or choose a New Company. If you select the new company, you will be asked to enter a company name.
- Description – Enter a name for your application.
- Business Email – Enter your email address.
Legal terms - Read the terms of service and check the box to confirm that you have read and agree to the terms.
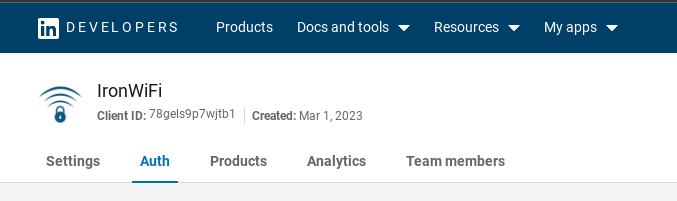
Auth
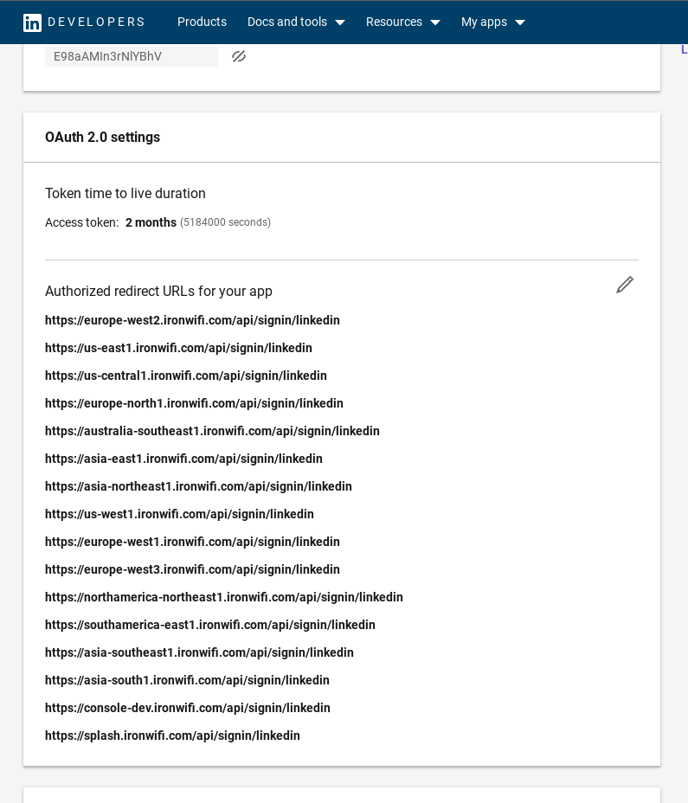
OAuth 2.0 settings
Enter Valid OAuth Redirect URLs (depending on your IronWiFi console region)
Authorized redirect URLs >>>
- https://europe-west2.ironwifi.com/api/signin/linkedin
- https://us-east1.ironwifi.com/api/signin/linkedin
- https://us-central1.ironwifi.com/api/signin/linkedin
- https://europe-north1.ironwifi.com/api/signin/linkedin
- https://australia-southeast1.ironwifi.com/api/signin/linkedin
- https://asia-east1.ironwifi.com/api/signin/linkedin
- https://asia-northeast1.ironwifi.com/api/signin/linkedin
- https://us-west1.ironwifi.com/api/signin/linkedin
- https://europe-west1.ironwifi.com/api/signin/linkedin
- https://europe-west3.ironwifi.com/api/signin/linkedin
- https://northamerica-northeast1.ironwifi.com/api/signin/linkedin
- https://southamerica-east1.ironwifi.com/api/signin/linkedin
- https://asia-southeast1.ironwifi.com/api/signin/linkedin
- https://asia-south1.ironwifi.com/api/signin/linkedin
- https://console-dev.ironwifi.com/api/signin/linkedin
- https://splash.ironwifi.com/api/signin/linkedin
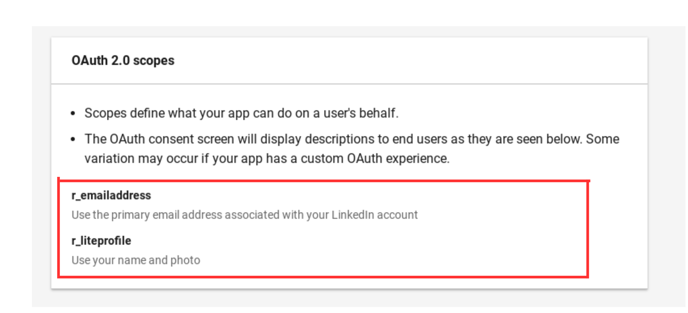
Scopes ( Social Login v2.3+ )
Add the two required scopes in the app settings: r_liteprofile and r_emailaddress.
To do this, go to the Products tab, select and add Sign In with LinkedIn to your products. A legal agreement pop-up window will appear, read the terms and check the box if you agree. Then click the "Request Access" button.
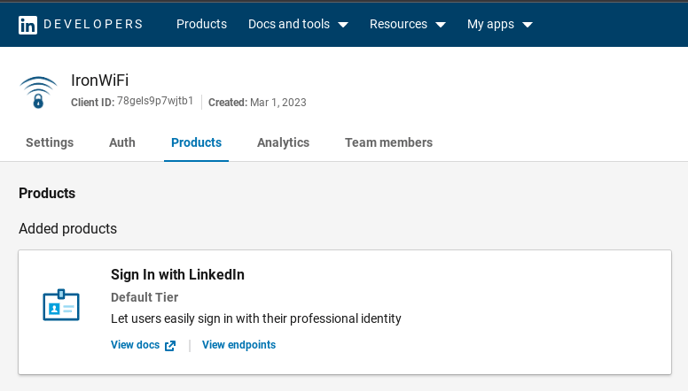
Return to Auth tab and wait for a few seconds for it to appear in 0Auth 2.0 scopes.
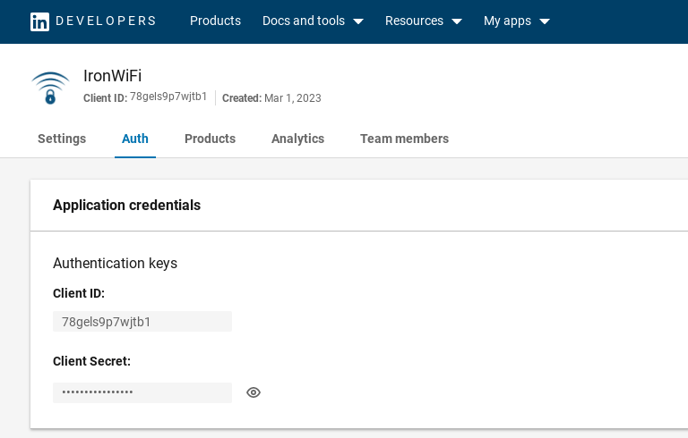
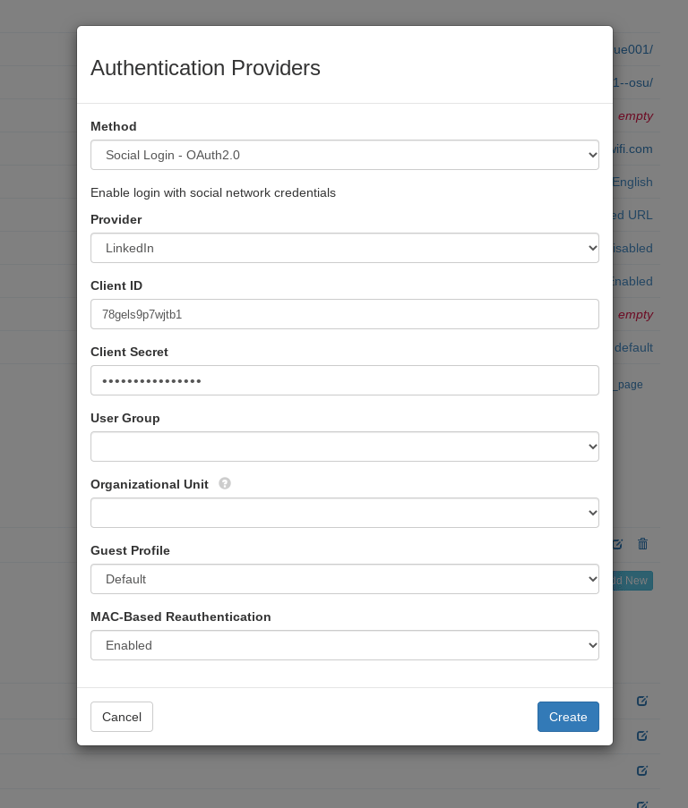
Copy Client ID and Client Secret and add it to the Authentication Provider settings in IronWiFi Console.
To authenticate your guests via Social Login, you will need to go to Networks -> Captive Portals -> Your Captive Portal -> Authentication Providers and click Add new. Choose Social Login and pick LinkedIn as a provider.
Test Splash page authentication, and authorize application access to the user profile. Optionally you can change the logo of your application to match your brand and styling.