Configuration of SAML authentication with Google Apps
This page provides instructions on how to configure your Google Apps account to allow Captive Portal authentication with SAML.
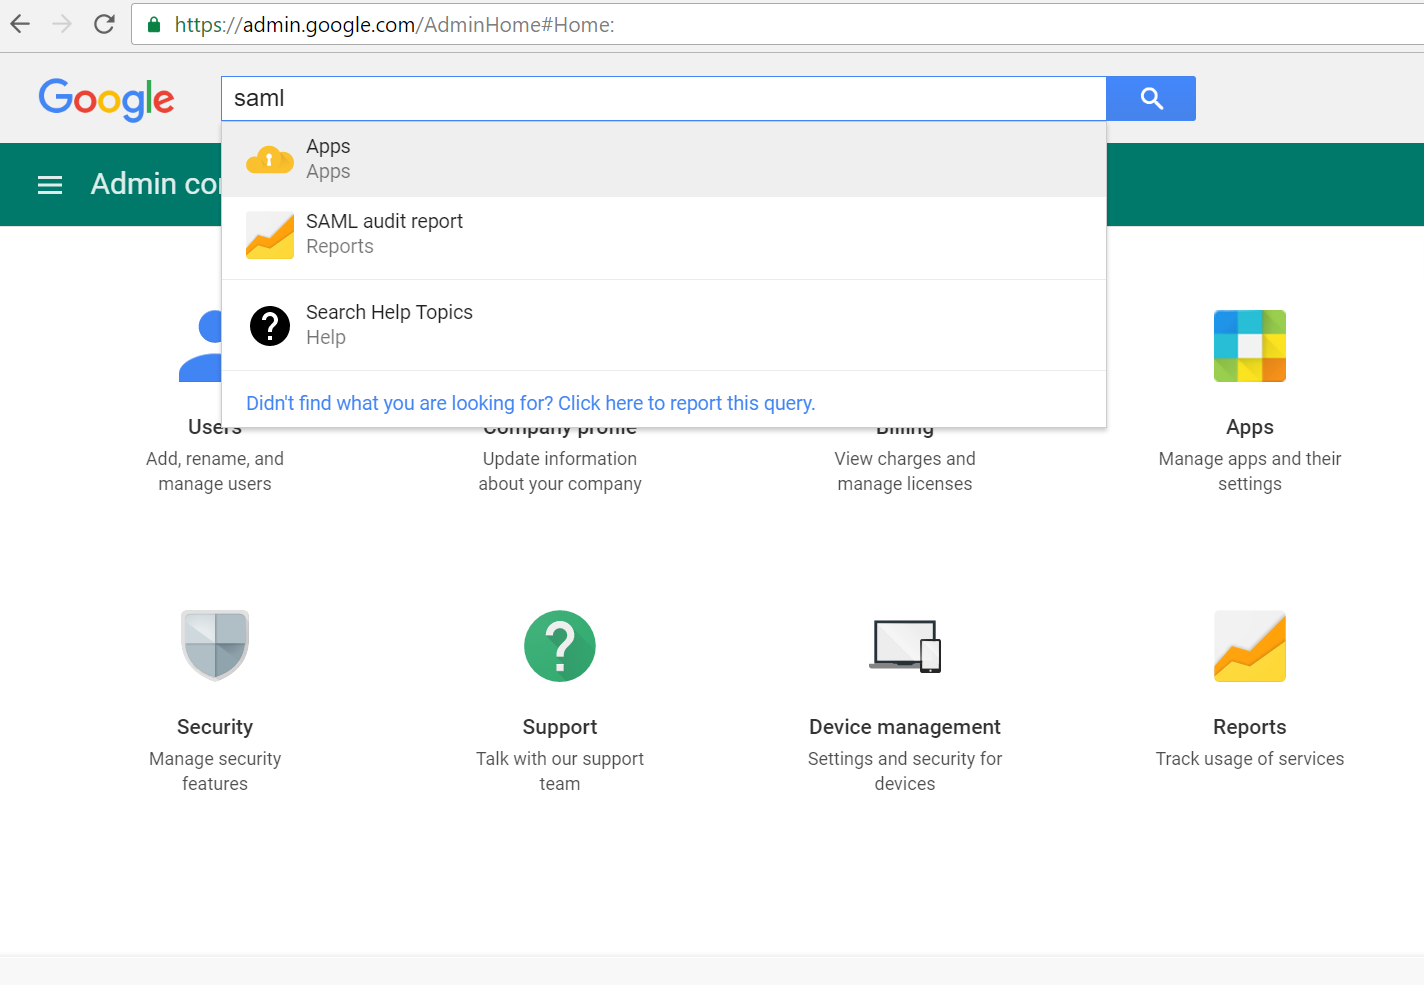
Sign in to your Google Apps / G-Suite administrative console and search for "saml." Click Apps or SSO with SAML applications in the search result. You can also try this direct link - https://admin.google.com/u/1/ac/apps/unified
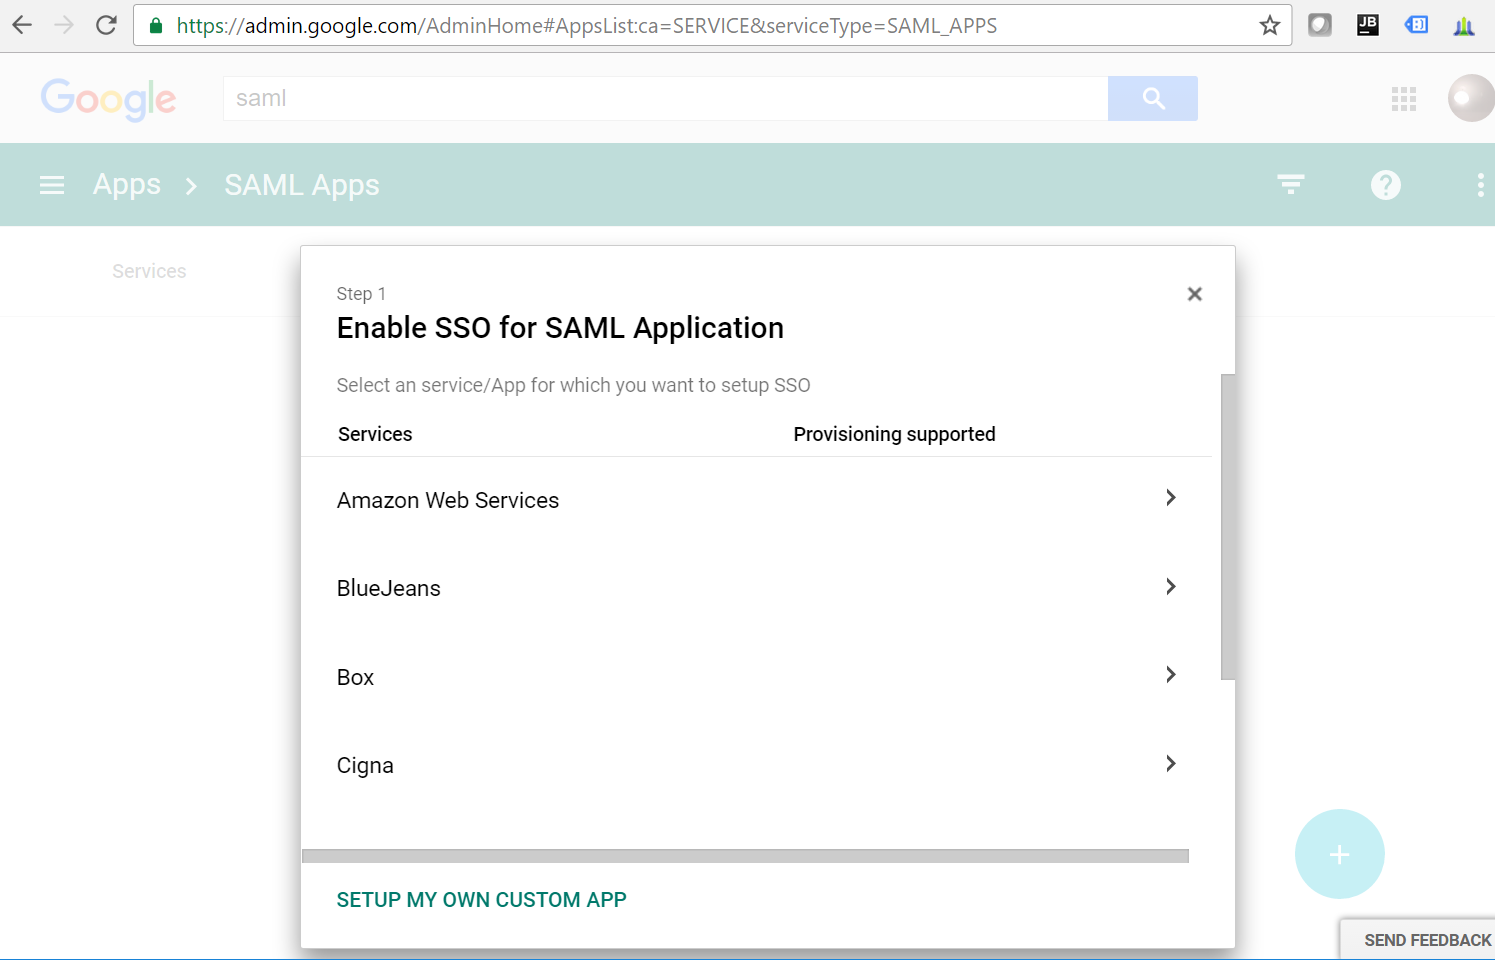
Click on the Add a service/App to your domain button.

Click SETUP MY OWN CUSTOM APP
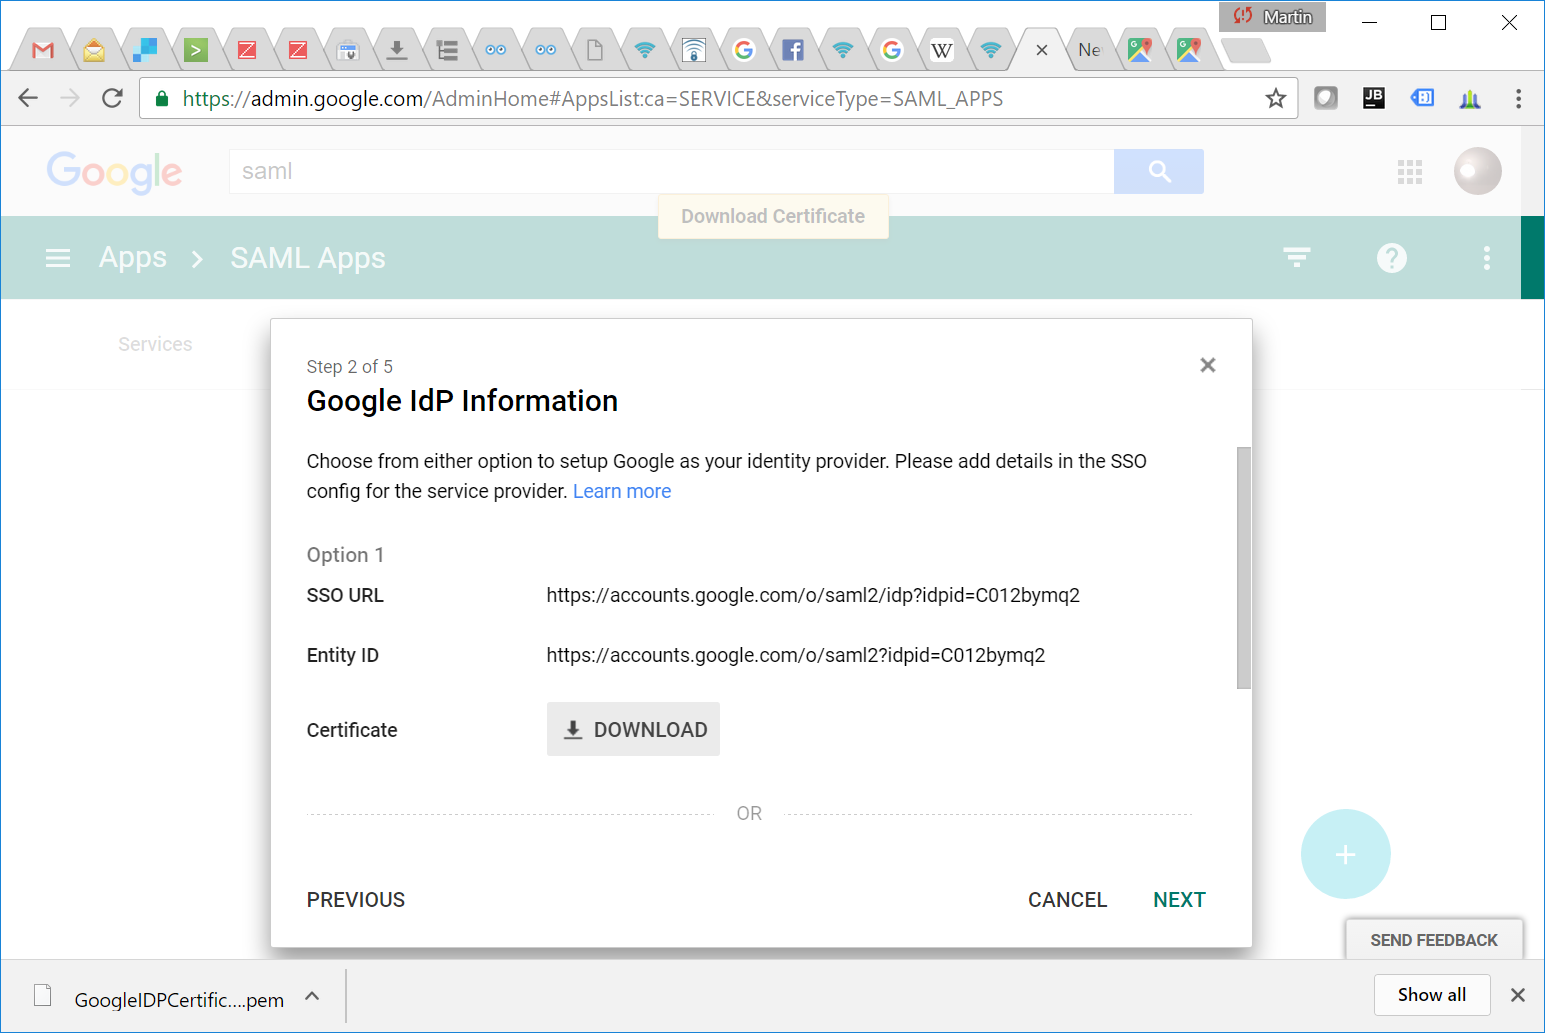
Google IdP Information will be displayed. Click the DOWNLOAD button to download public Certificate.
Sign in to the IronWiFi Console, navigate to Networks -> Captive Portals -> your captive portal -> Authentication Providers and add new SAML Authentication Provider.
Select SAML 2.0 Single Sign-On methods and add Google Idp SSO URL and Entity ID.
Open downloaded Google public certificate with a text editor, copy content and paste it to the Certificate input field. Click Create button.

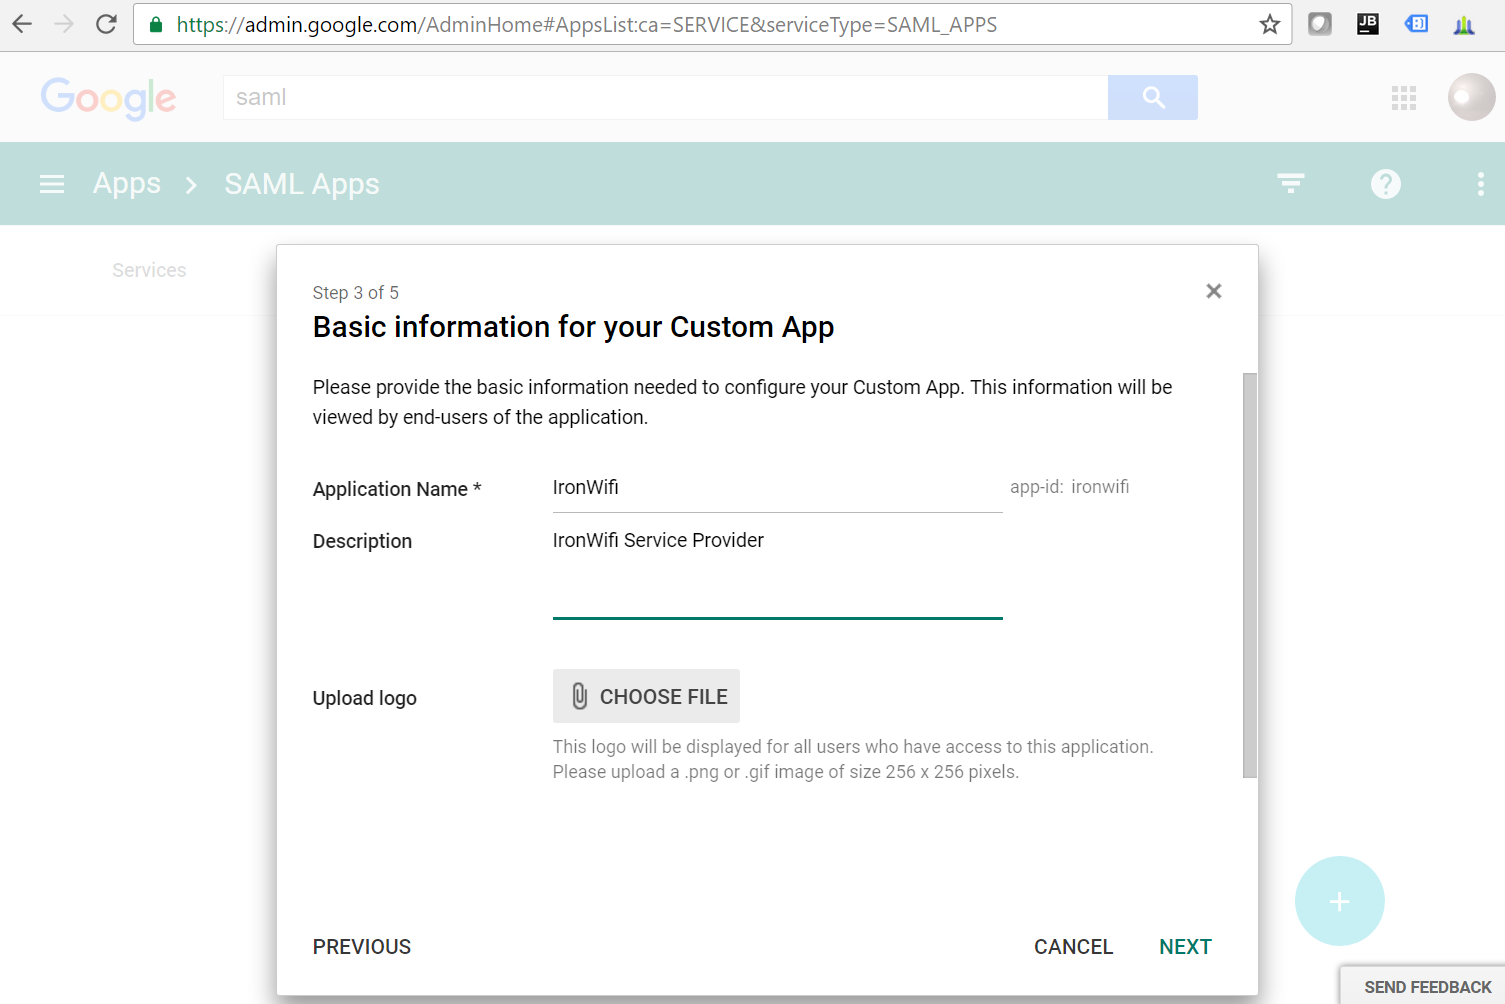
Return to Google Apps administration console and click Next. Enter Application Name, Description and click the Next button.
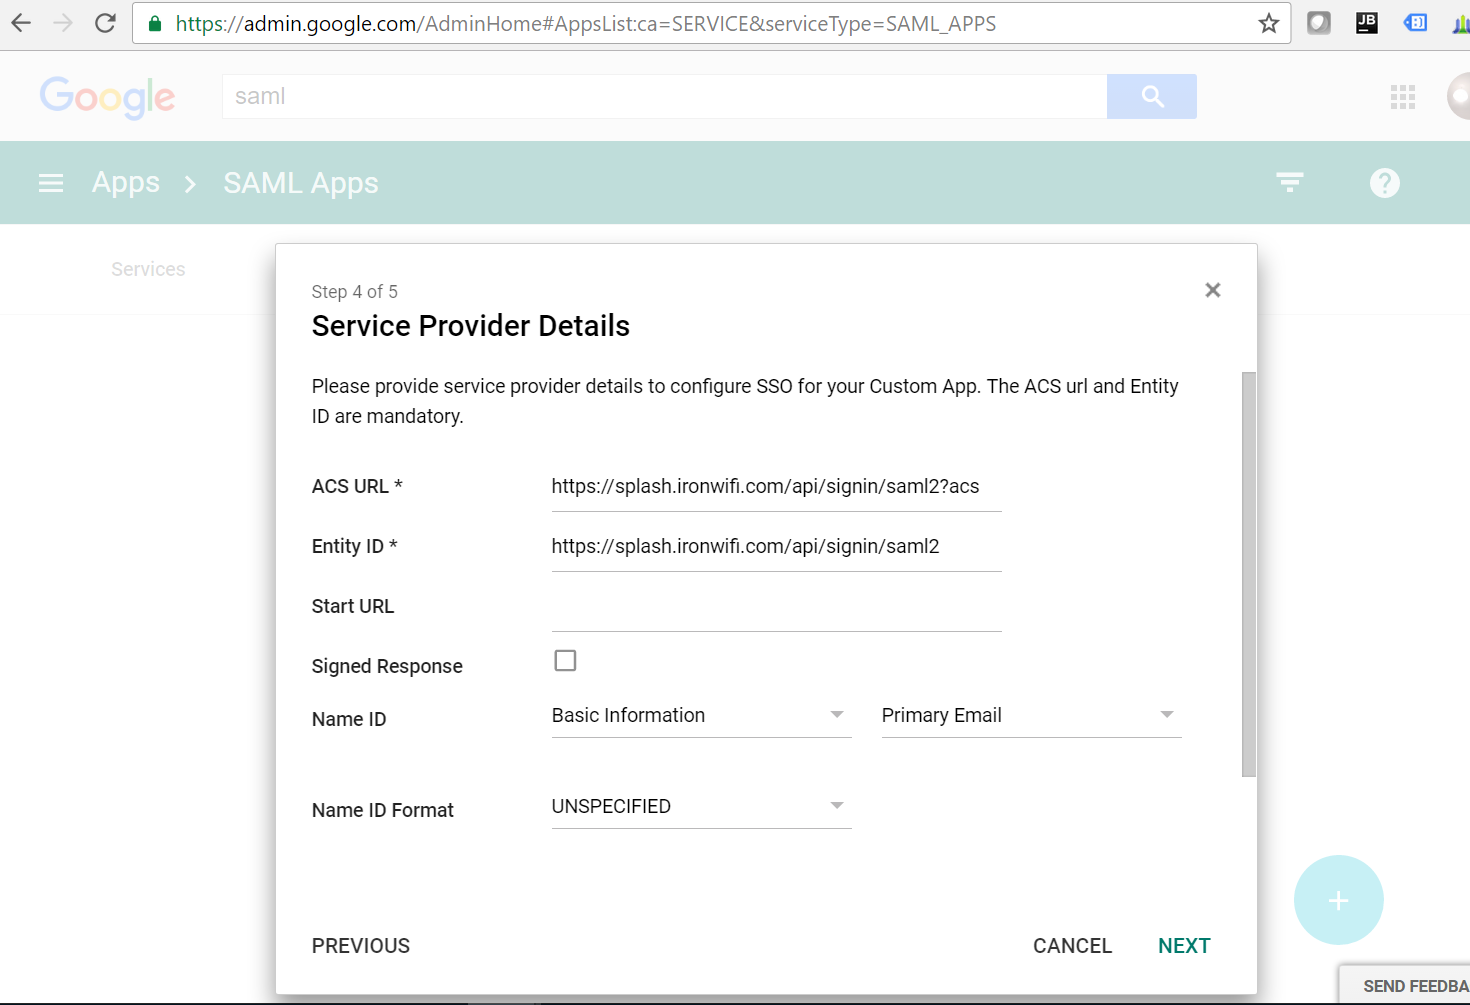
Return to IronWiFi Console and scroll down to the CONTROLLER CONFIGURATION of your Captive Portal.

Copy the ACS URL and Entity ID from Console and add it the the Service Provider Details configuration. Click Next to continue.
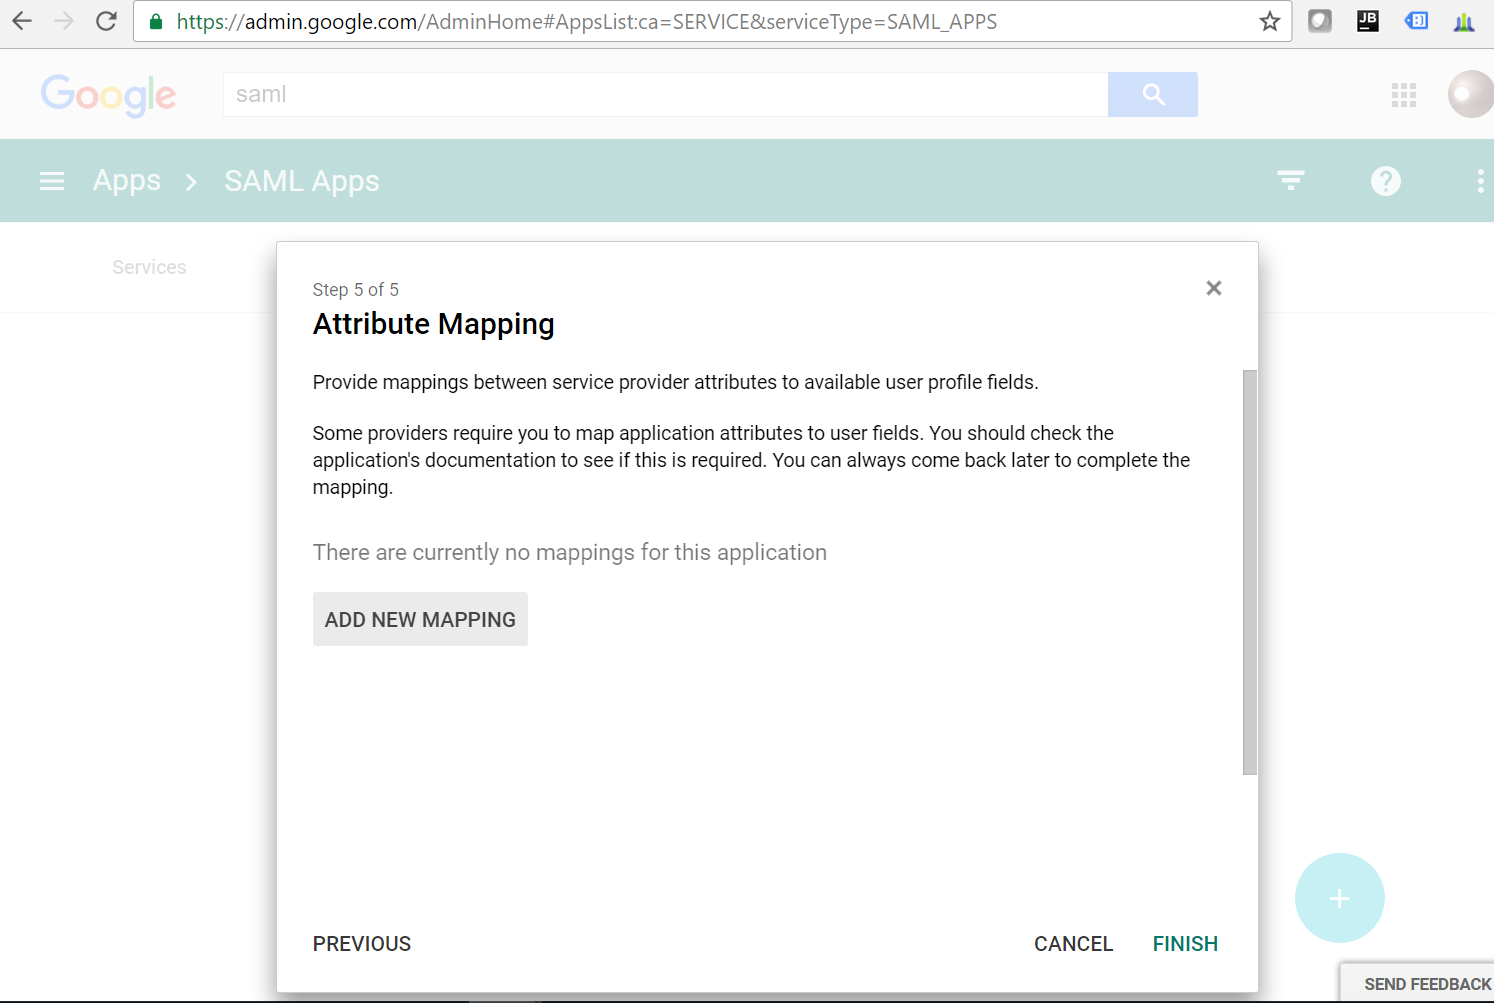
Click the Finish button.
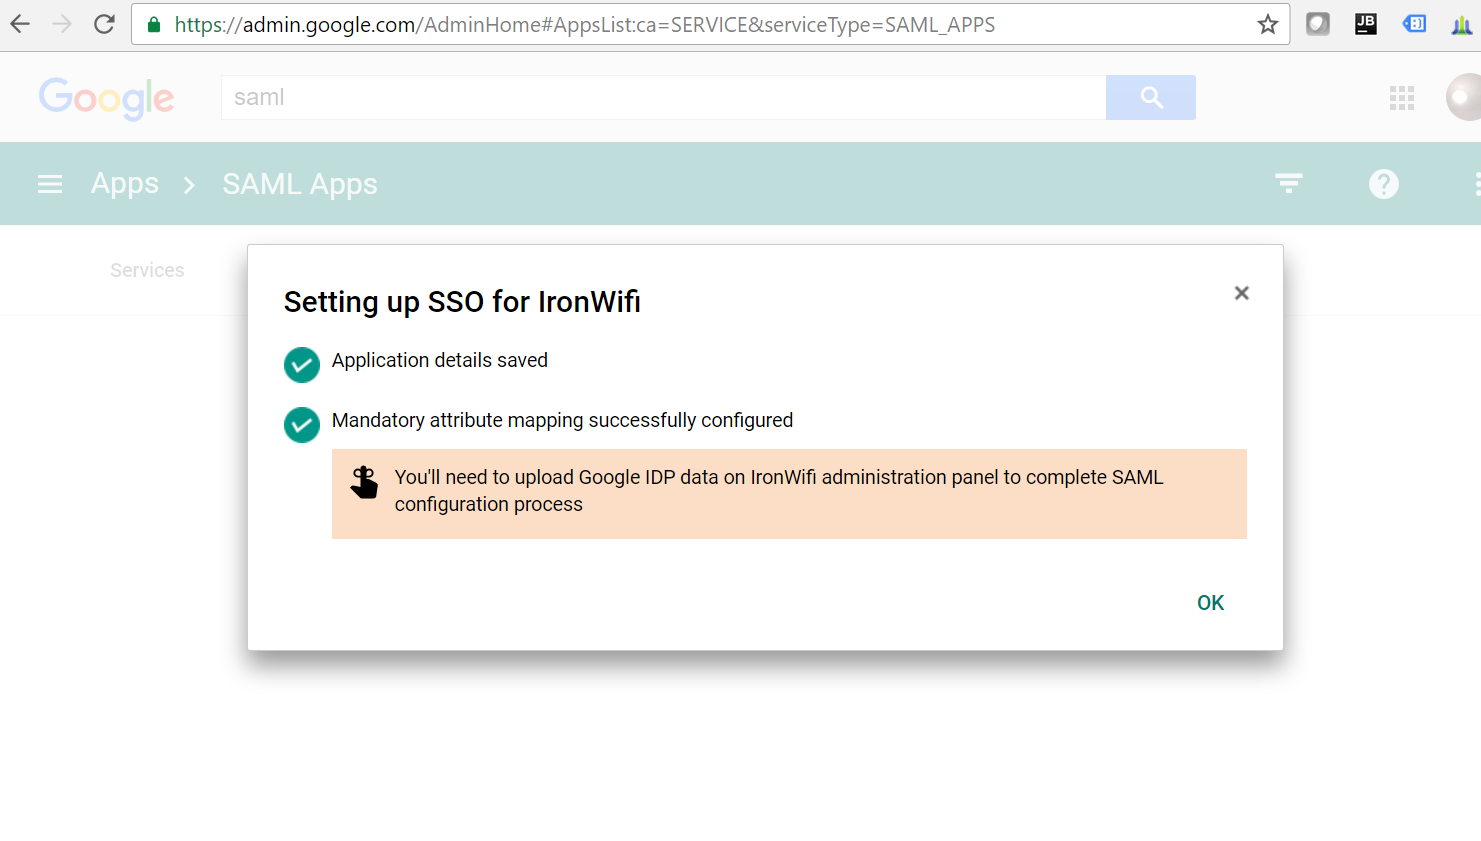
Click the OK button.
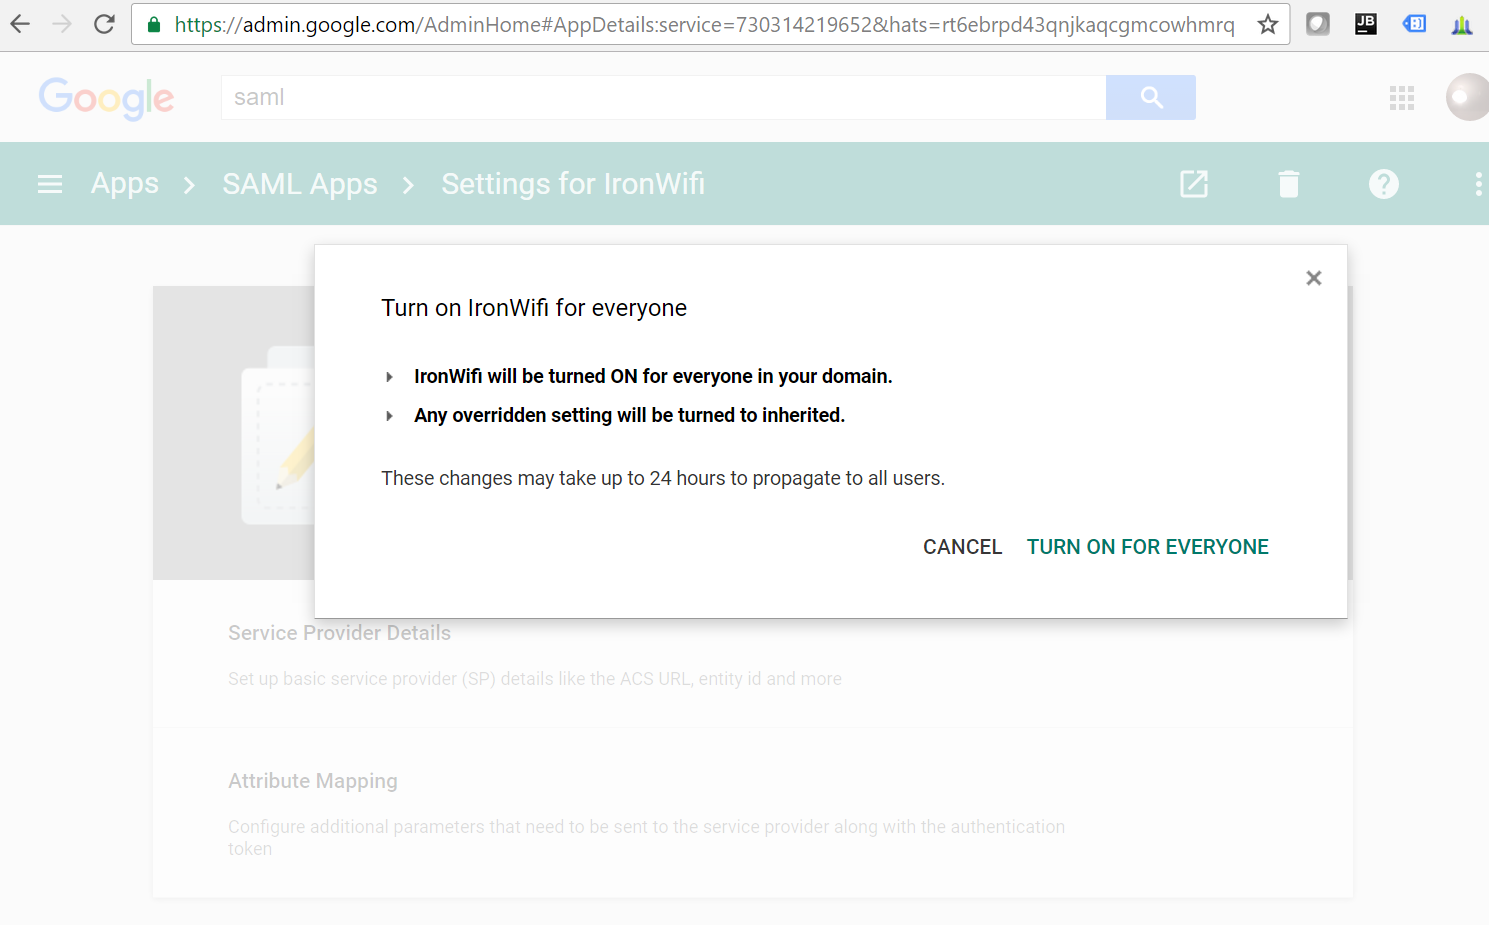
Click the Settings button available in top right corner and click ON for everyone.
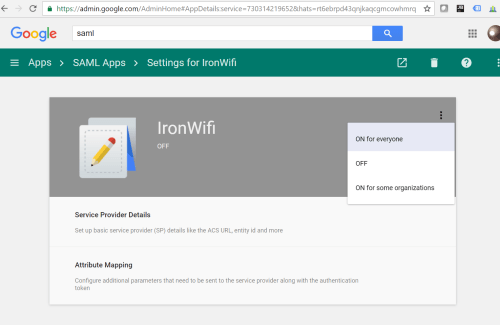
Click TURN ON FOR EVERYONE button. This will enable this Service Provider to be used by all members of your domain.