Find out how to go about connecting android 11+ devices to your WPA Enterprise secured network
In the past, Android supplicants haven't put any importance on trusting the Authenticating Server, this was seen as a blessing (ease of use) and a curse (without installing the root CA certificate on the client device, you don't know who you're talking to). Since Android 11 Security Enhancement released in December 2020, this has changed and as a result, you cannot skip the certificate validation.
In order to make connecting Android 11+ devices to your network seamless, you need to switch the server certificate on the IronWifi's end from self-signed to trusted.
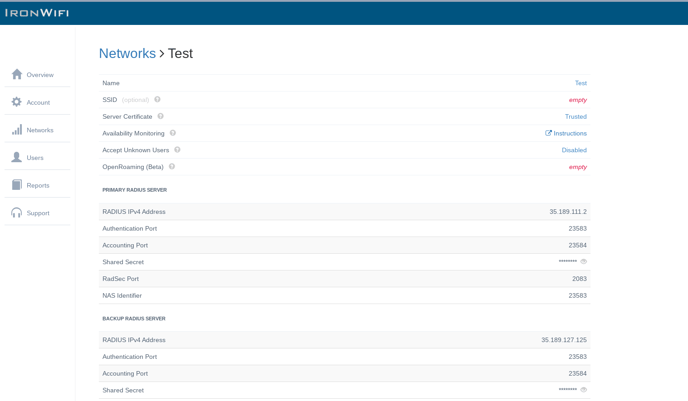
- To do this, you will need to log in to the IronWiFi console, navigate to networks -> your network name, and change the "Server Certificate" setting to "Trusted".
If your account is managed by a 3rd party / reseller, they will have to do these changes for you. - Create a new SSID and migrate the users to the new SSID, and then remove the old SSID once that has been completed.
If you want to keep the same SSID, all current users (devices) will need to remove the old wireless wireless profile and reauthenticate. - When asked to enter a domain, the client should provide radius.ironwifi.com
It is recommended to do this change outside of normal business hours.
If this option is not possible, then the procedure below may just work.
-
Download the Self-Signed CA Certificate to the phone. You can download it from this URL - and email it to your device - https://console.ironwifi.com/assets/html/ironwifi.crt
-
Once you have the certificate on the phone, open Settings → Security → Encryption & Credentials → Install a Certificate → Wi-Fi Certificate.
-
This will open the phone directory select → Download, you should see the Certificate listed here.
-
Select it and give it a name.
-
Once that is complete, go to Settings → Network & Internet → Wi-Fi.
-
Select the SSID.
-
Fill in the required fields
- CA certificate (select the Certificate you just uploaded)
- Domain - IronWiFi Server Certificate
- Identity
- Password
-
Save at the bottom.
Now connect to the SSID.
More information about this topic is available on this page - https://www.xda-developers.com/android-11-break-enterprise-wifi-connection/