In this guide we describe how to configure your Aerohive (Extreme) devices to work with Passpoint profiles, OpenRoaming and SIM card authentication
Prerequisites
- Access to the ExtremeCloud Dashboard as a user with administrative privileges.
- Information about the assigned RADIUS servers (Server IP address, port numbers, shared secrets):
- Email or document that contains this information
OR - Access to the IronWiFi Management Console - Sign in or Open Account
- Email or document that contains this information
Log in to the ExtremeCloud console as admin. For existing environments with additional users, log in as a user with administrative privileges.
The ExtremeCloud Dashboard appears. Your access points are displayed.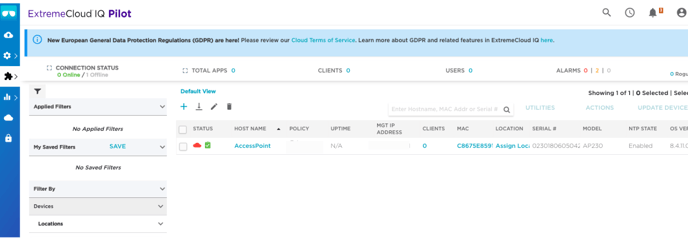
Note: There are a number of options you can set. Only the options that require your input are shown. Default values are used for options that don’t need adjustment.
Configure the wireless LAN
To configure the wireless LAN, you create a network policy (profile), an SSID, and RADIUS servers.
Create a network policy
- Click Configure in the menu bar on the left of the Dashboard.
- Select Network Policies.
The Network Policy page appears.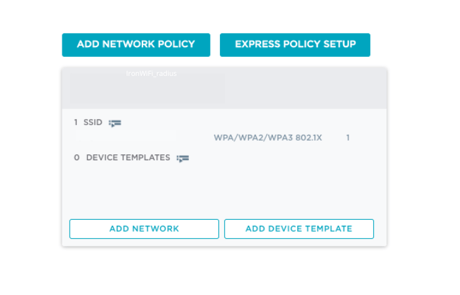
- Click Add Network Policy.
The Network Policies New Policy page appears. The Policy Details tab is open. - Under What type of policy are you creating?, leave the box checked next to Wireless. Uncheck the boxes next to Switches and Routing.
- Enter a Policy Name, such as “IronWiFi_network_policy”.
- Click Save on the bottom right.
The Wireless Networks page appears.


Create an SSID
- Click Configure in the menu bar on the left of the dashboard.
- Select Network Policies under Configure.
- Select Wireless Networks at the top.
- Click + to create an SSID.
- Select All other Networks (standard).
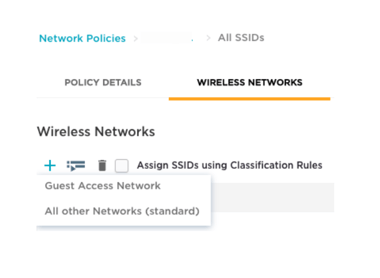
A page appears where you’ll define the SSID and authentication settings. - Enter an SSID Name for internal purposes, such as “IronWiFi_Secure_WiFi” and a Broadcast Name that your clients will see. The names can be the same.
- For SSID Usage, select Enterprise. (The default is Private Pre-Shared Key.)
In the field Key Management select WPA2-802.1X and as Encryption Method chose CCMP (AES)
Add RADIUS authentication servers to the network policy
It’s important to set up a secure RADIUS connection between the wireless LAN controller and IronWiFi.
To add RADIUS authentication servers to your network policy, you create a server group and then add servers to the group.
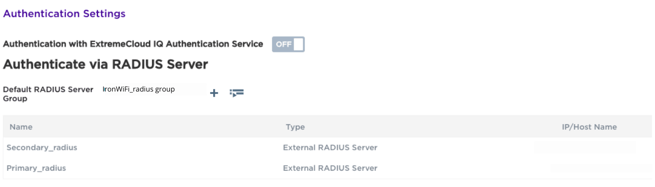
- Still on the Wireless Networks page, scroll down to Authentication Settings.
- Under Authenticate via RADIUS Server, click + to add a RADIUS server group.
The Configure RADIUS Servers dialog box appears. - Enter a RADIUS Server Group Name, such as “IronWiFi_radius_group”.
- Click Settings to the right of the server group description.

The Select RADIUS Settings dialog box appears.

You return to the Configure RADIUS Servers dialog box.
7. Click + under External RADIUS Server to add a RADIUS server to the server group.
The dialog box expands to display a New External RADIUS Server section.
8. Enter the Name, such as “Primary_radius”.
.png?width=605&height=225&name=IronWiFi%20(5).png)
10. Select IP Address.
The New IP Address or Host Name dialog box appears.
.png?width=688&height=314&name=IronWiFi%20(4).png)
You return to the New External RADIUS Server section. You see the name of the object you created in the IP/Host Name field.
.png?width=655&height=474&name=IronWiFi%20(3).png)
14. Enter the Shared Secret from the Console
You return to the Configure RADIUS Servers page where you see the server you added (Primary_radius).
16. Check the box next to the server you added. This indicates you want to add it to the server group.
You return to the Authenticate via RADIUS Server section of the Wireless Networks page. You see the RADIUS server group and server you created.
18. Repeat steps 7-17 to add the secondary RADIUS server for high availability. The secondary RADIUS IP address is from the Console
You return to the Wireless Networks page where you see the SSID you created.
Assign the SSID to the network policy
- Still on the Wireless Networks page, select the SSID by clicking the checkbox next to the SSID .

- Click Next on the bottom right. Clicking Next assigns the selected SSID to the network policy.
The network policy configuration is complete.
Configure Hotspot 2.0
Hotspot 2.0 allows mobile devices to join a WiFi network automatically via Passpoint when the devices enter the Hotspot 2.0 area.
You’ll use the supplemental CLI option to configure Hotspot 2.0. When you enable supplemental CLI, you enter the commands into the GUI. For that reason, we recommend composing the commands in a text file beforehand so you have them ready when enabling the supplemental CLI.
Compose your CLI
Create a text file with the commands that link your network policy to Hotspot 2.0.
1. Create a hotspot profile with a profile name “IronWiFi-profile”, anqp domain ID, and network type.anqp-domain-id default is 0, which means that the ANQP information is unique to this access point. A network type of 1 indicates a private network.
hotspot profile IronWiFi-profile
hotspot profile IronWiFi-profile anqp-domain-id 0
hotspot profile IronWiFi-profile network-type 1 access-internet
2. Configure the operator name “IronWiFi-Operator” and the language (English).
hotspot profile IronWiFi-profile operator-name IronWiFi-Operator language-code eng
3. Configure the hotspot to support IPv4 with a single NAT private IPv4 address by configuring ip-type ipv4 3. ipv6 0 indicating that IPv6 is not available.
hotspot profile IronWiFi-profile ip-type ipv4 3 ipv6 0
4. Configure the domain name.
hotspot profile IronWIFi-profile domain-name ironwifi.net
5. Create the NAI-realm “IronWiFi-Realm” by specifying these parameters:
Encoding type—”0” (the default)
EAP method—”21” for EAP-TTLS
Inner authentication—”4” for MS-chapv2
hotspot profile IronWiFi-profile nai-realm IronWiFi-Realm encoding-type 0
hotspot profile IronWiFi-profile nai-realm IronWiFi-Realm eap-method 21 inner-auth 4
6. Configure IronWiFi SSID to use WPA2-AES 802.1X authentication.
security-object IronWiFi security protocol-suite wpa2-aes-8021x
7. Apply the IronWiFi-profile hotspot profile to the SSID.
ssid Secure_WiFi hotspot-profile IronWiFi-profile
8. Save the configuration.
save configuration
Enable the supplemental CLI
- Select Global Settings on the top right of the Dashboard under your user icon.
- On the left side of the Dashboard, click VIQ Management under Administration.
The VIQ Management page appears.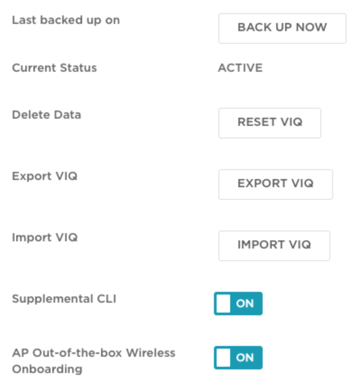


Add the Hotspot 2.0 configuration to the network policy
- Click Configure in the menu bar on the left of the Dashboard.
- Select Network Policies.
The Network Policy page appears.
You see the network policy you created, “IronWiFi_network_policy”.
- Click the name of the SSID you created.
The Wireless Network page appears..png?width=688&height=170&name=IronWiFi%20(6).png)
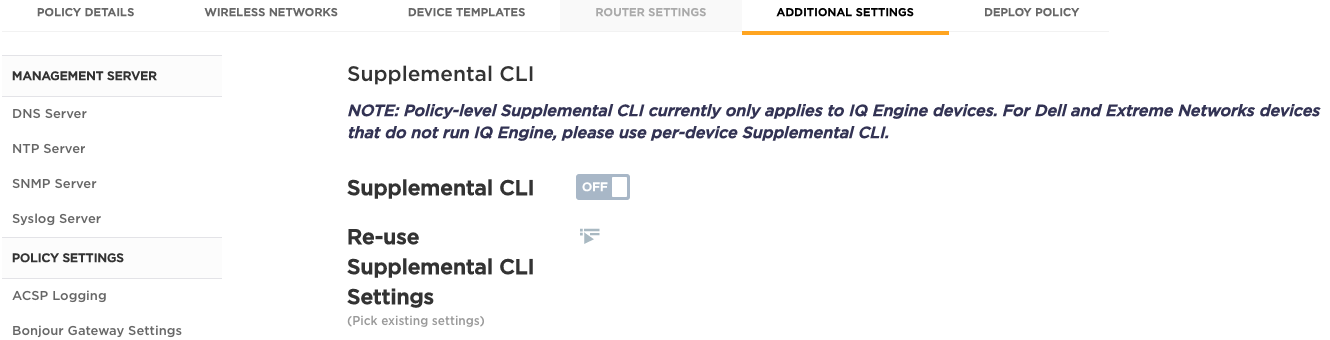
- Click Additional Settings in the top menu bar.
The DNS Server page appears. - Under Policy Settings in the menu bar on the left, click Supplemental CLI.
The Supplemental CLI page appears. - Verify that Supplemental CLI is ON. If not, enable it
- Enter a Name, such as “Hotspot”.
- Paste the CLI commands in your text file into the CLI Commands box.
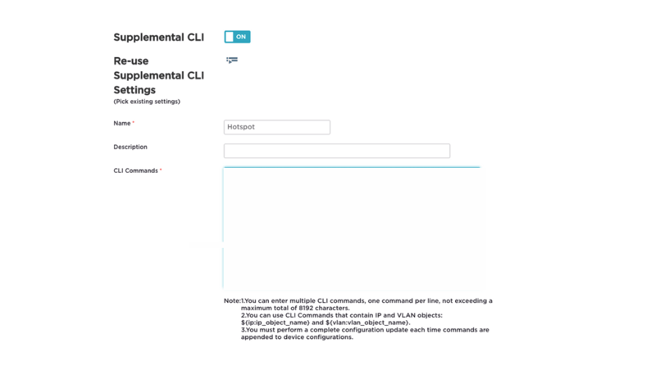
- Click Save on the bottom right.
A message appears on the top left indicating that the supplemental CLI was saved. - Click Next.
The Apply the network policy to selected devices page appears. - Click Eligible to display your access points.
.png?width=655&height=155&name=IronWiFi%20(8).png)
- Select your access points by checking the box next to them in the Status column.
- Click Upload on the bottom right.
The Device Update dialog box appears. - Under Update Network Policy and Configuration, select Complete Configuration Update. (Delta Configuration Update is the default; you want a complete update.)
- Click Perform Update on the bottom right of the dialog box to save your configuration.
The access points are rebooted (this can take a few minutes). You see a message on the upper left indicating that the devices are successfully deployed.